About Products
Overview
This document will demonstrate how to use every feature offered by the Products page. You can create products and product kits that combine multiple products into a single item. It will also explain how the filters function and how to edit or delete the product entries you have created.
Accessing the Products Page
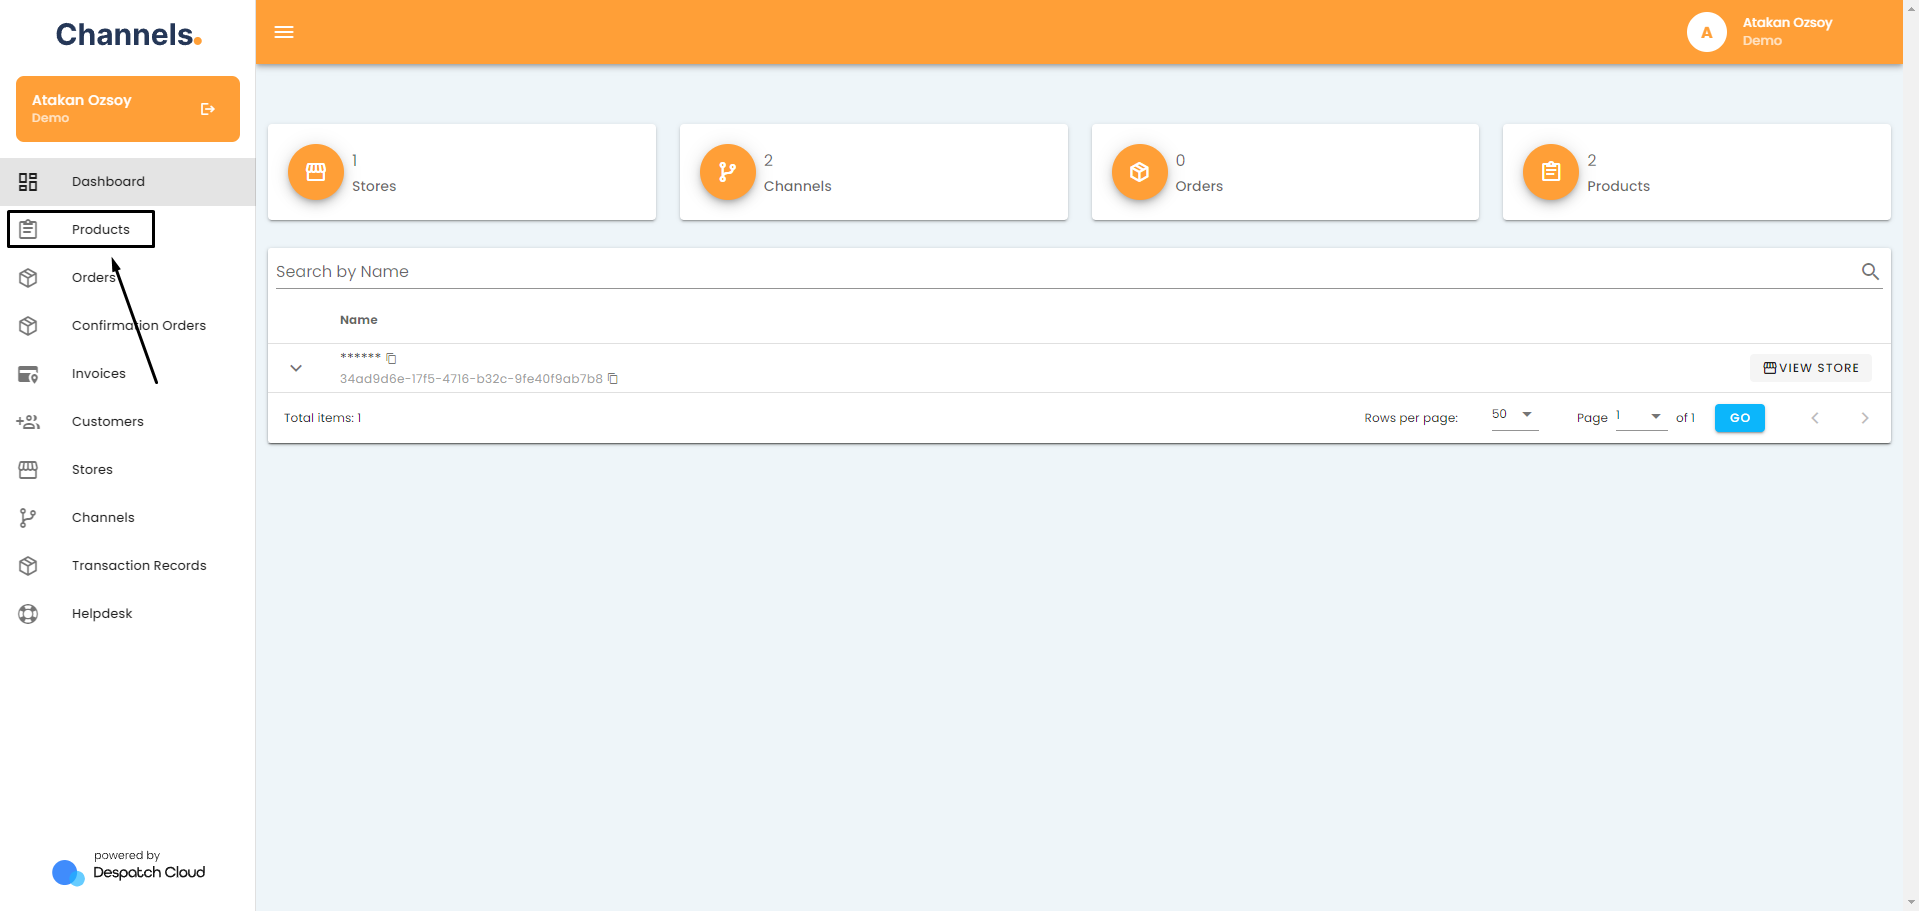
To access the orders page, click the "Products" button located in the left-hand menu.
Creating a New Product
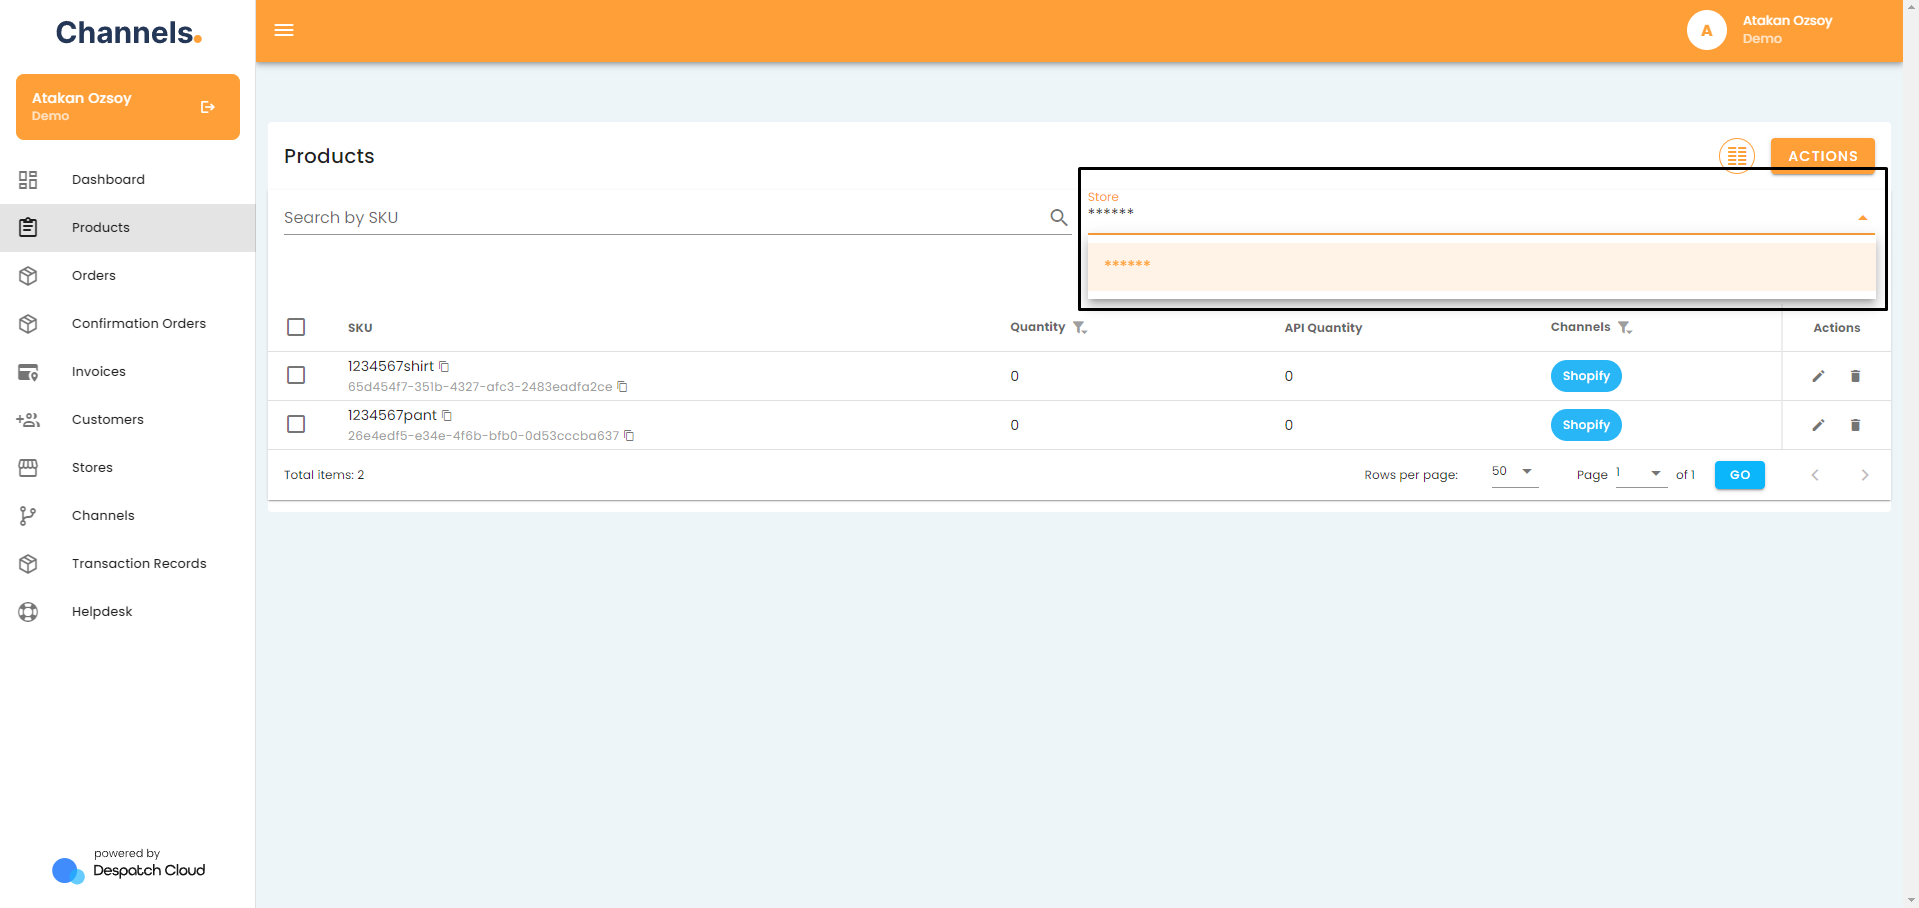
To create a new product, start by selecting the store in which you want to create the product. You can do this by clicking and choosing a store from the "Store" dropdown at the top of the page.
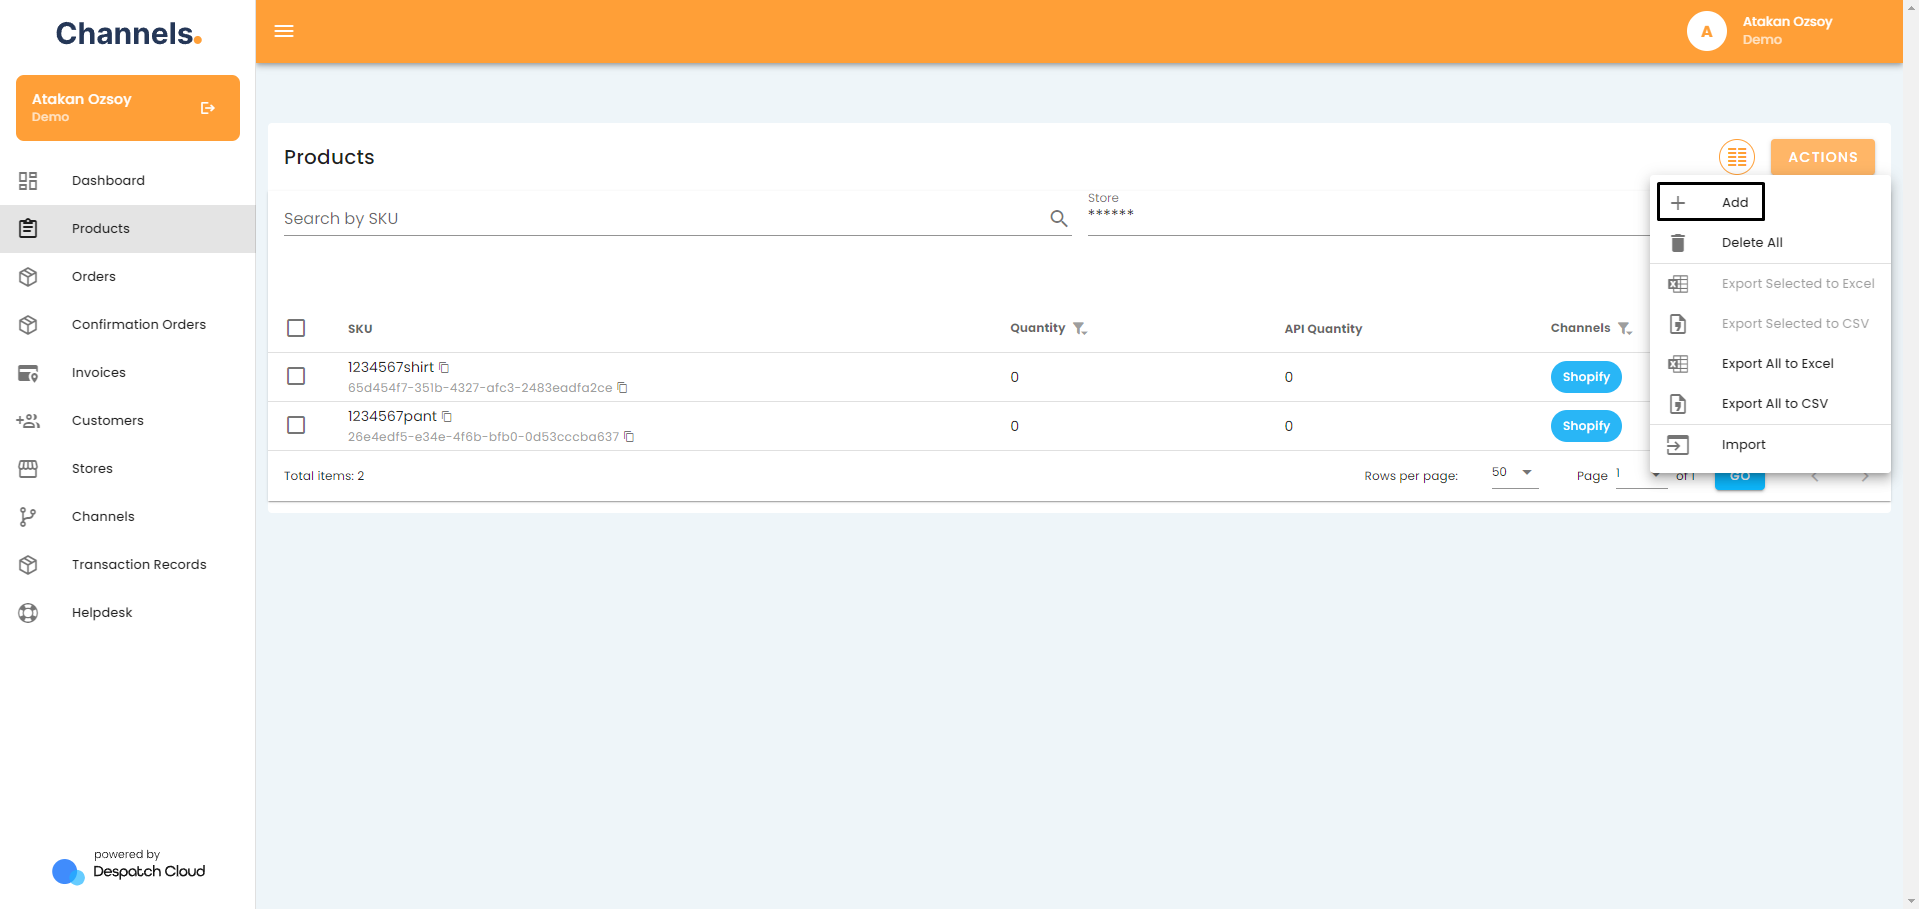
The next step is to initiate the process of creating a new product by clicking the "Actions" button located above the store selection.
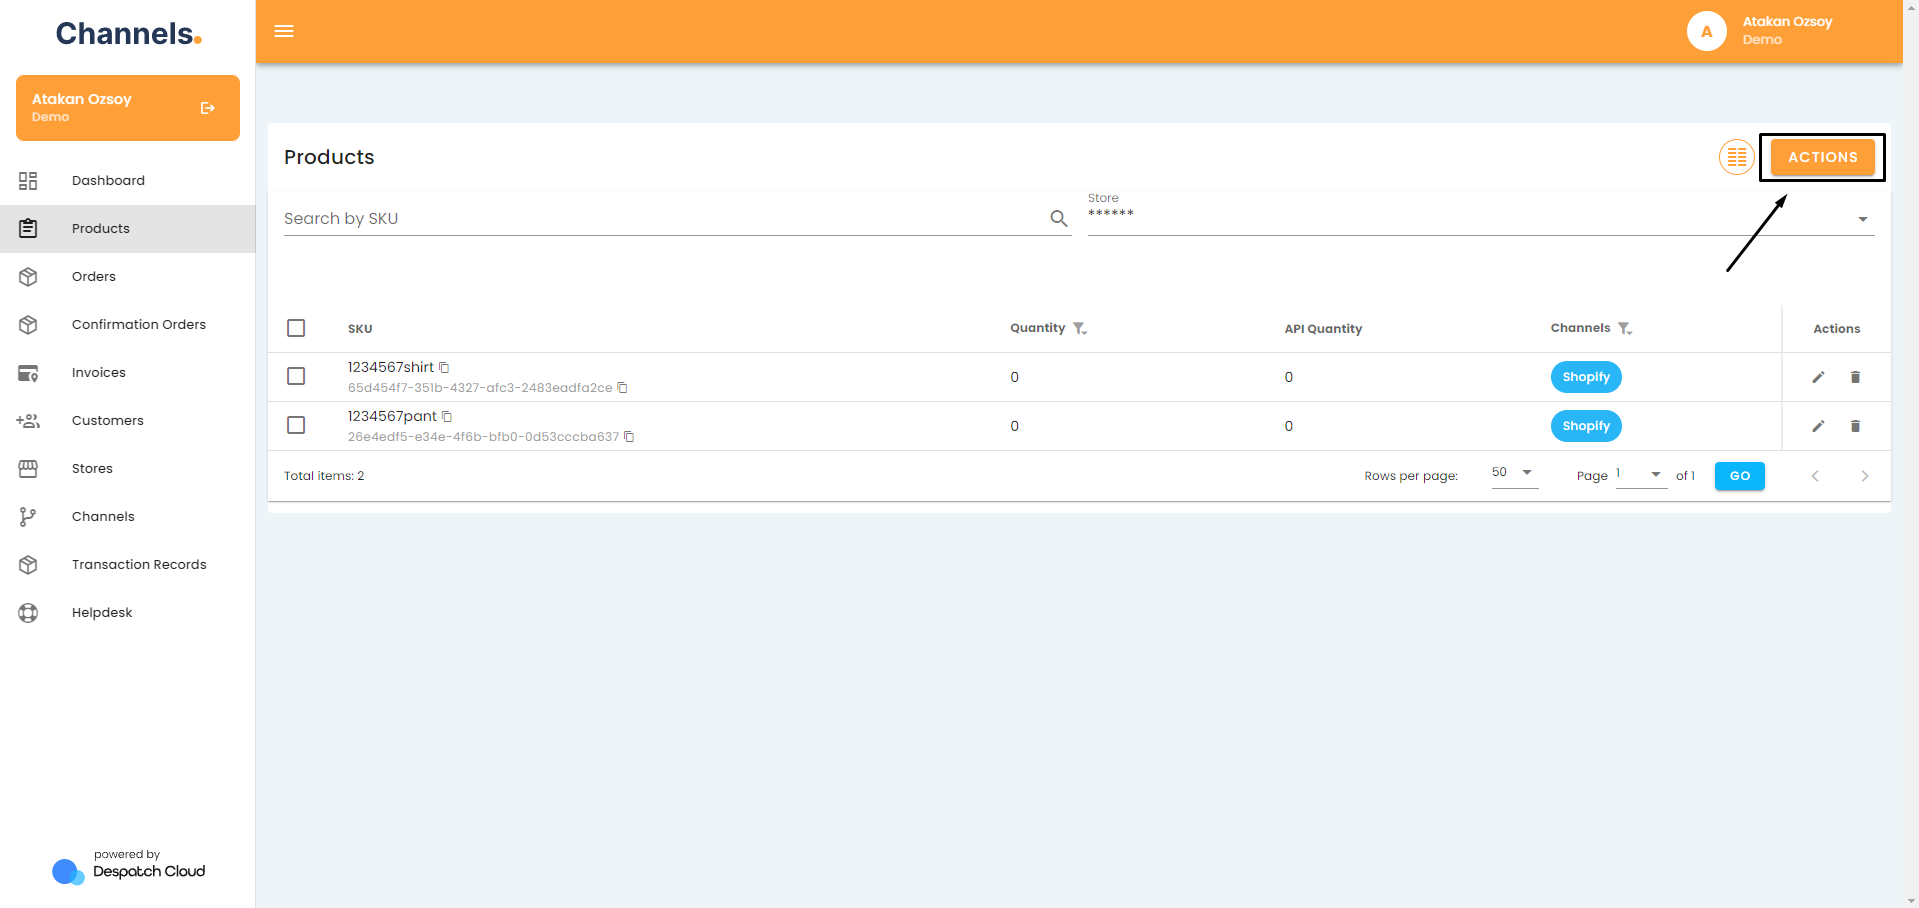
After that, you can select "+ Add" from the dropdown menu.
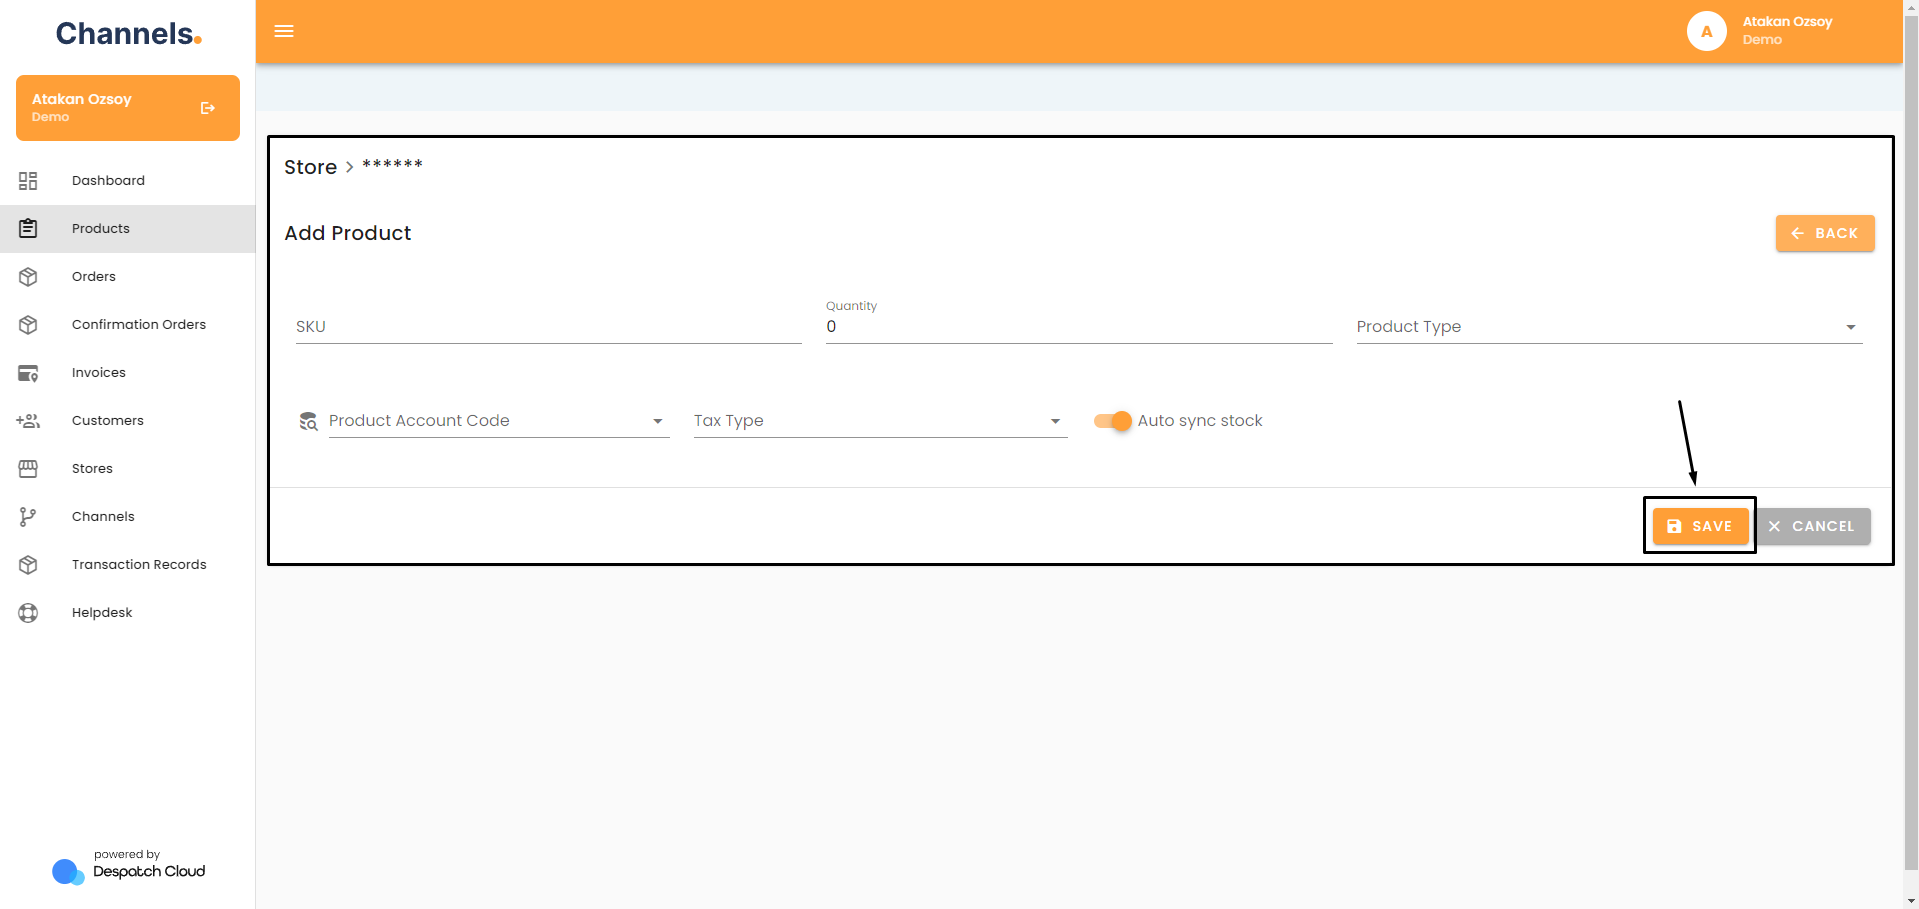
Here are the product fields:
- SKU: This is a Stock Keeping Unit (SKU), which serves as a unique identifier for the product.
- Quantity: Indicates the total stock quantity of the product.
- Product Type: You have two options for this selection:
- Product: This option enables you to create an individual product.
- Kit: If you choose this option, additional options will appear below. It allows you to create a product group, search for SKUs, and add more than one product to a kit. When you create an order using the kit SKU, all the products added to this kit will be selected through a single ID.
- Product Account Code: You can search for an account code and assign the product to a specific account.
- Tax Type: After selecting the account, you can choose a predefined tax rate.
- Auto Sync Stock: This option keeps the stock levels synchronised with the store/account you've selected.
Once you have completed filling in the details, click the "Save" button at the bottom right of the page to create the product.
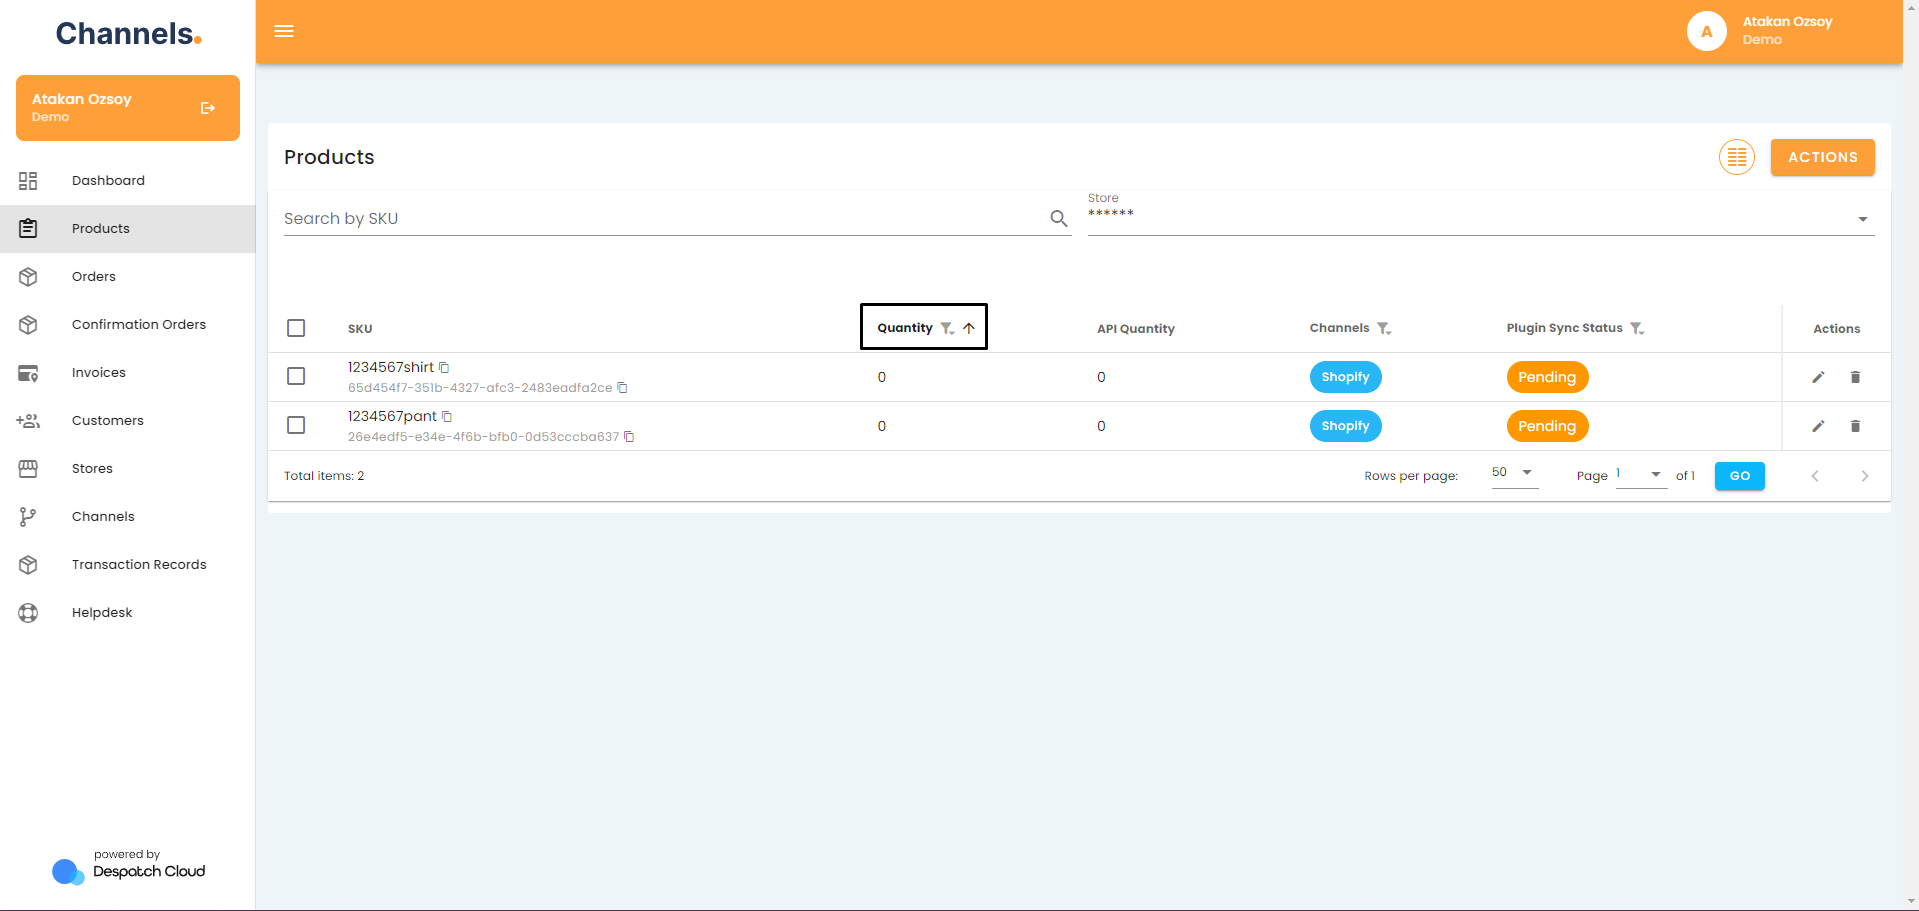
Filters
Located just above the product entries, you'll find an information and filtering bar.
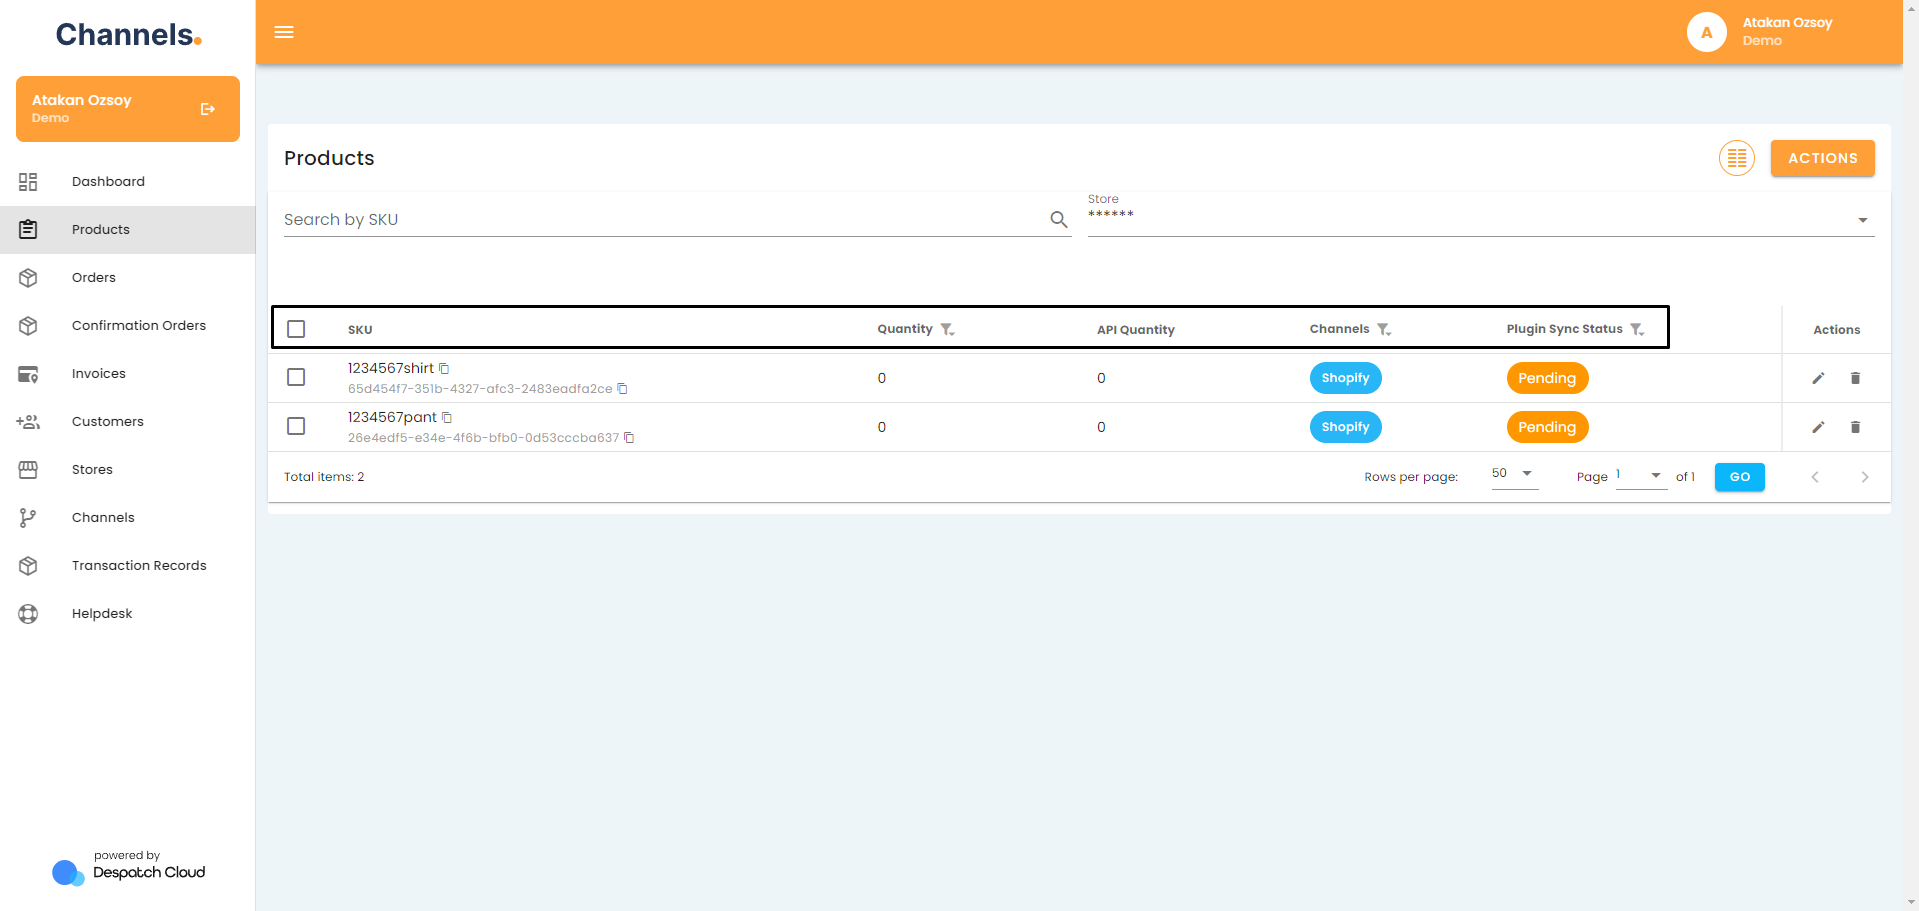
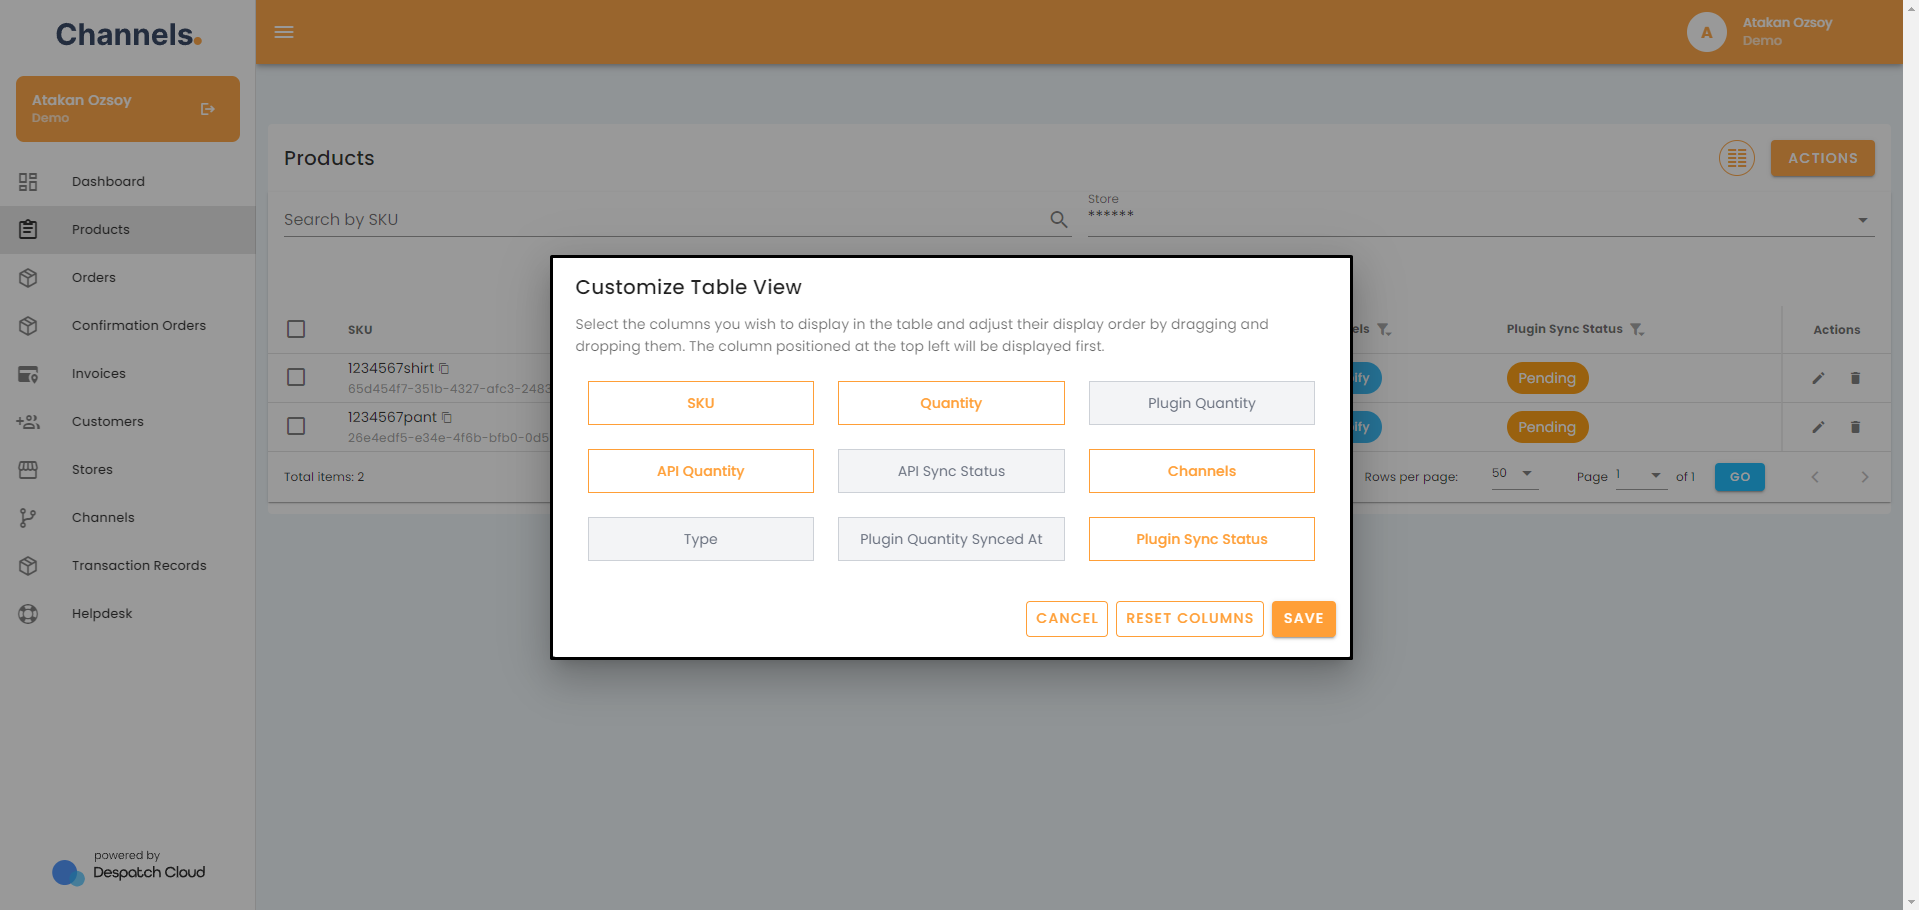
This bar enables you to view various sections and actively filter products based on different criteria, including quantity, connected channels, product type, and plugin sync status. You can add or remove filters to this bar by clicking the filter icon next to the "Actions" button.

And selecting what columns you'd like to see.
Click on any one of the filters to sort by said filter and wait a short while for it to apply automatically.
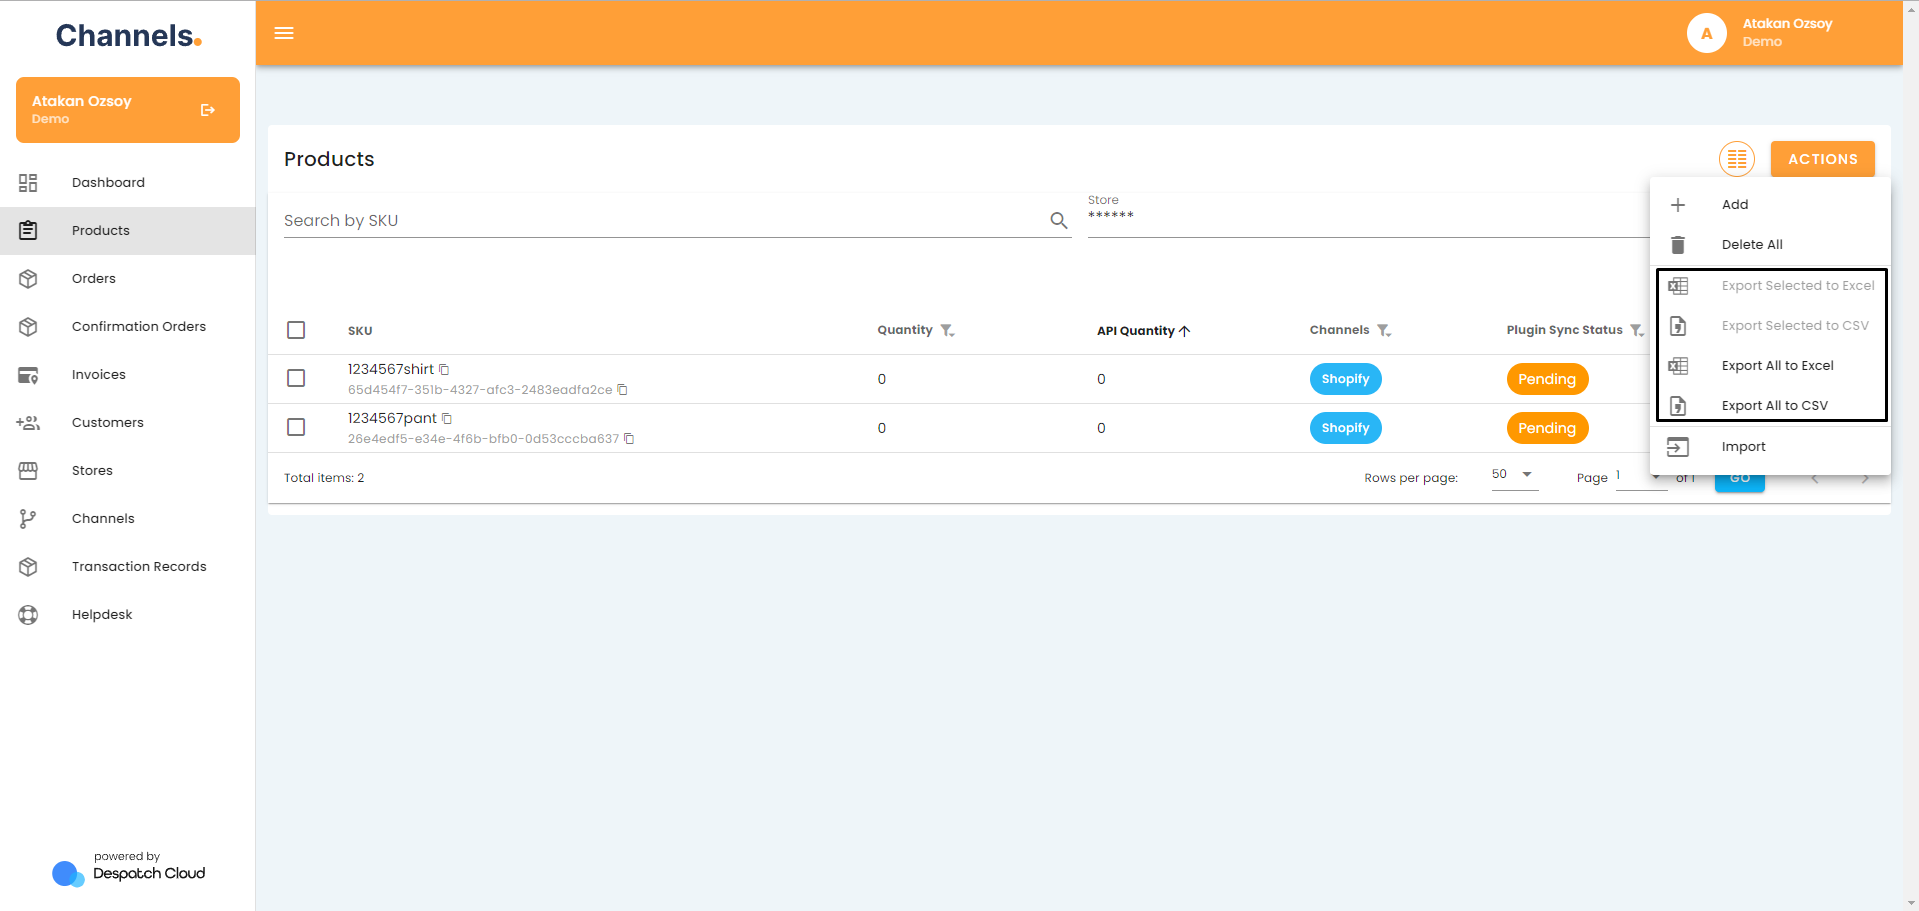
Importing and Exporting
You can export your products into an Excel or CSV file by clicking "Actions", then picking the option you want.
For export actions, you will receive an email notification with a download link.
You can also import products from an Excel or a CSV file by clicking "Actions", then picking the "Import" option at the bottom of the list.
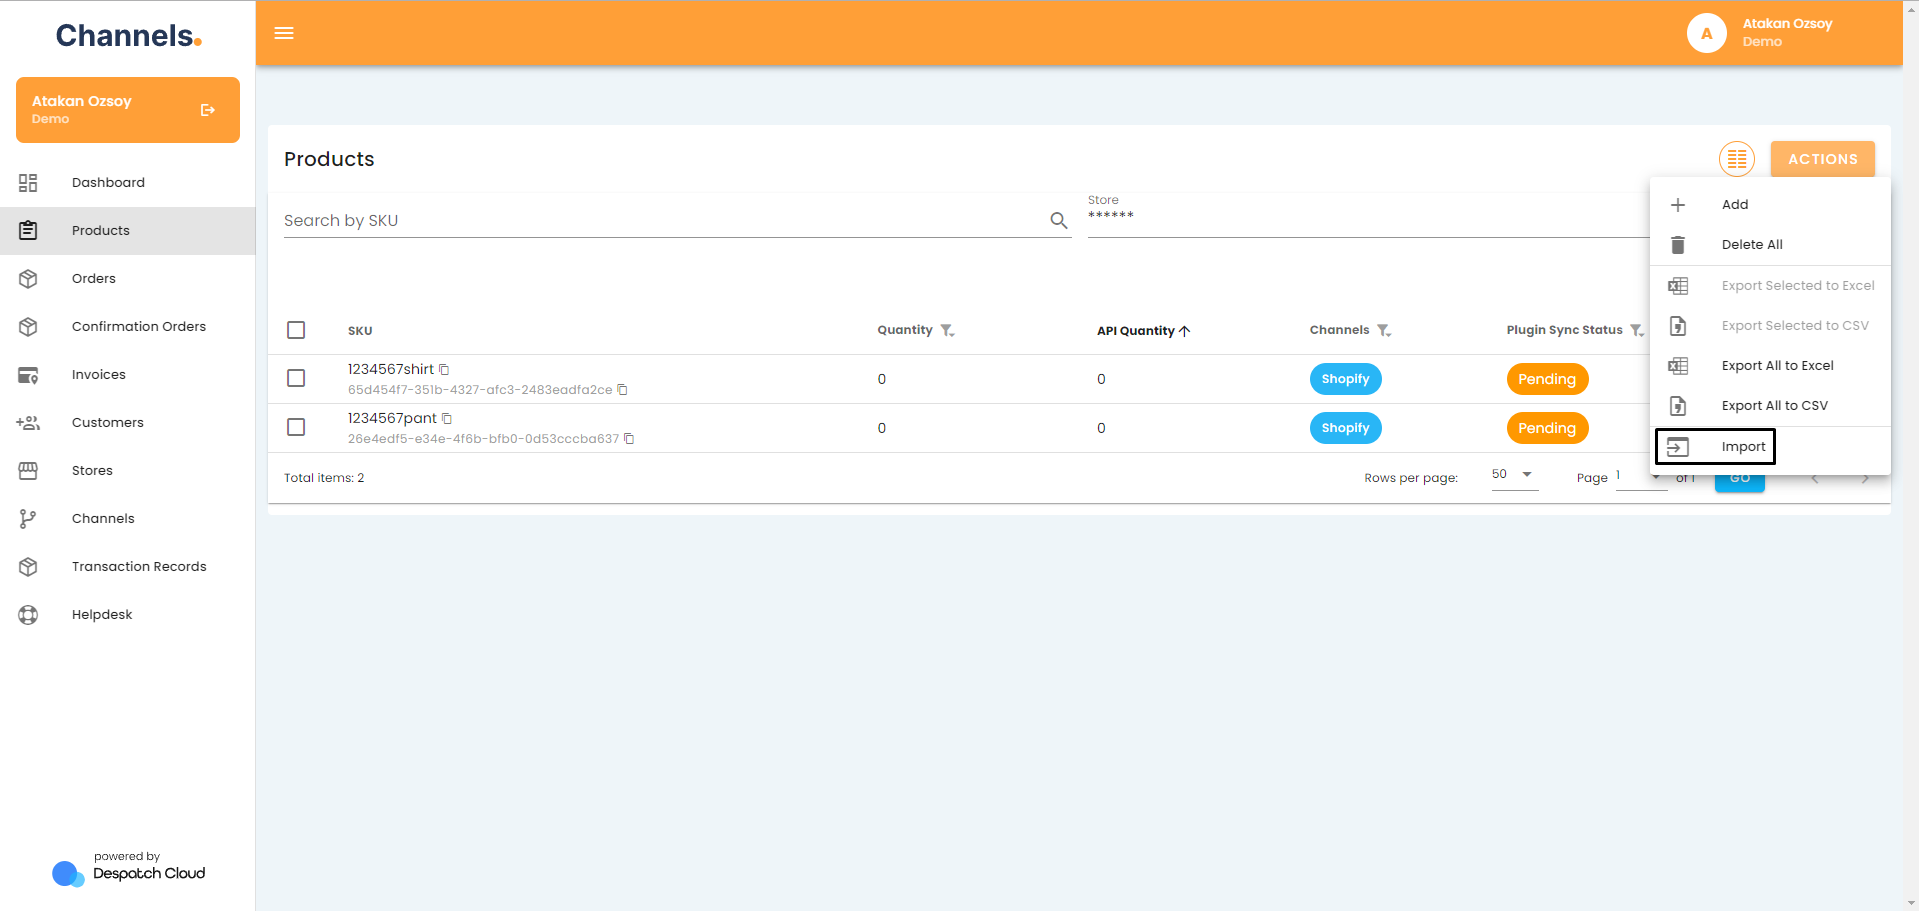
In the case of an import action, a new window will open, allowing you to select a file for import.
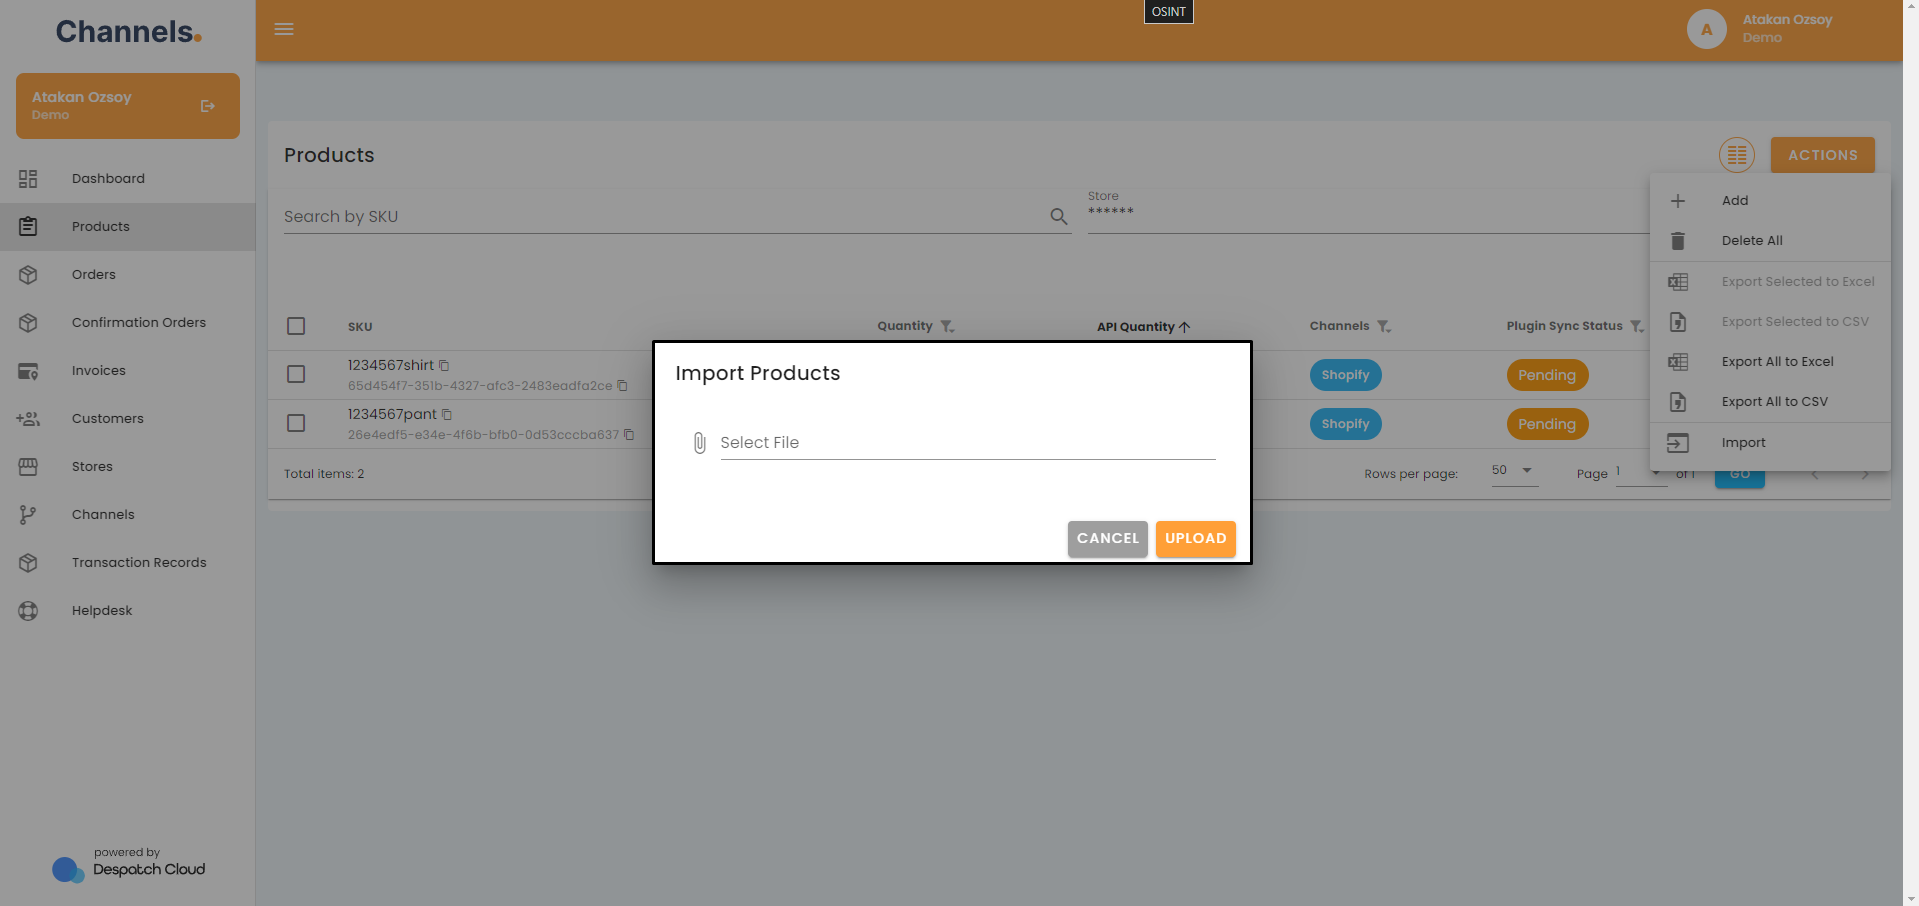
The file you import should be a CSV file with the following fields in the first row:
- parent_sku: If you want to add kit products, you need to enter the kit product SKU as a parent SKU and list the individual products under this kit in the SKU field. Each product within the kit should be entered as a separate row. Use this field if you are uploading kit products only. If not applicable, this column can be left blank.
- sku: Enter the SKUs of the products in each row (one product per row).
- quantity: Enter the quantity of the individual products corresponding to each SKU.
Kit product quantities are calculated automatically based on the lowest quantity value of the products within the kit.
Upon completion of the import process, you will receive an email confirming that the operation has been successfully finished.completed. If you do not receive this email, it means the bulk upload process was not successful. Please contact customer support in that case.
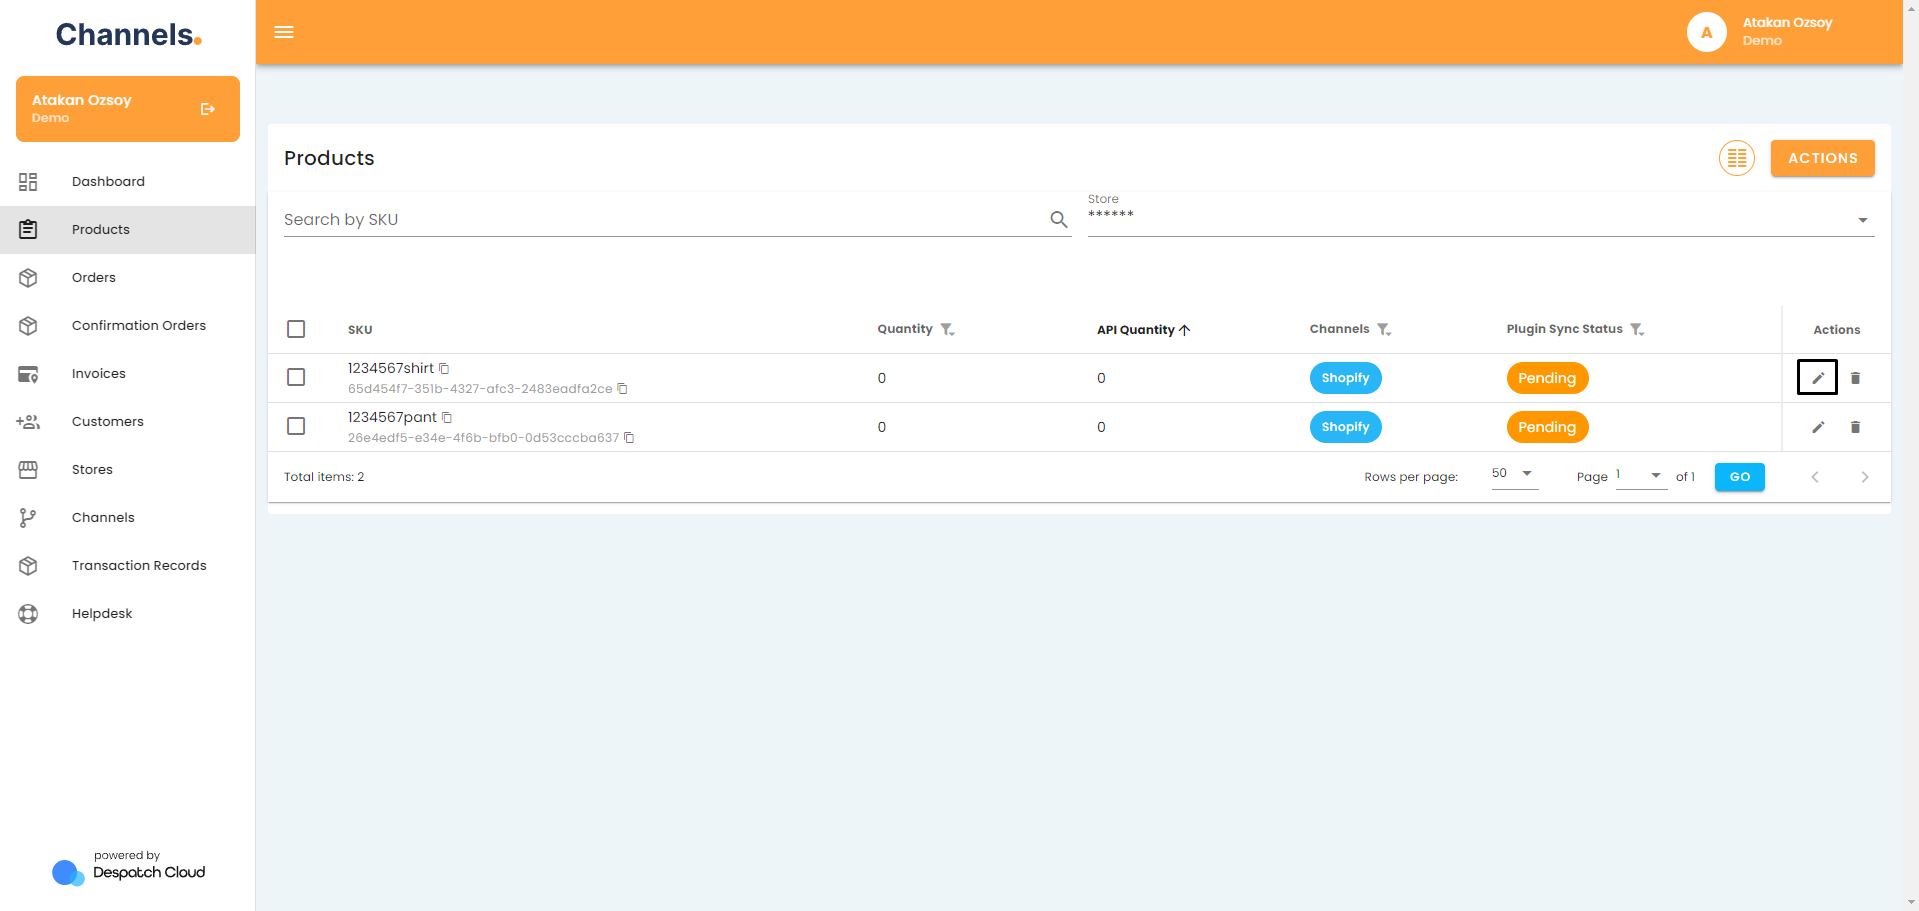
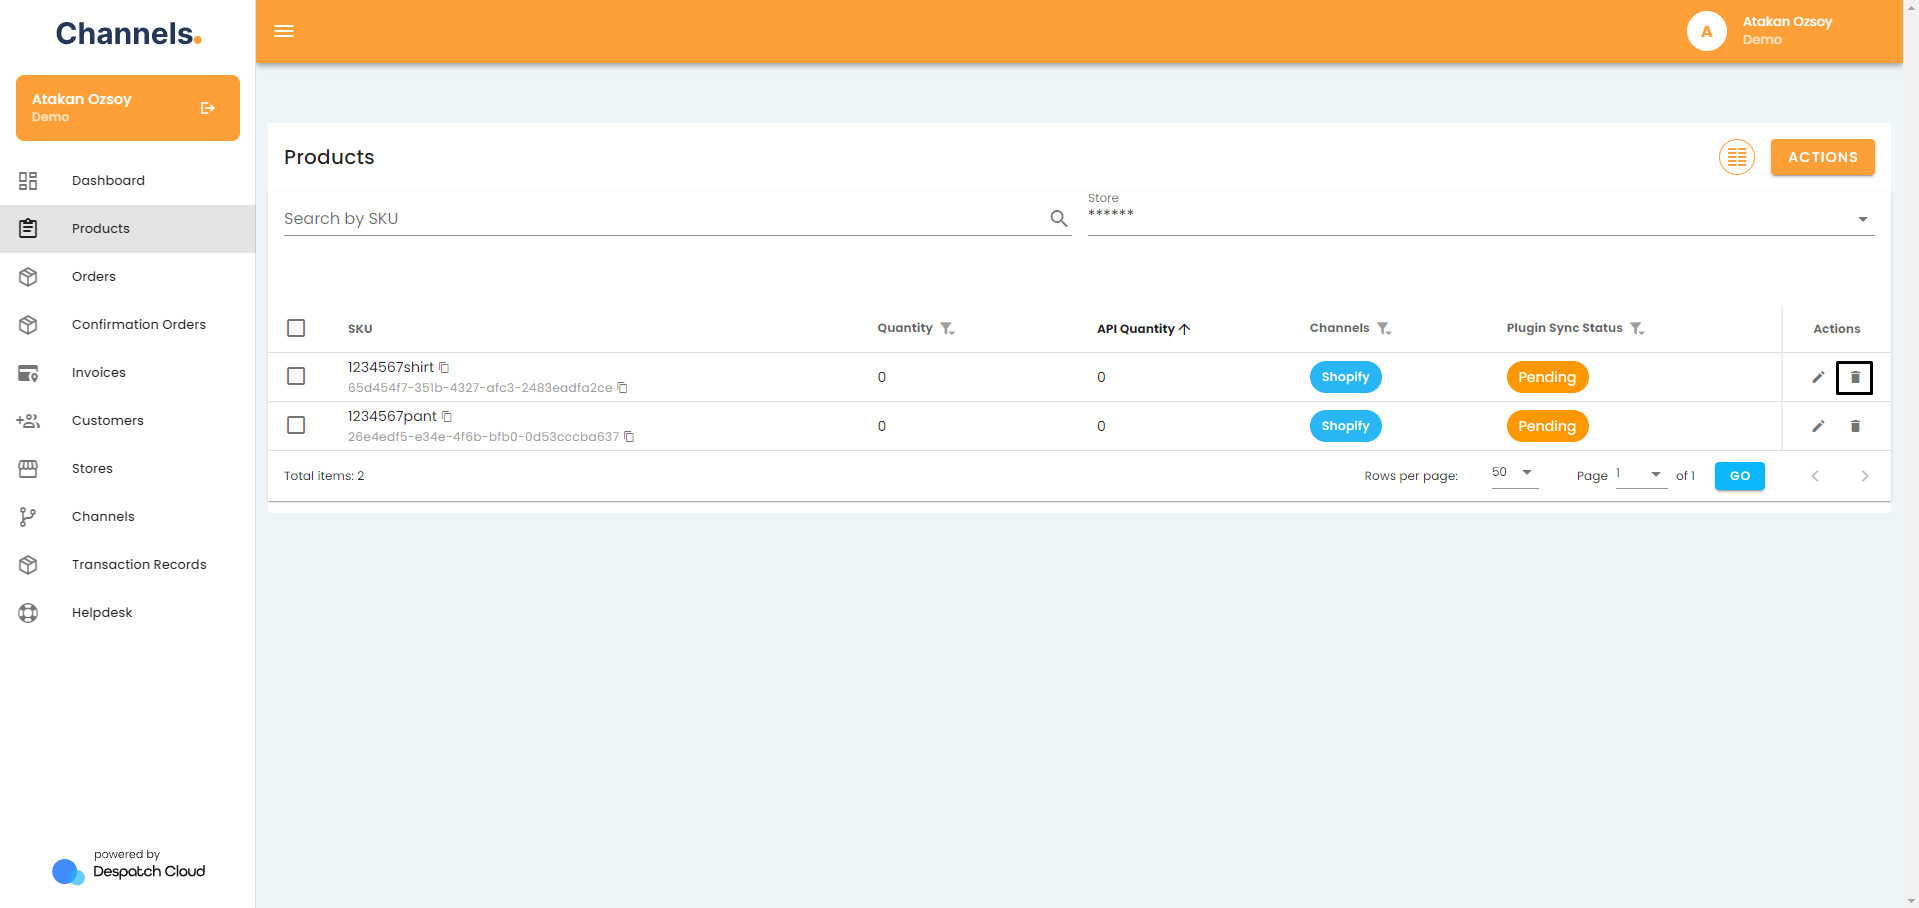
Edit and Delete Actions
The action sections are located on the far-right side of the product display. Clicking the pen icon enables you to actively edit an existing product, revealing details such as channel product information and the latest stock updates, including when it was last updated or used.
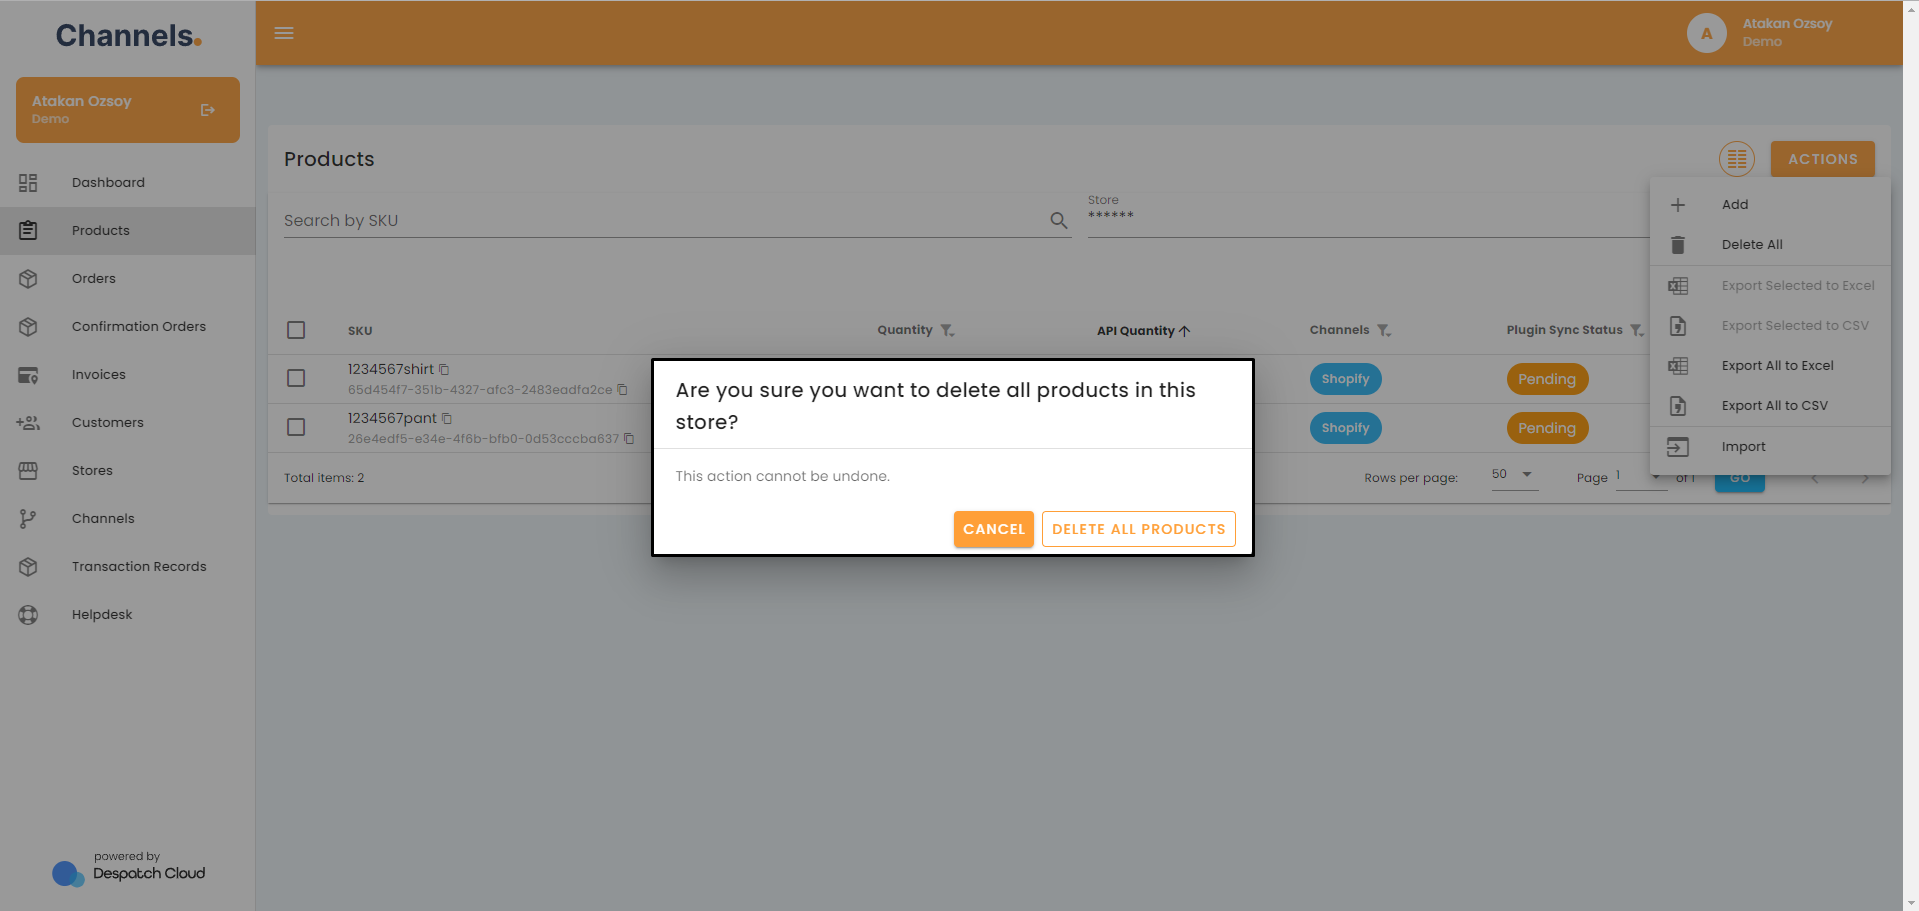
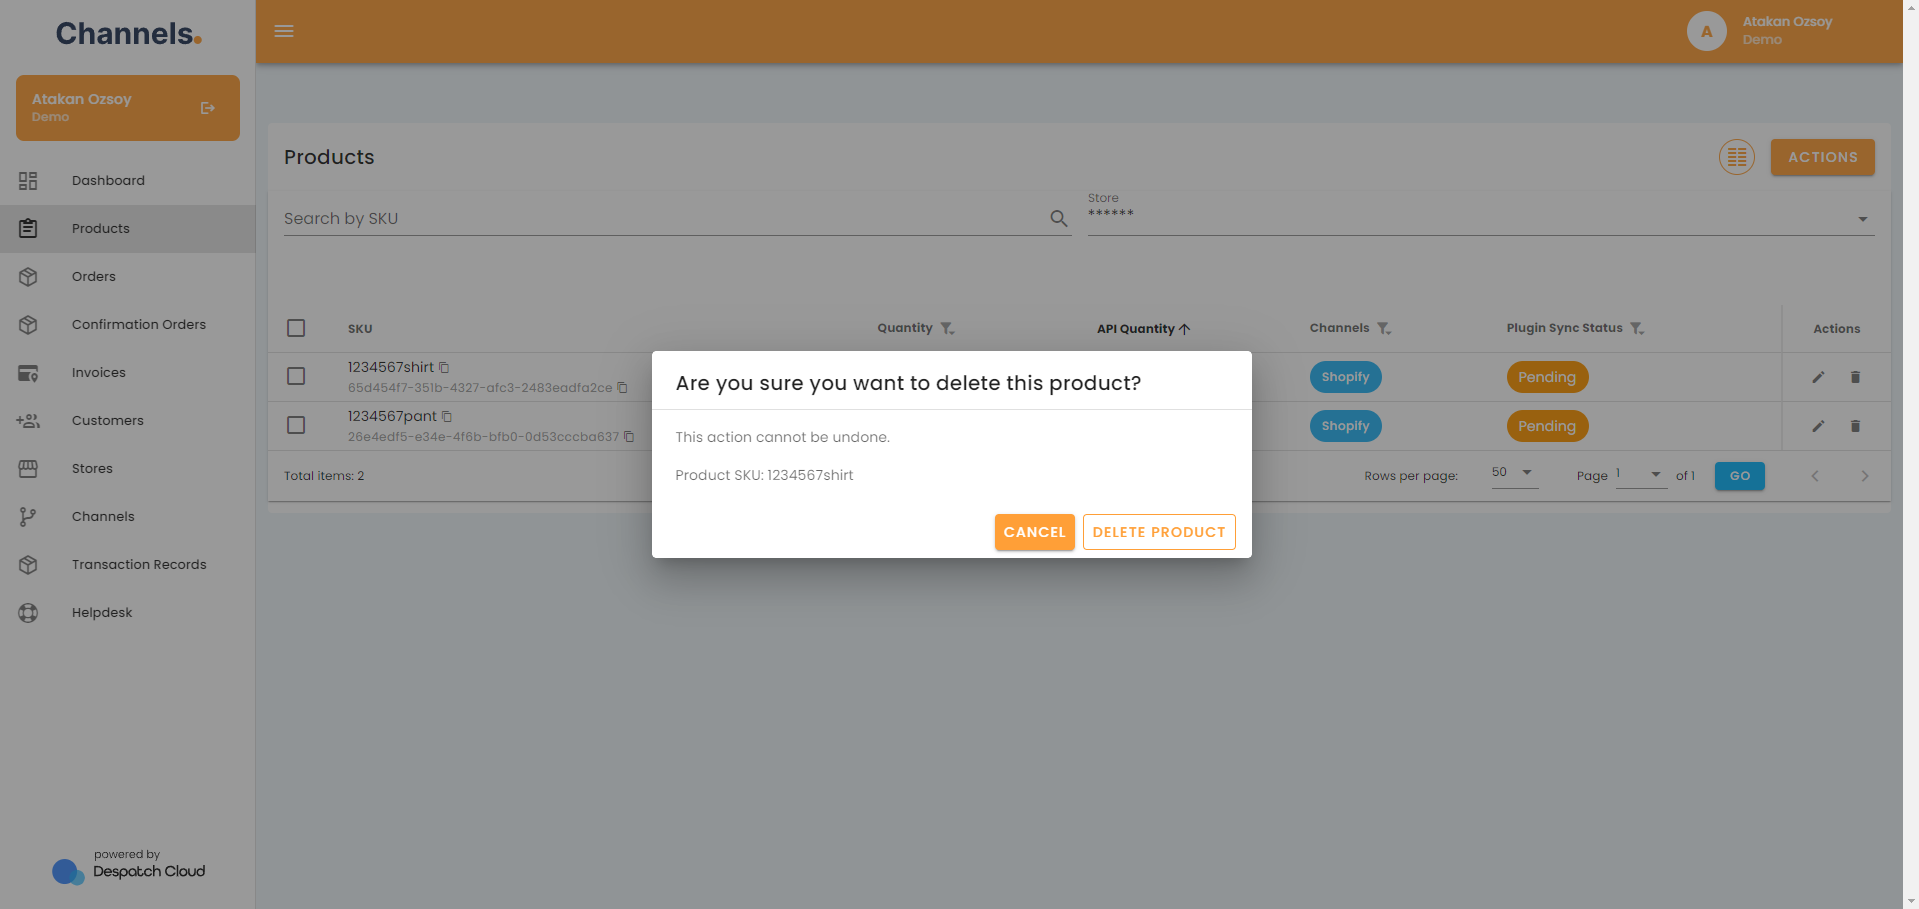
On the other hand, you can delete a product entry by clicking the trash bin icon next to the edit button.
A confirmation popup window will appear at the top of the page, asking for your confirmation, as this action is irreversible once executed.
If necessary, you can delete all products in your store by clicking "Actions", then picking the "Delete All" option below the "+ Add" option.