About Orders
Overview
This documentation page is dedicated to providing insights into the elements of the orders page. We will explore its contents and offer guidance on maximising the benefits of your system.
Accessing the Orders Page
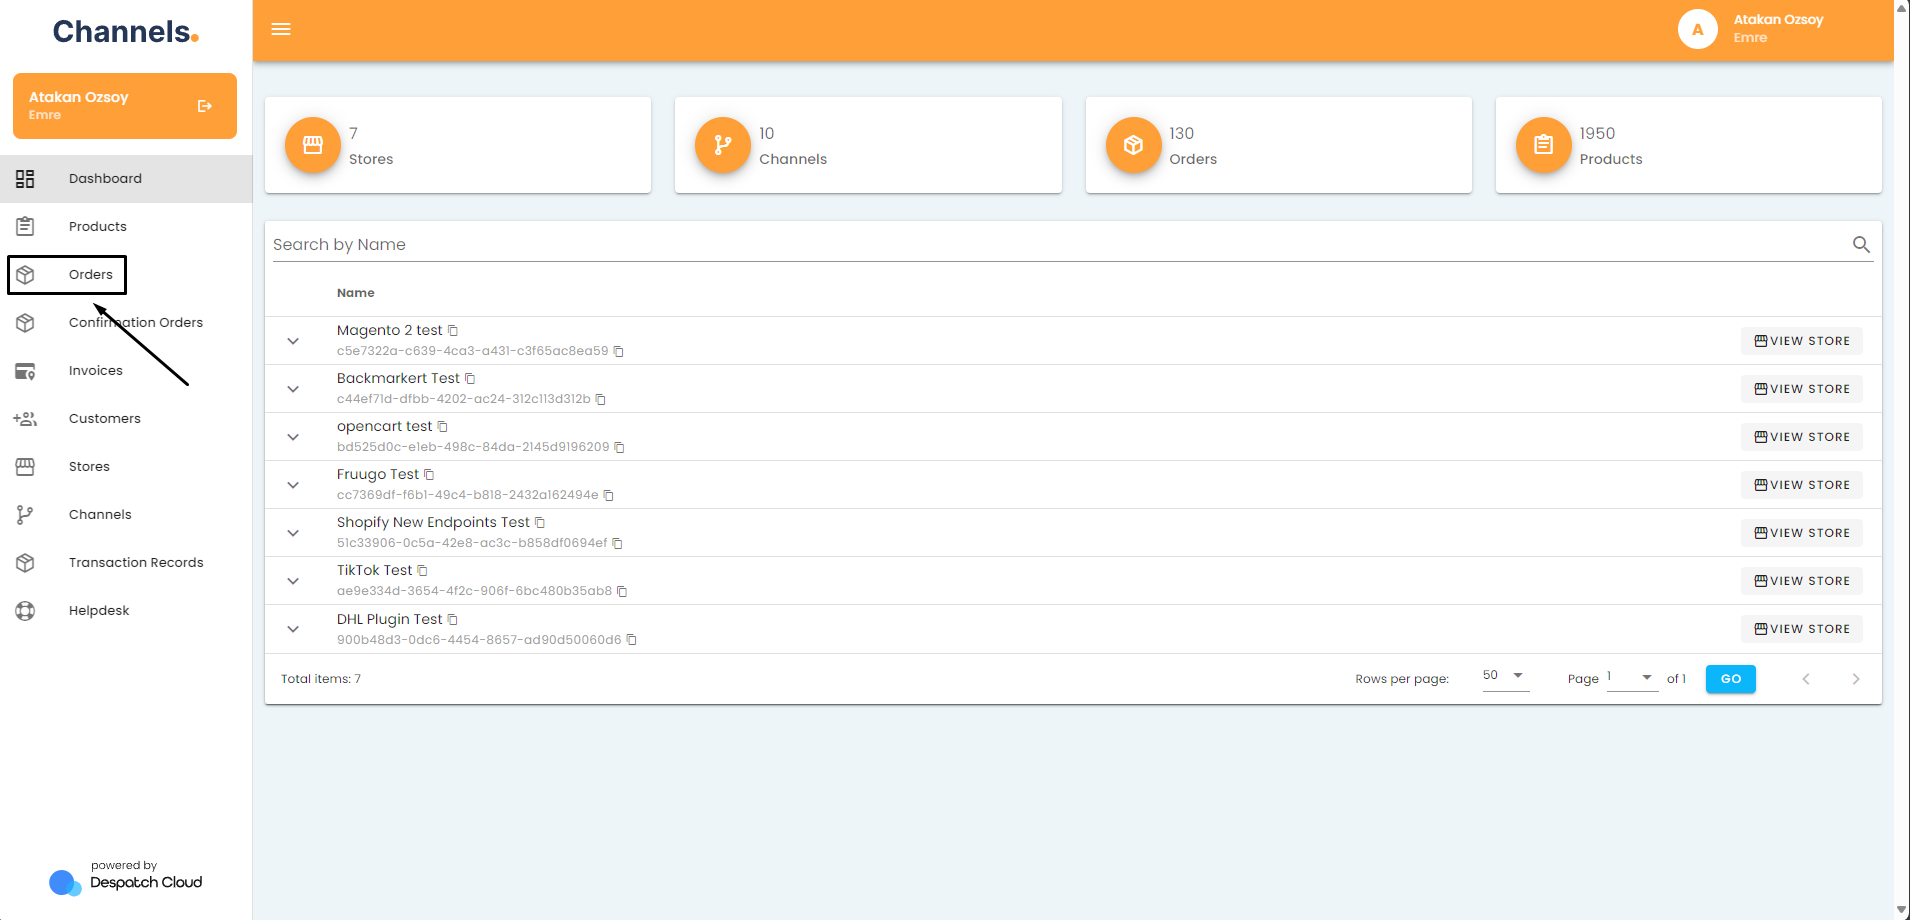
To access the orders page, click the "Orders" button, located in the left-hand menu.
Details of the Orders Page
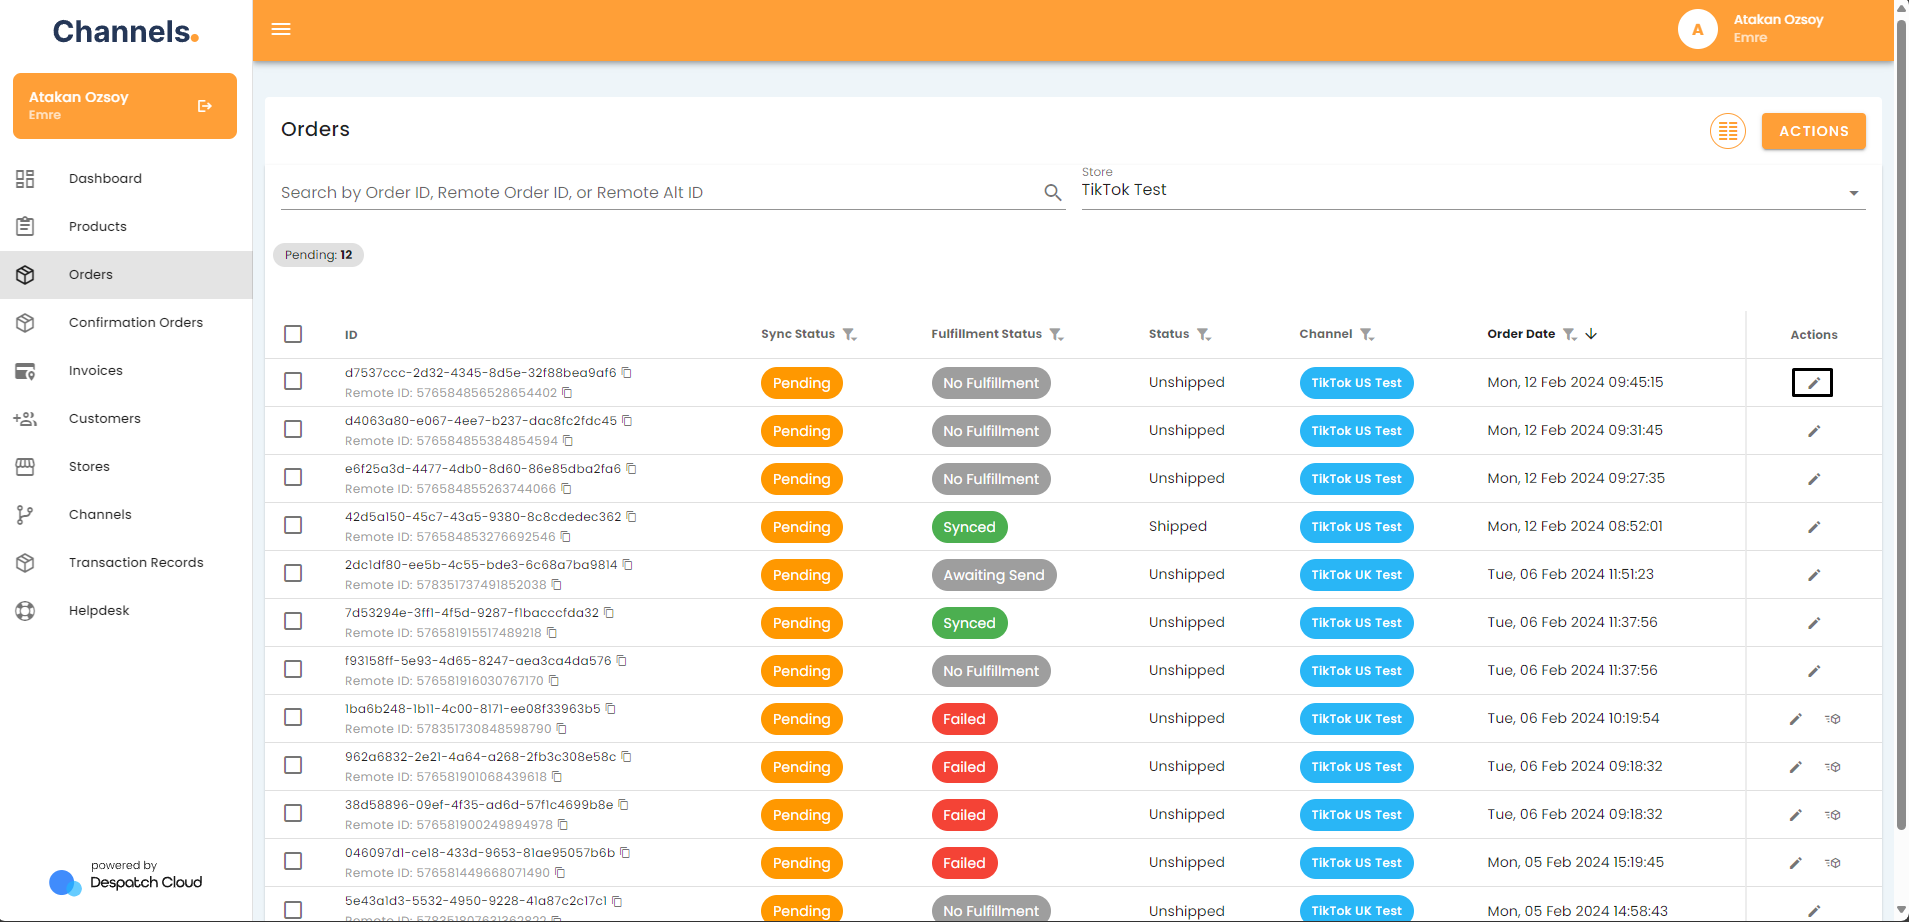
Upon entering the Orders page, your initial step should be to select a specific store. Without this selection, no orders will appear, and the page will remain empty. To choose a store, click on the "Store" dropdown located at the top of the page and pick the store you wish to view.
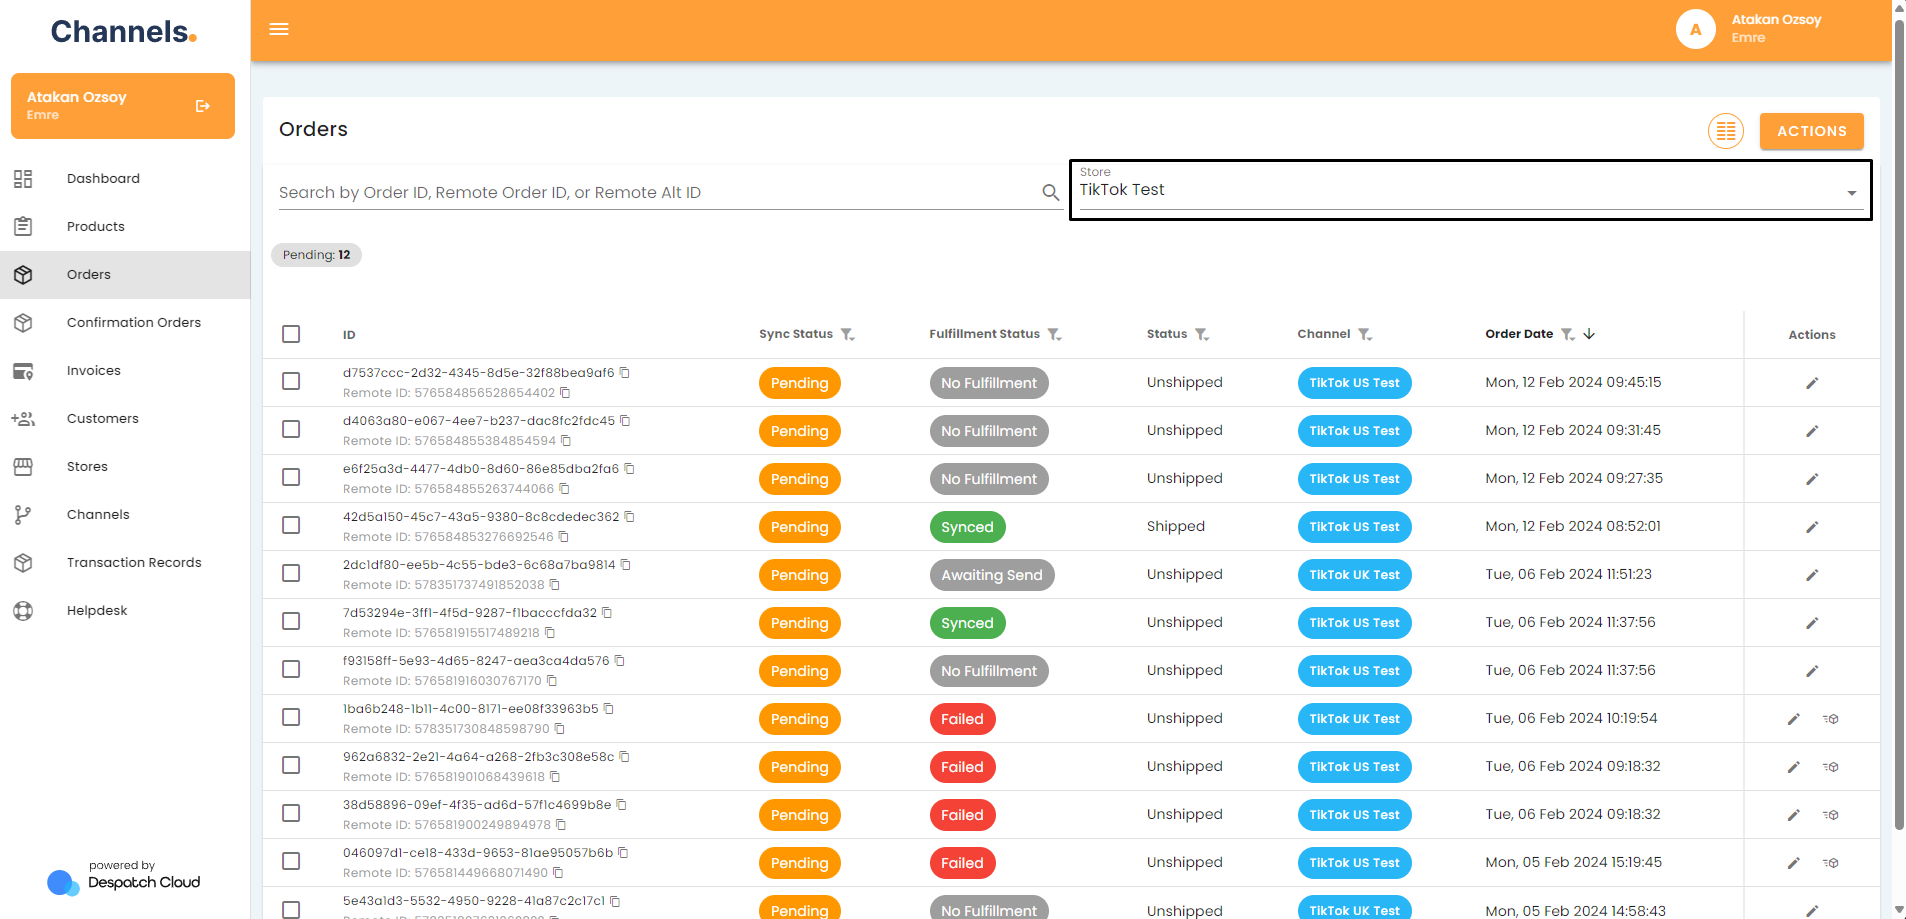
Once you've done this, the orders related to that store will load below and become ready for processing. Each order will display the following information:
- ID: A unique identification number for the order.
- Channel: The sales channel from which the order originated.
- Customer: The name of the customer who placed the order.
- Number Of Items: The number of items the customer ordered.
- Status: The current status of the order, with the following options:
- Unpaid
- Unshipped
- Partially Shipped
- Shipped
- Cancelled
- Refunded
- Unfulfillable
- Order Date: The date the order was created.
- Sync Status: Indicates the order's current status within the sales channel, with the following statuses available:
- Pending
- Updated
- Synced
- On Hold
- In Progress
- Excluded
- Failed
- Fulfilment Status: Reveals the current fulfilment status of the order, with the following options:
- Awaiting Send
- Pending Sync
- Synced
- Failed
- No Fulfillment
- Locations Pending
- Warning
- Prime
- Waiting for Process Check
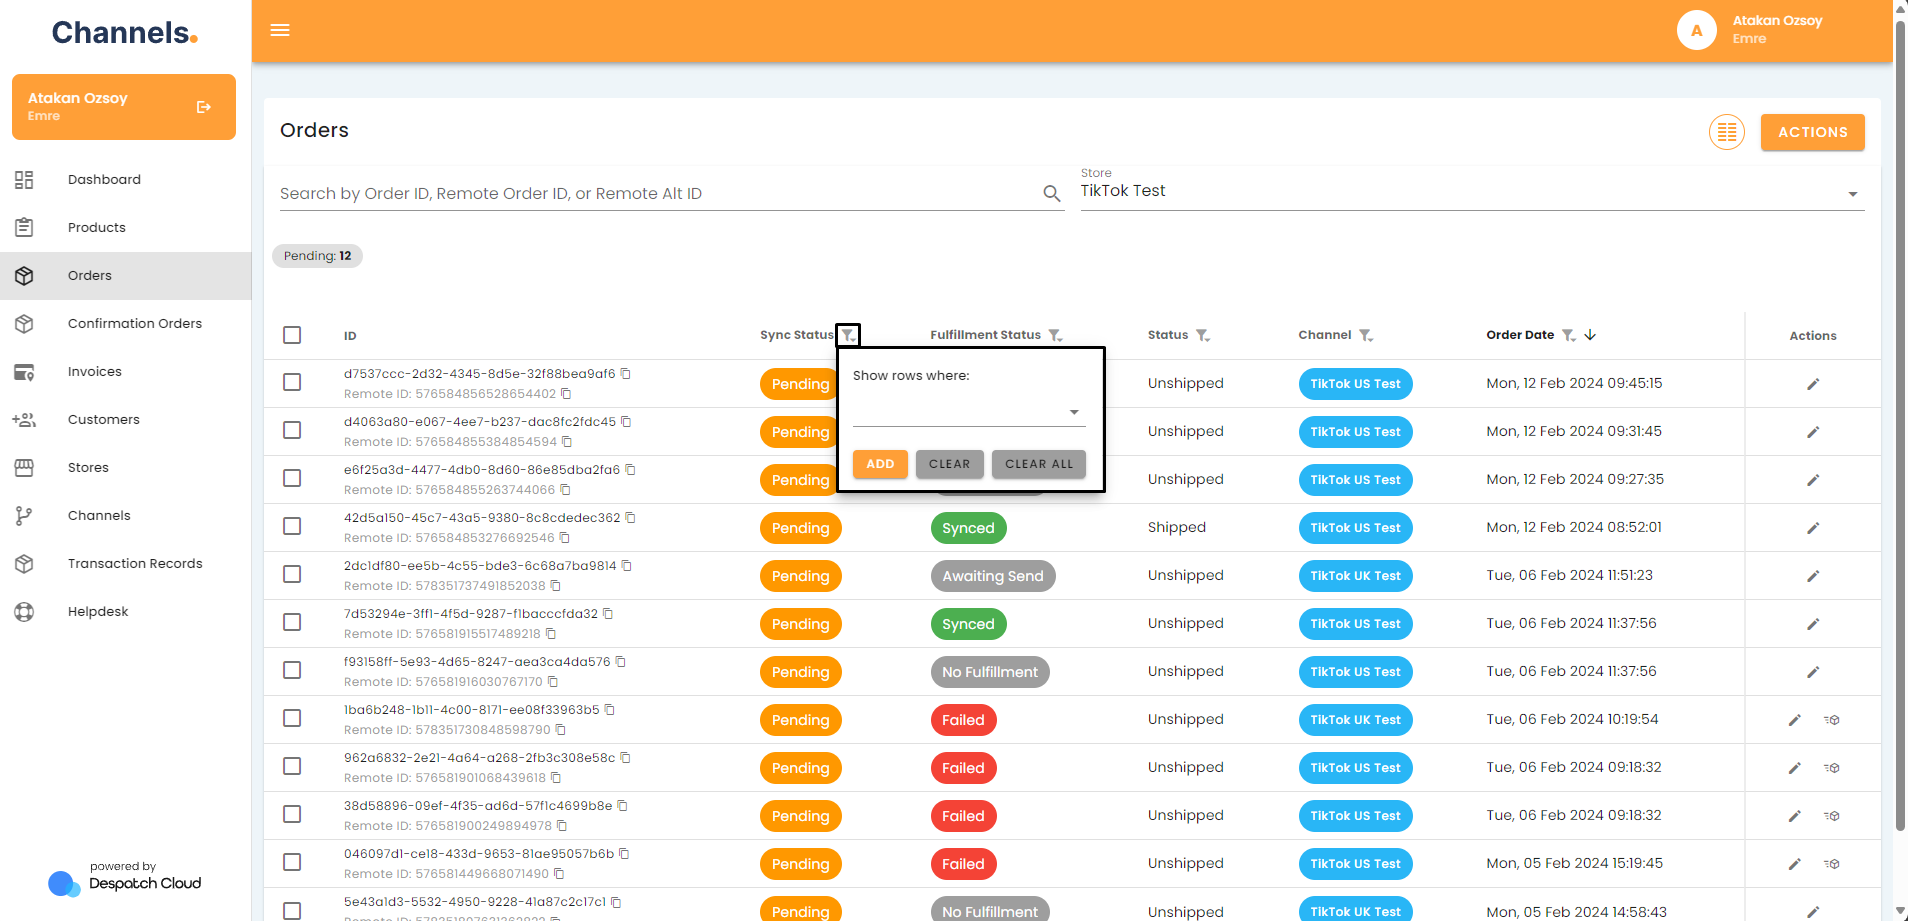
At the top of the Orders page, you'll find a filtering bar. You can apply filters to the orders based on order channel, status, date, sync, and fulfilment status.

After making your selections, click the "Apply Filters" button on the right side. If you ever want to clear the selected filters, you can click the "Clear All" button next to it to display all orders without any filters.
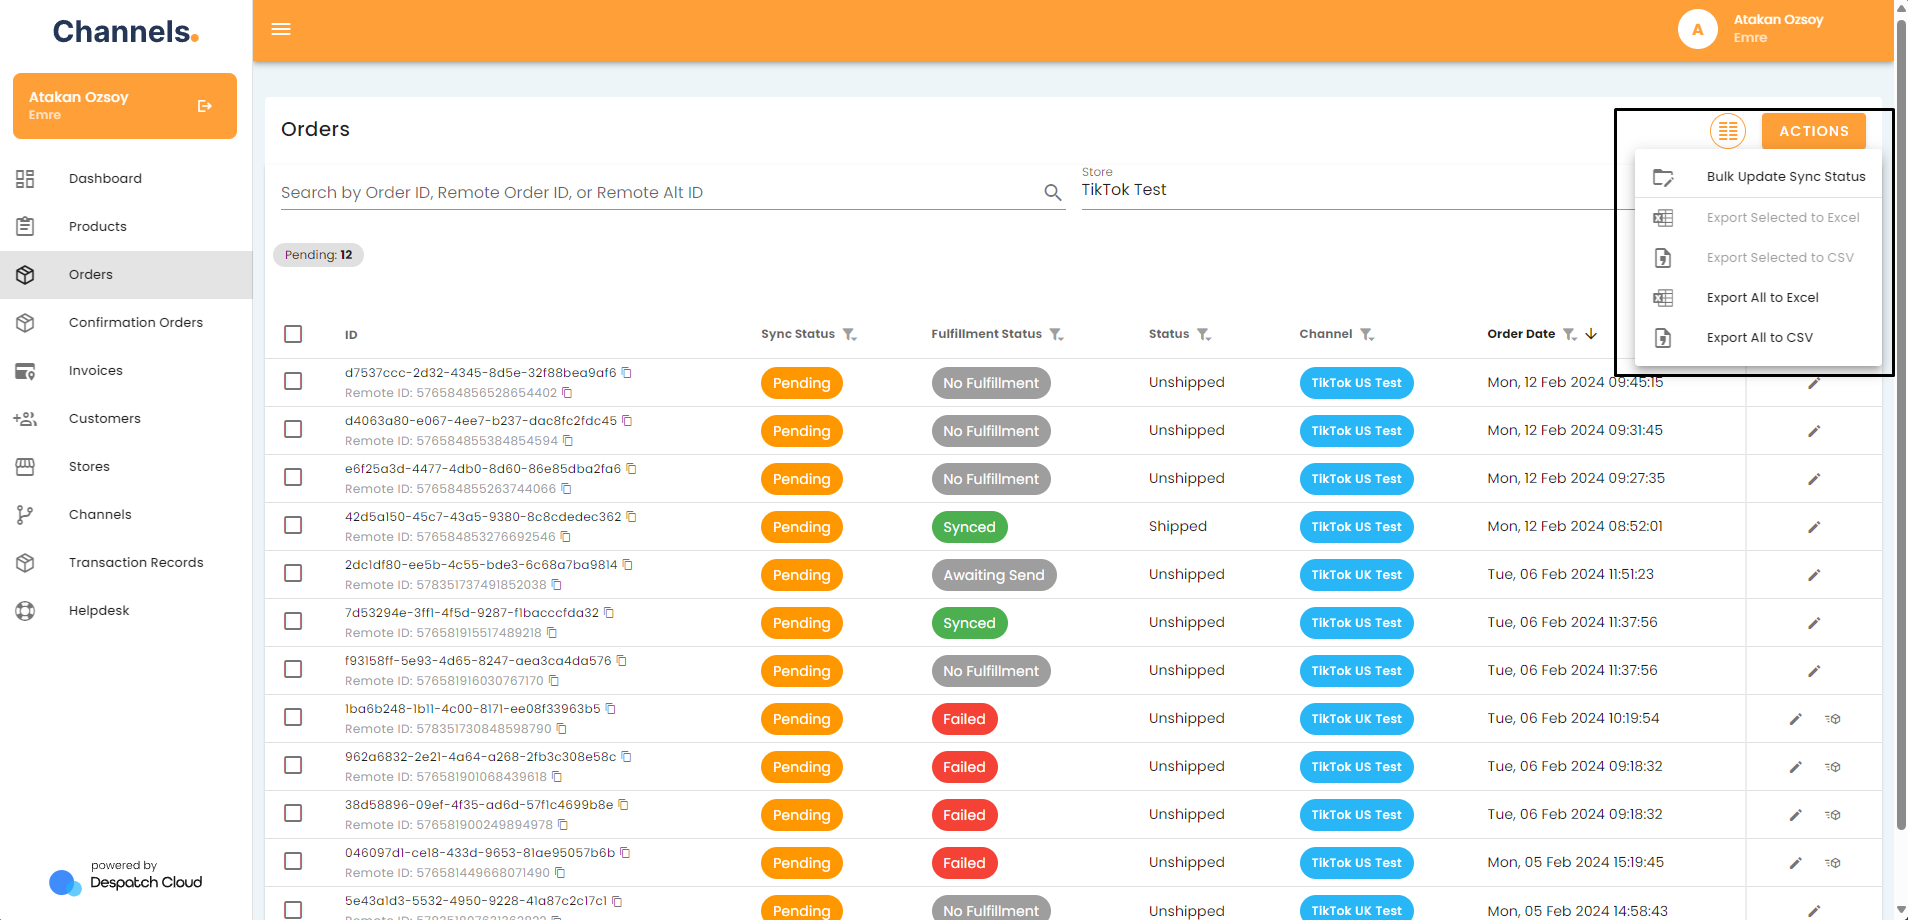
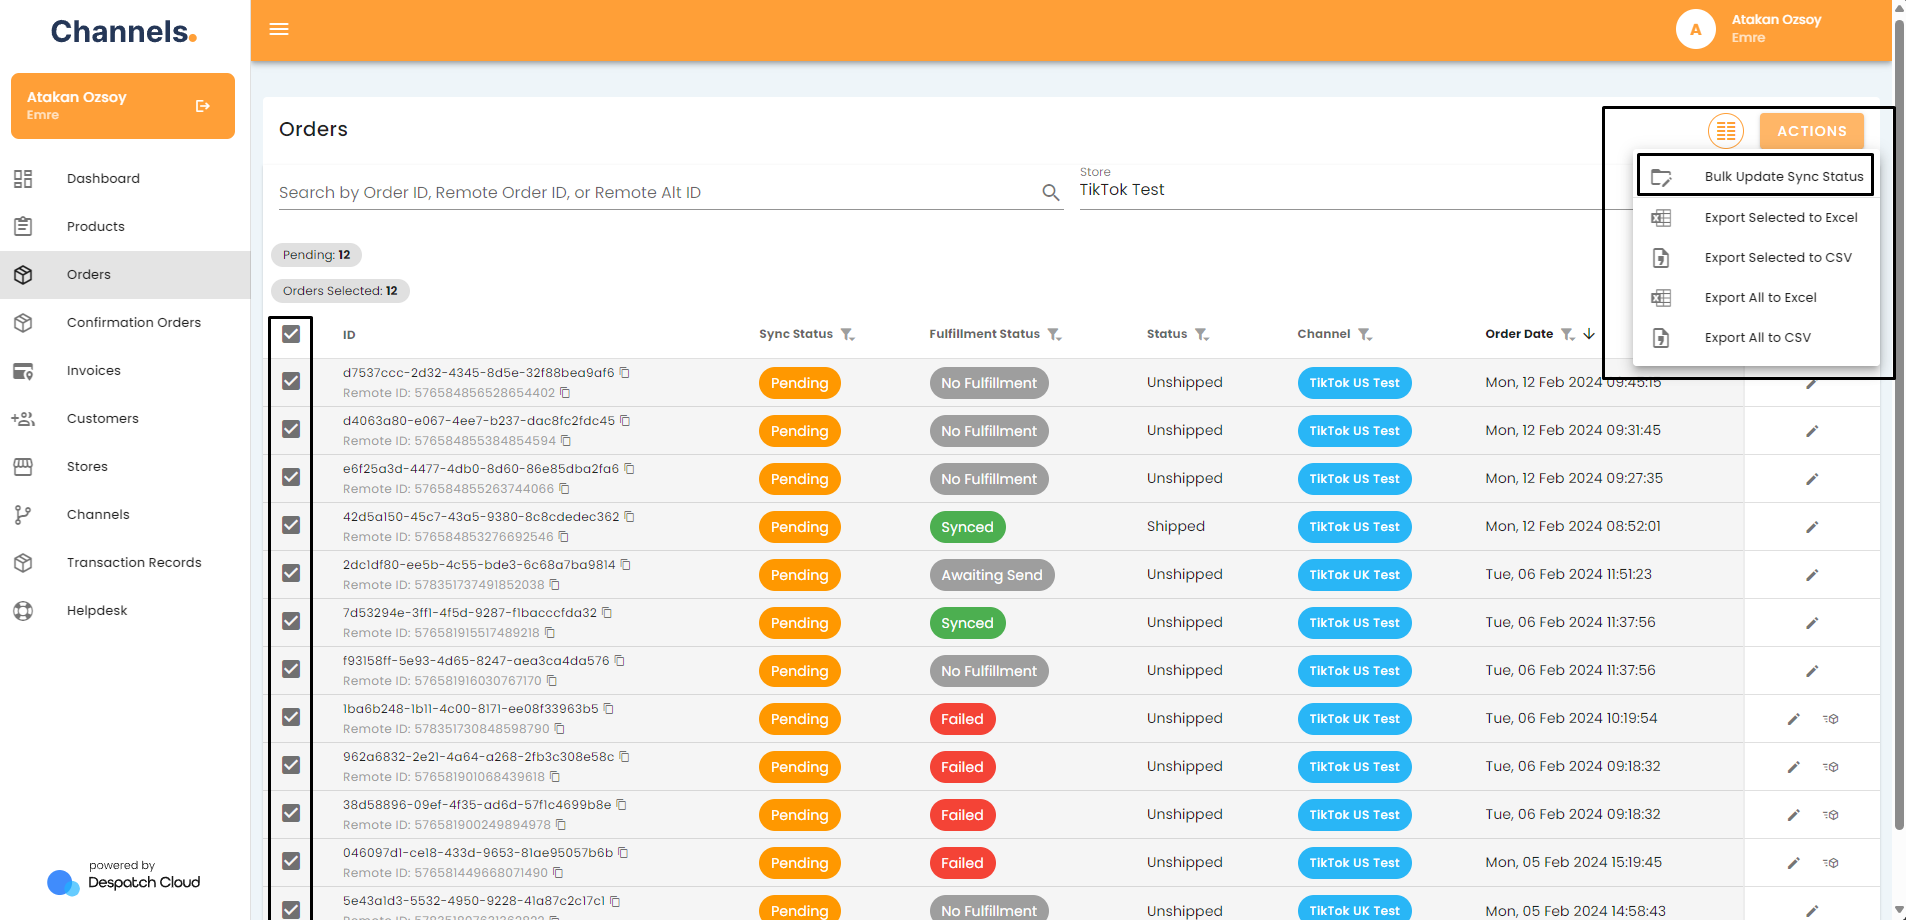
Additionally, you can select one or all orders on a page simultaneously and mark them as synced or not synced using the "Actions" menu and choosing the "Bulk Update Sync Status".
Afterwards,You can also bulk update fulfillment sync statuses and plugin sync statuses on the Bulk Update Orders Screen through the Action Type dropdown menu.
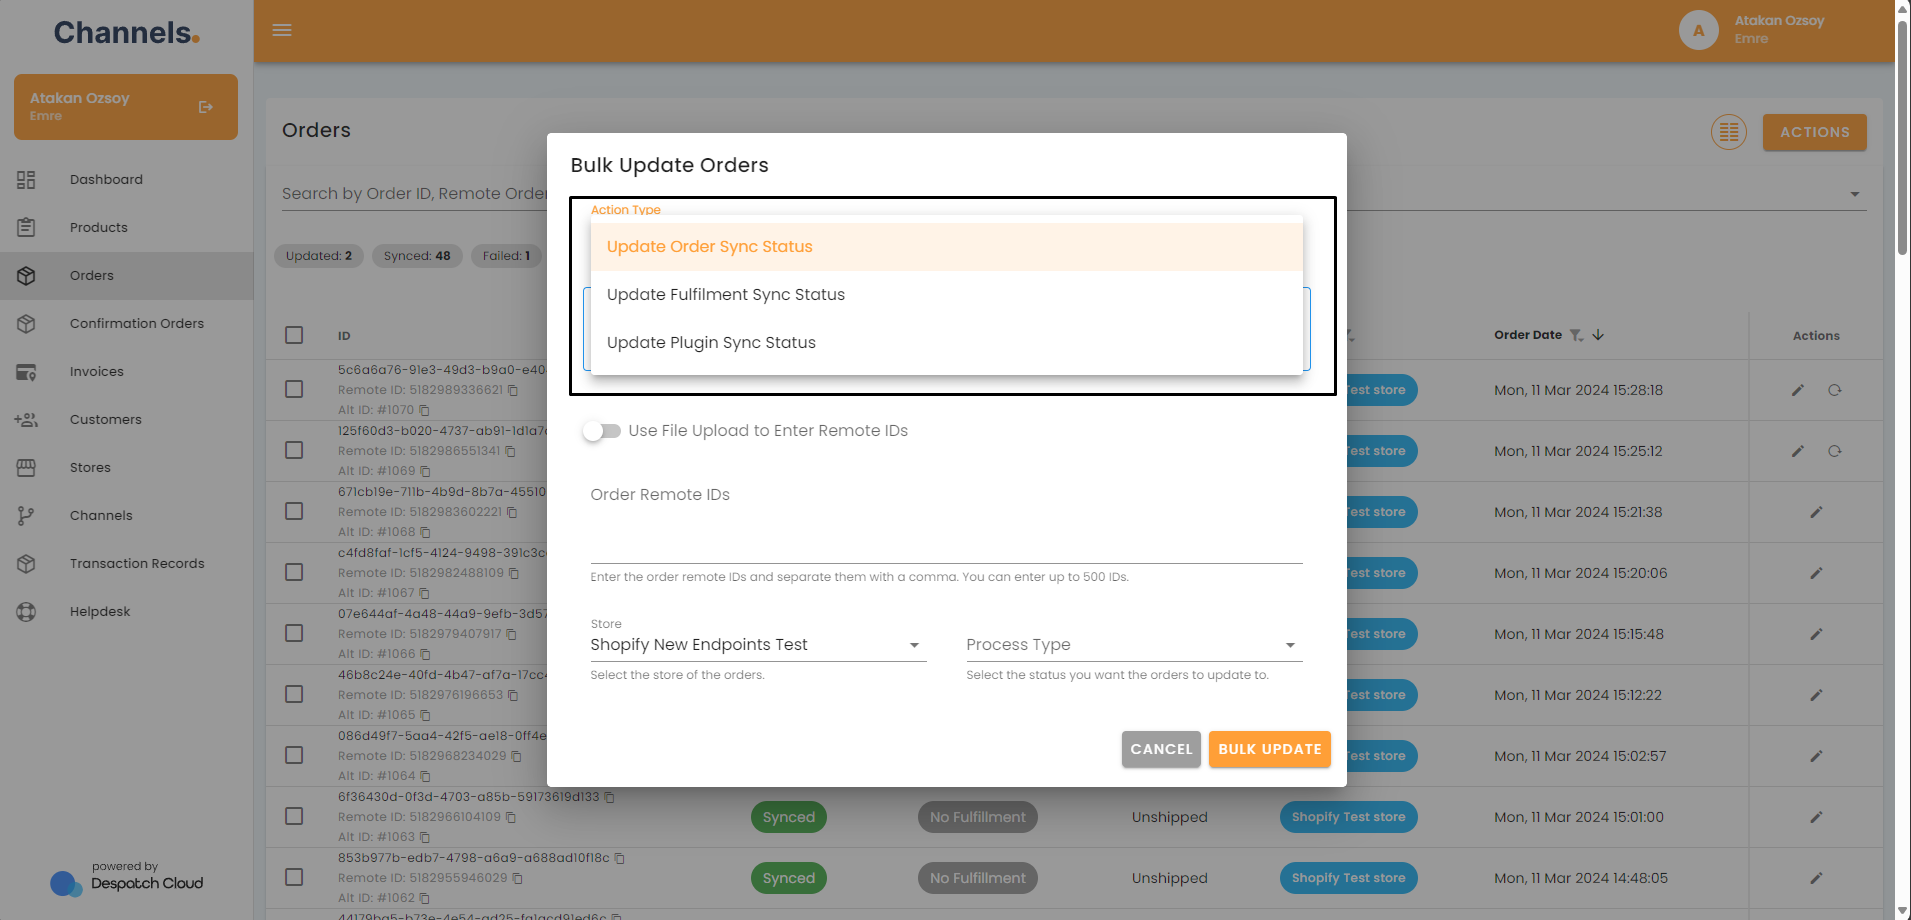
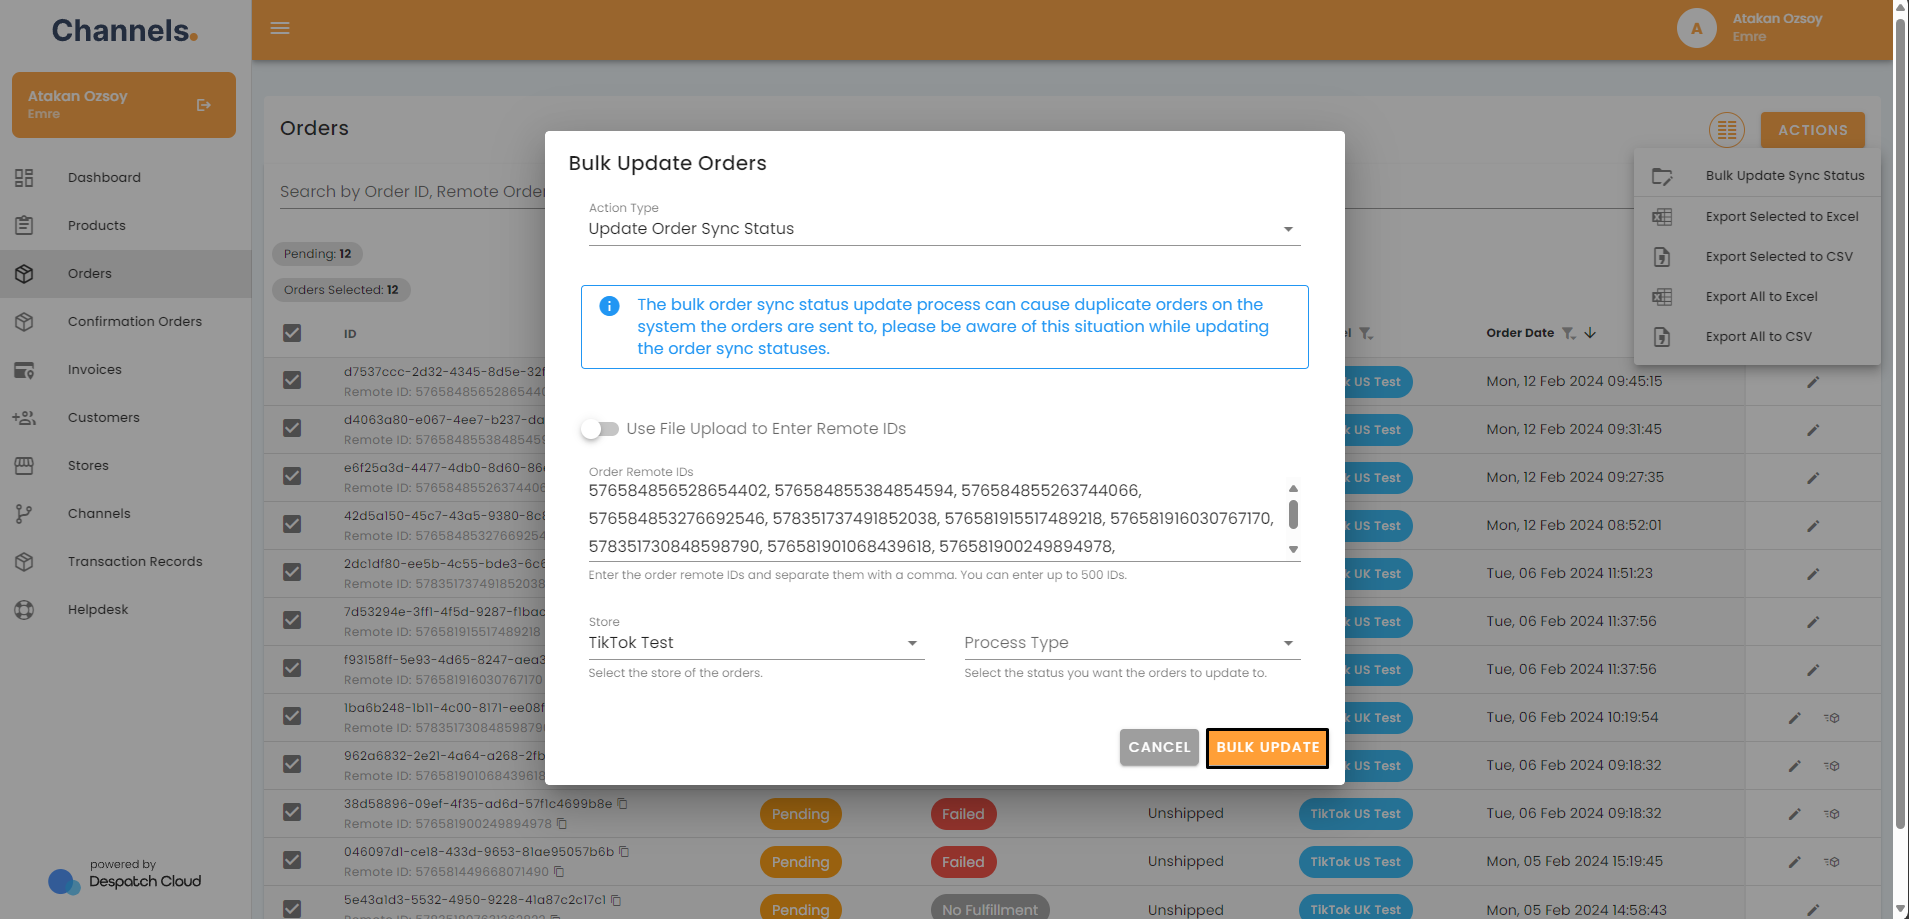
After selecting what type of action you want to take, you can enter the Order Remote IDs by hand or check the "Use File Upload to Enter Remote IDs" option to upload a file which contains the order remote IDs you'd like to update. Next, choose the store that contains the specified orders and select the sync status you'd like to update them to.
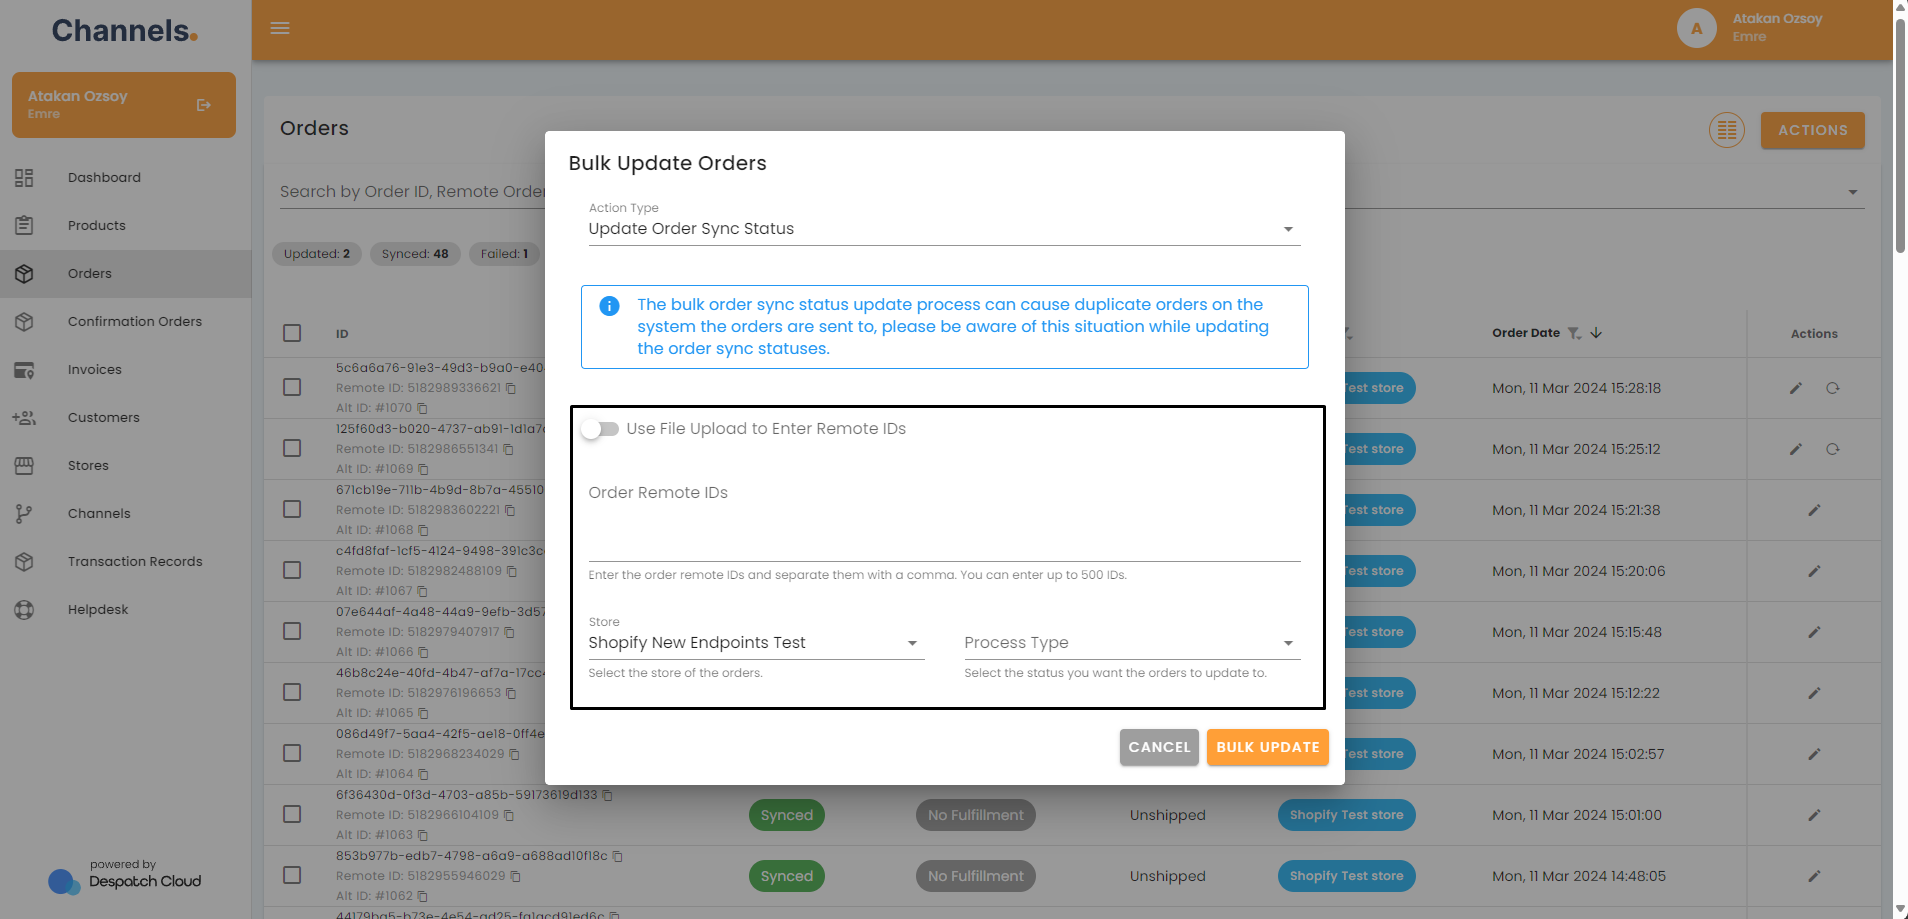
After making your selections, you can click "Bulk Update" to save the new sync statuses.
To access the order details, click on the pen icon located in the actions field on the right side of each order entry.
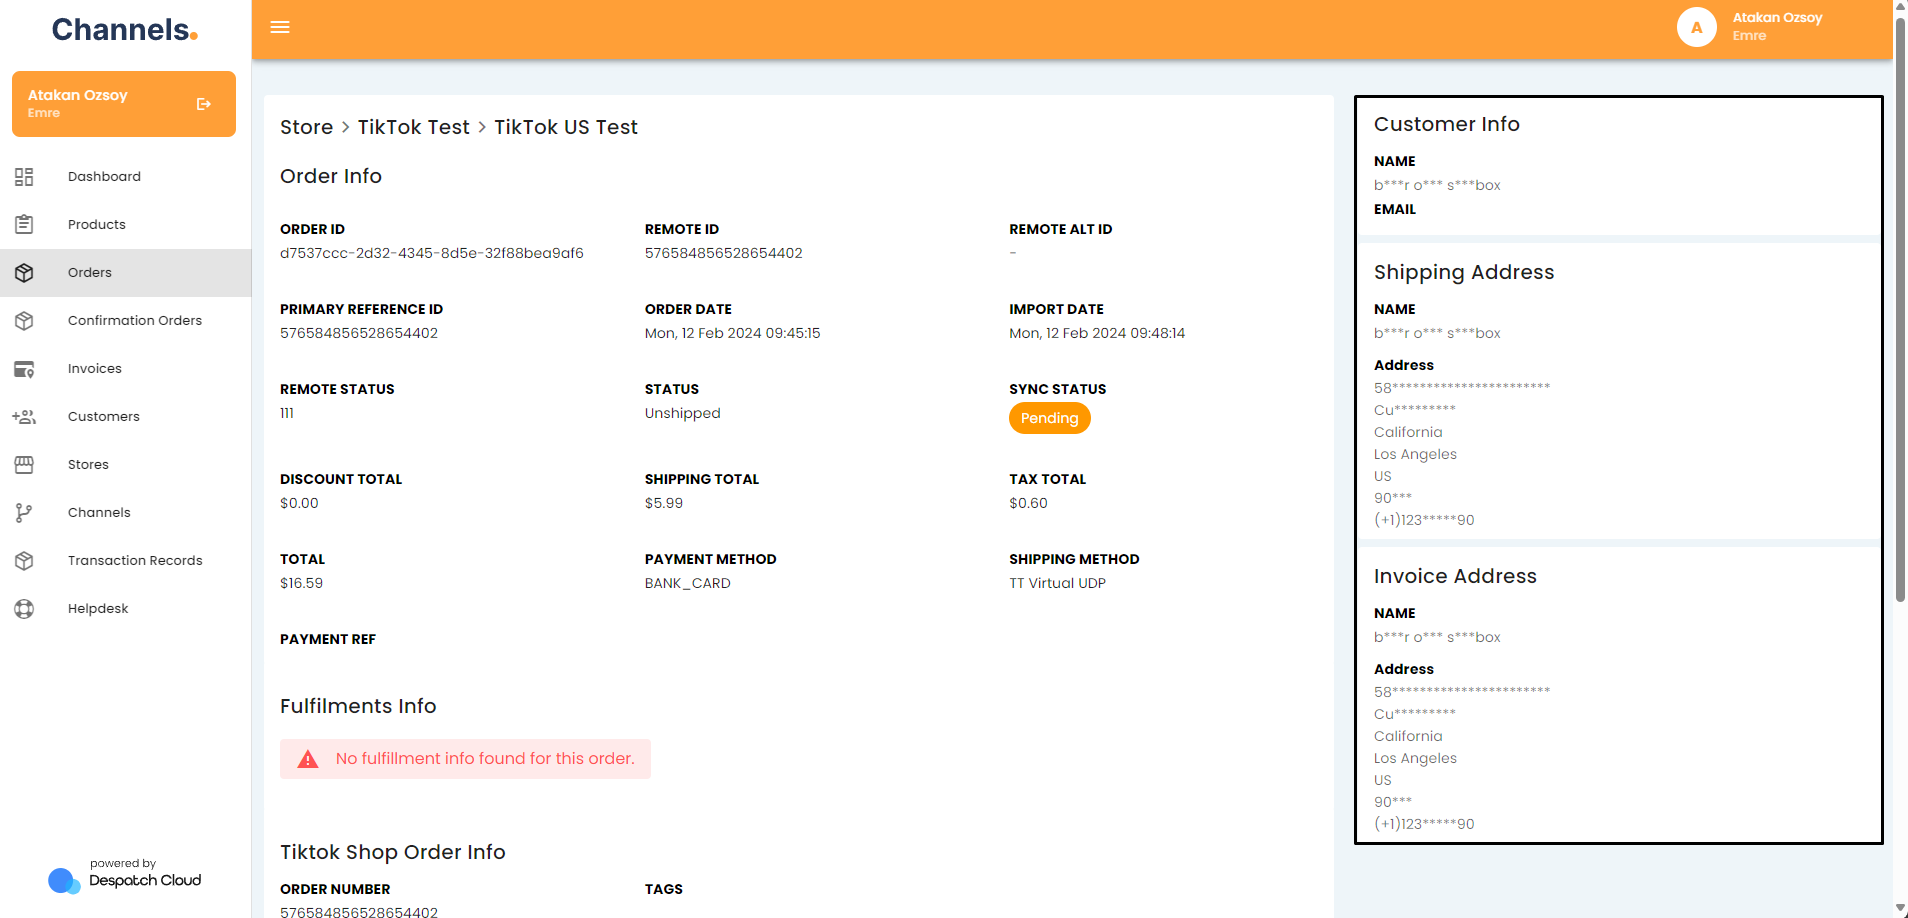
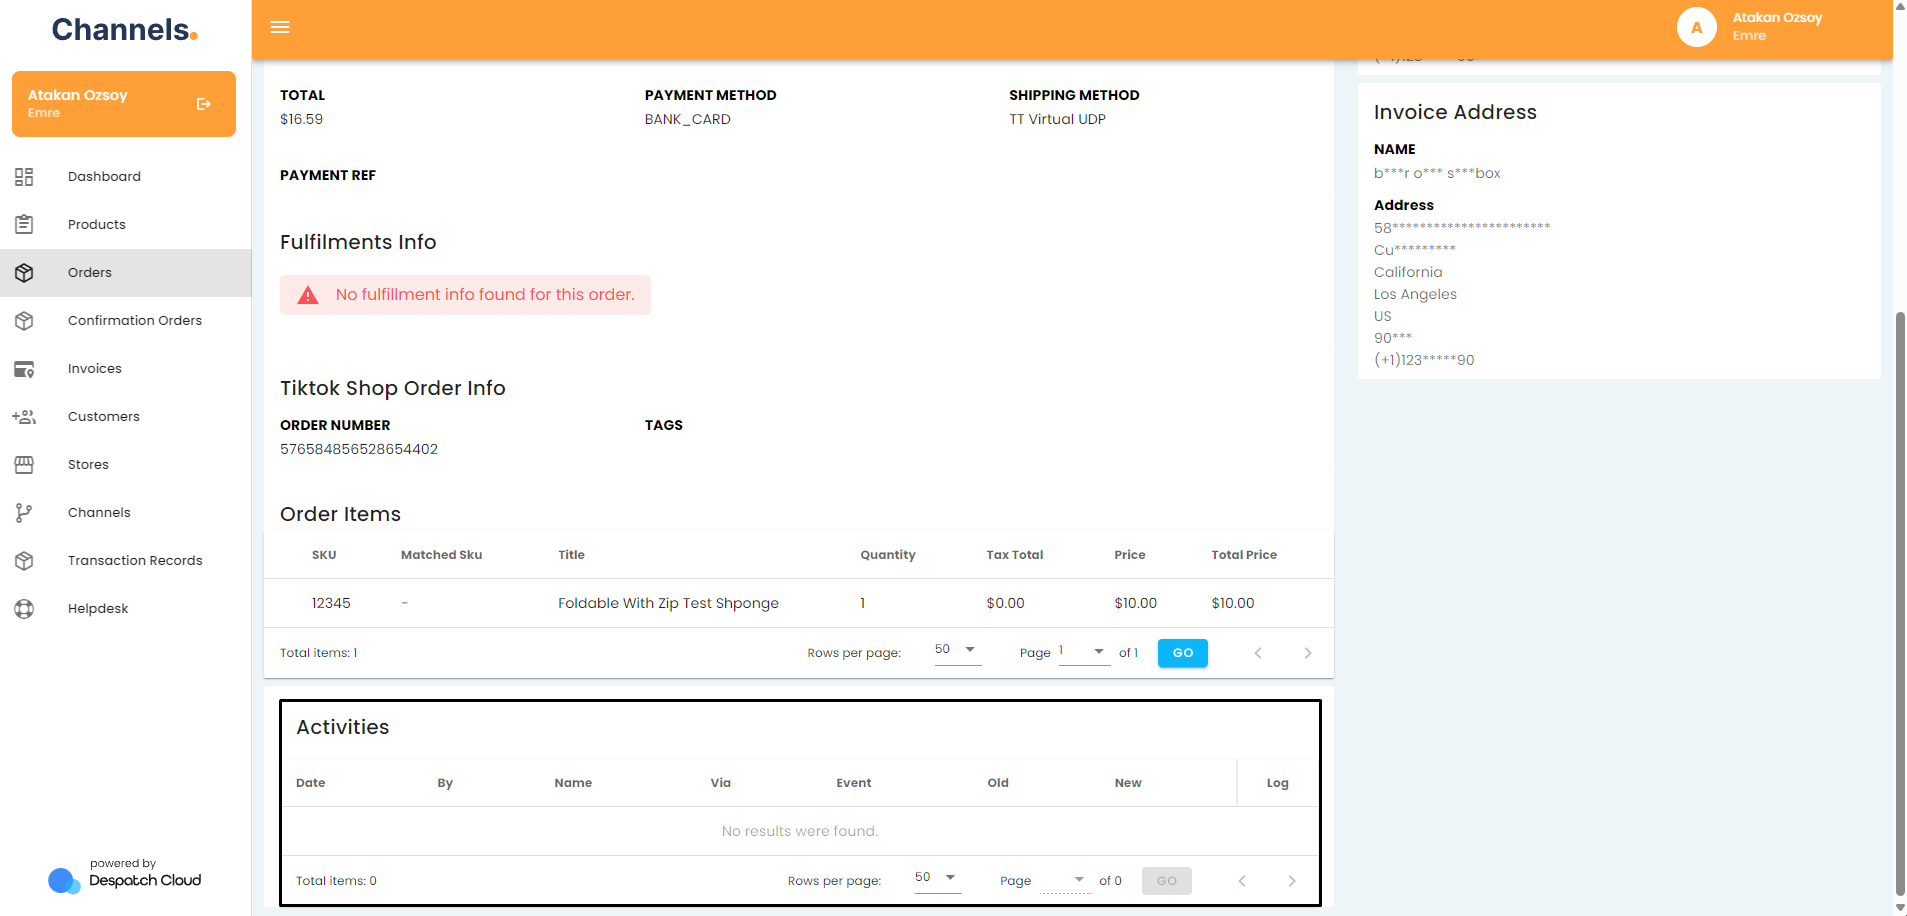
The first section provides comprehensive general information about the order. It includes essential details such as order IDs, dates, statuses, pricing, payment information, and the chosen shipment method. If the order follows a fulfilment route, that information will also be displayed.
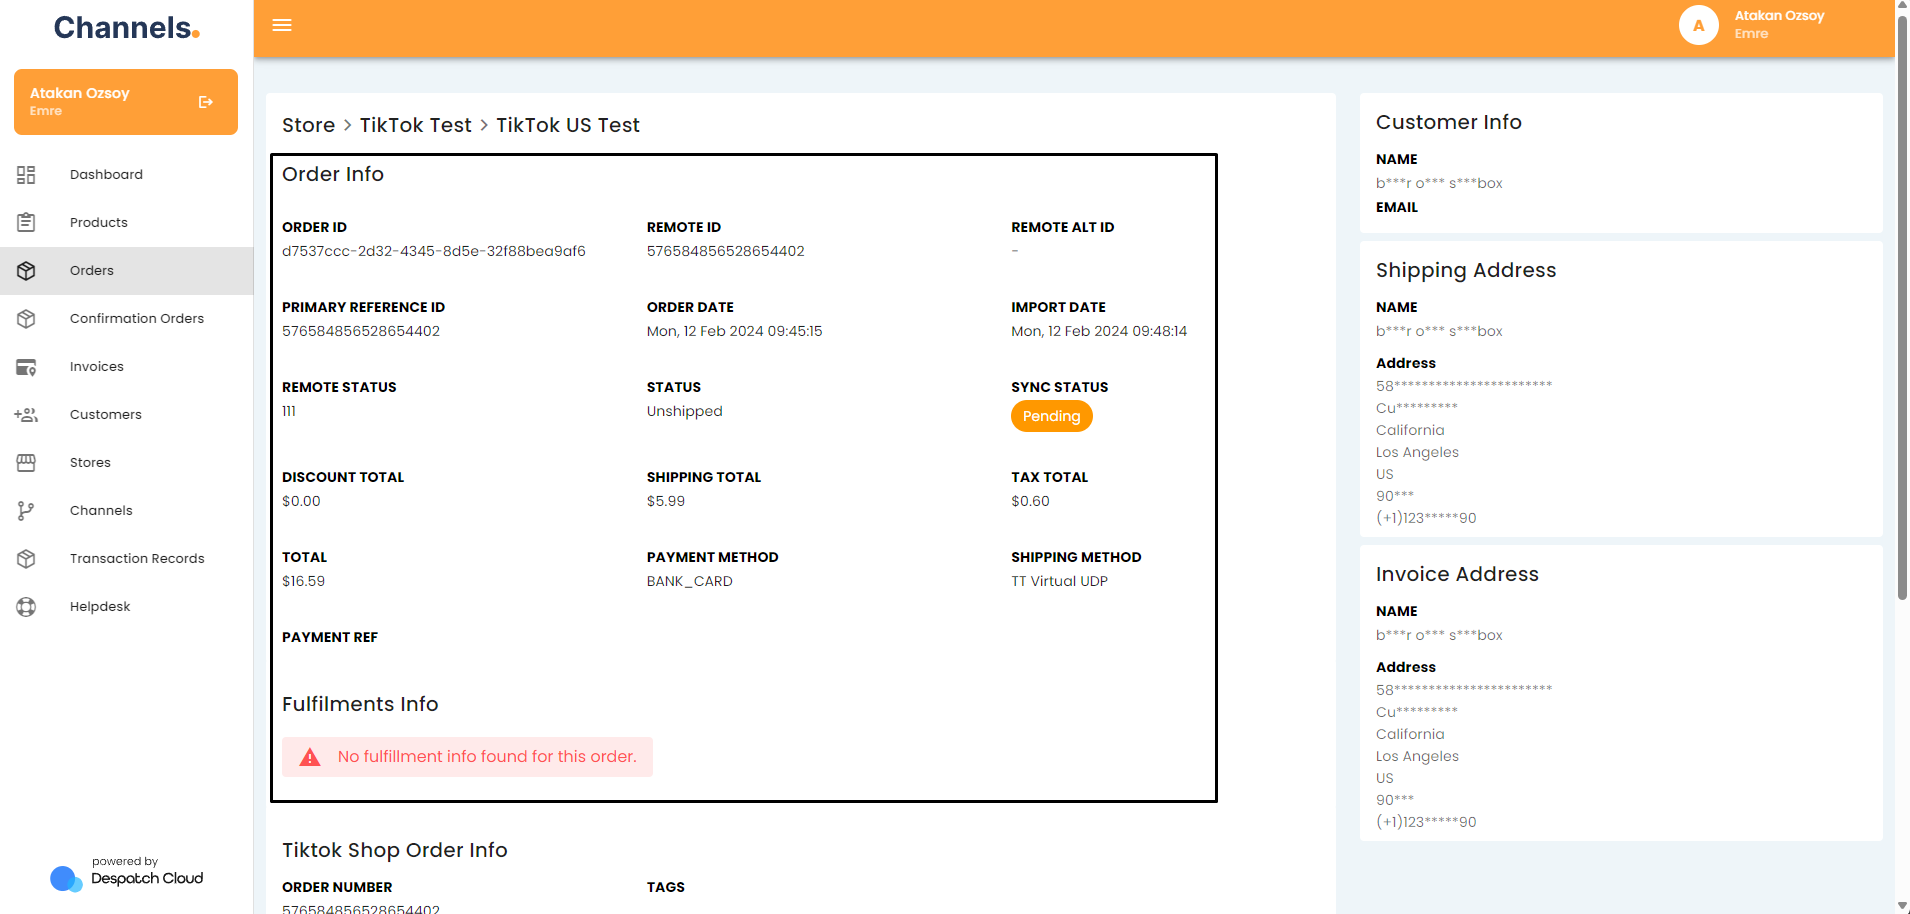
Moving to the second section on the right, you'll find all customer-related information. This section includes the customer's name and contact information, as well as the shipping and invoice addresses.
Towards the bottom of the page, you'll find the activities section, which displays the complete history of the order you are viewing. It provides precise timestamps for each action, along with information about who acted. You can easily distinguish between actions that were automated by the channel and those manually entered by a user.
For added convenience, you have the option to export orders from the orders page. You can find the export buttons in the "Actions" menu in the top right corner. When you click any of the export buttons, a popup window will appear, allowing you to select the date range you wish to export and choose the desired file format. Our system supports exporting orders as either an Excel file or a CSV file. Once you've made your selections and initiated the export, the system will prepare the export file, and you'll receive an email in your inbox with a link to download the file.