Frequently Asked Questions
You can find answers and solutions to the frequently asked questions here.
- My Products Are Not Appearing on the Sales Channels
- Channel Set Up, but Orders Not Coming Through? What to Do
- Orders on Hold After Sales Channel Setup: What Does It Mean?
- Fulfillment Not Sent to Sales Channel: What to Do?
- Webhooks Set Up, But Not Working
- Plugin Set Up, But Orders Not Sent: What to Do?
- Product Quantities Not Synced to Sales Channels: What to Do?
- How to Refetch Product Updates from Sales Channel
- How to Refetch Orders and Order Updates
- How to Resend Orders via Webhook/Plugin
- How to Update Wix App Permissions and Reconnect Your Wix Sales Channel
My Products Are Not Appearing on the Sales Channels
Check if the Channel is Active
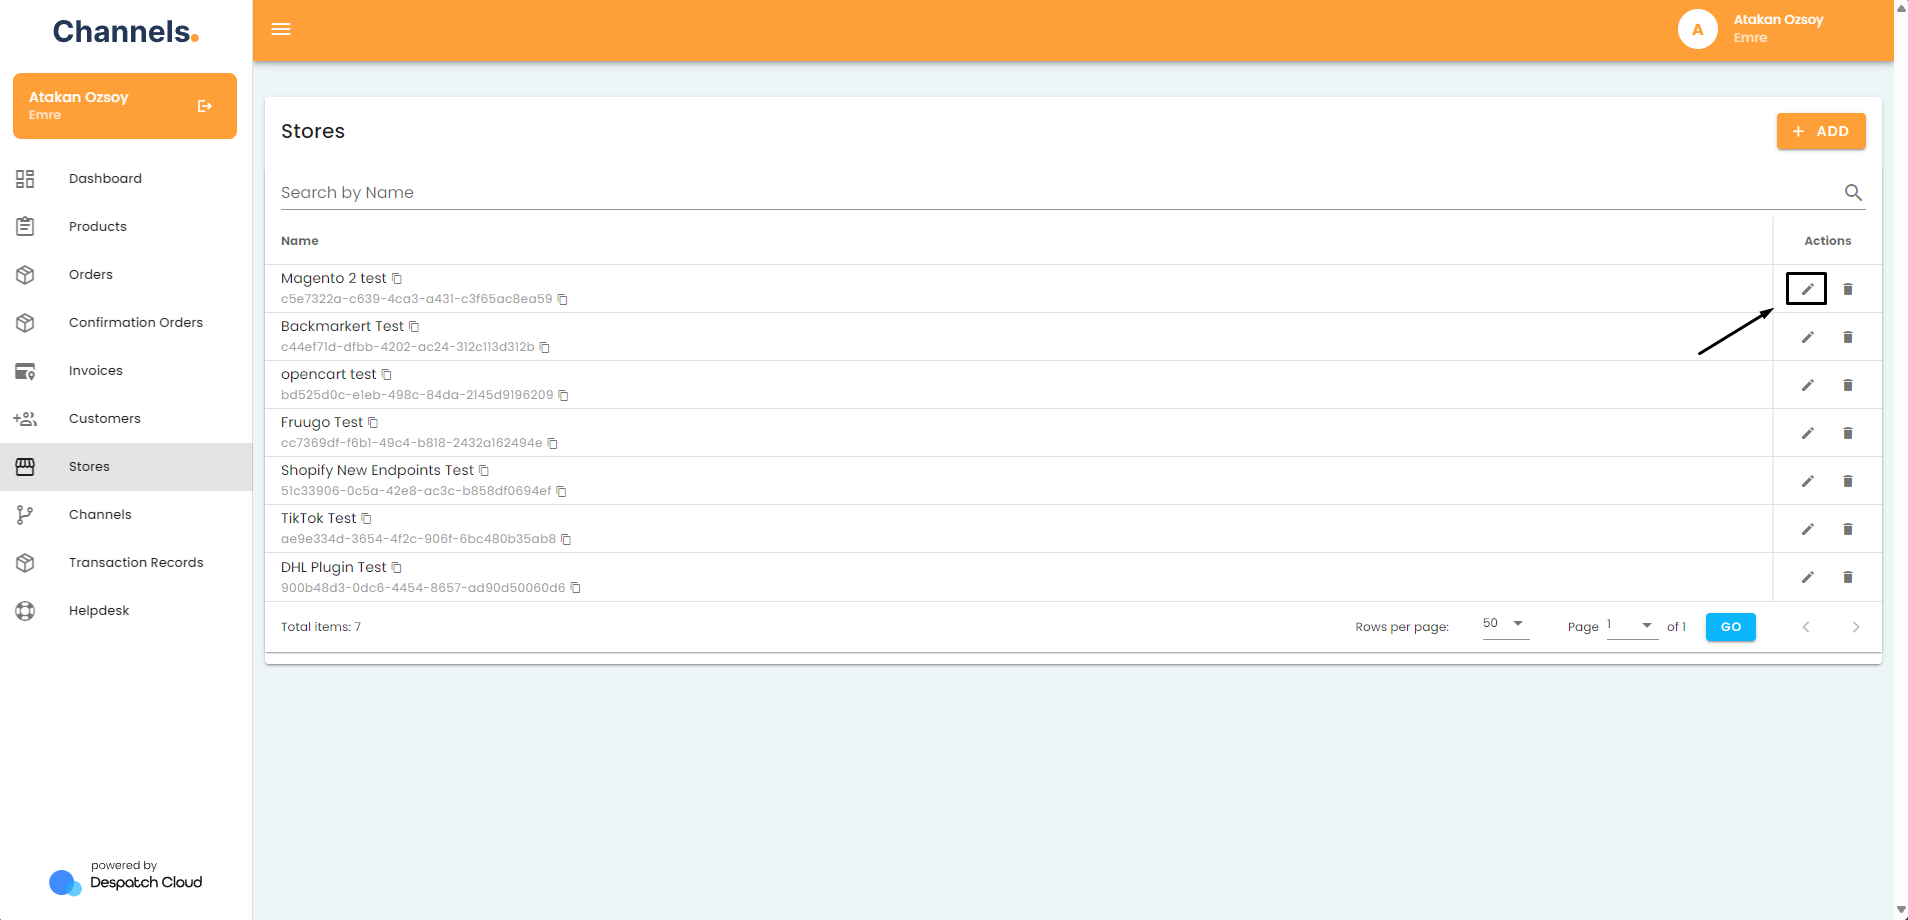
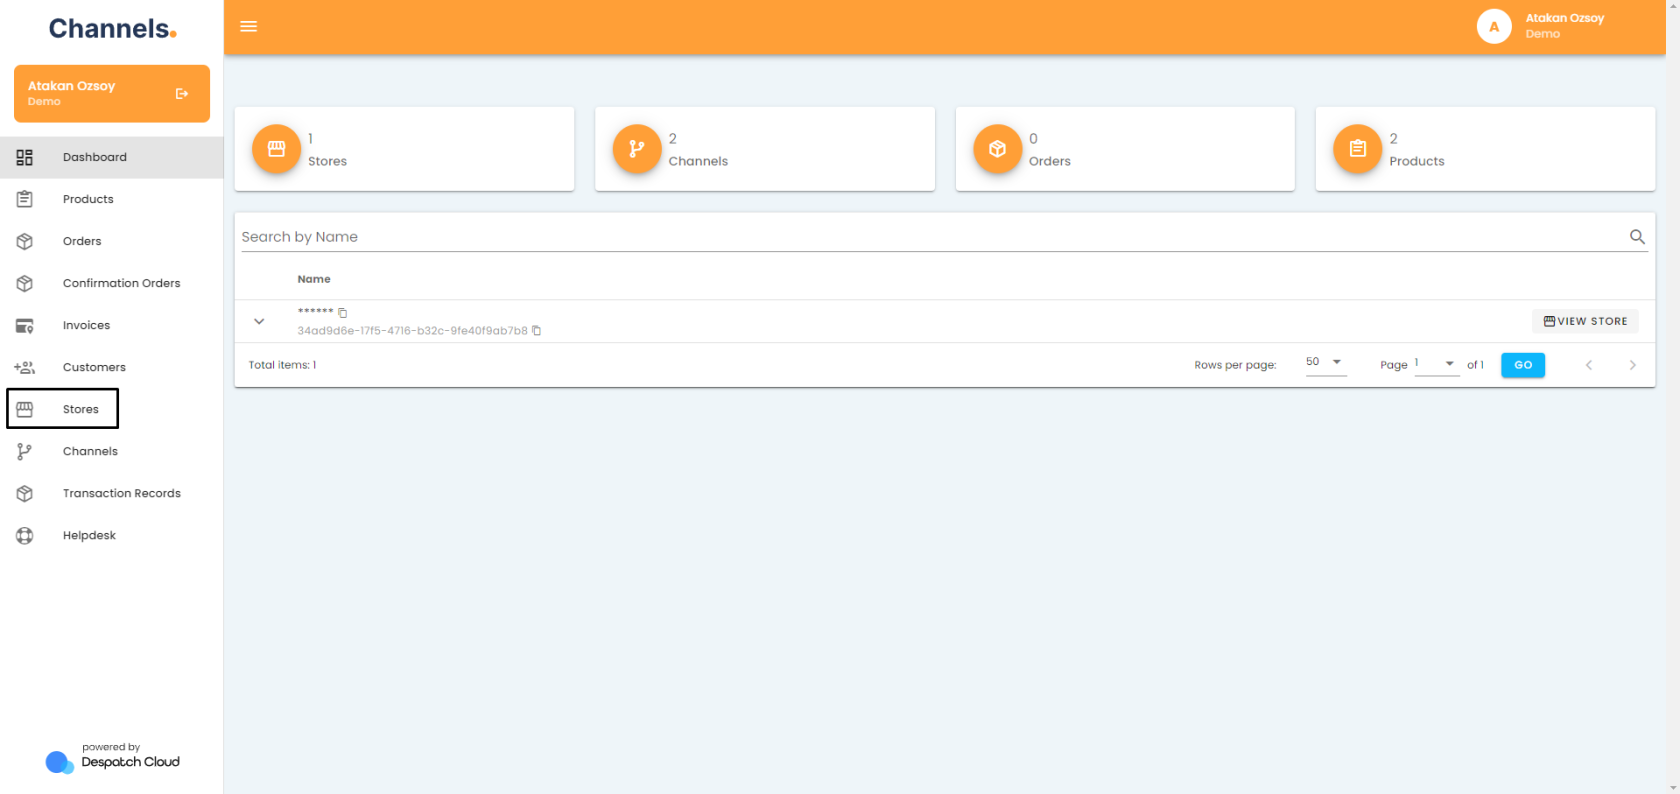
- Go to your stores by clicking “Stores” on the side menu.

- Click on the pencil icon next to the store your channel is in.

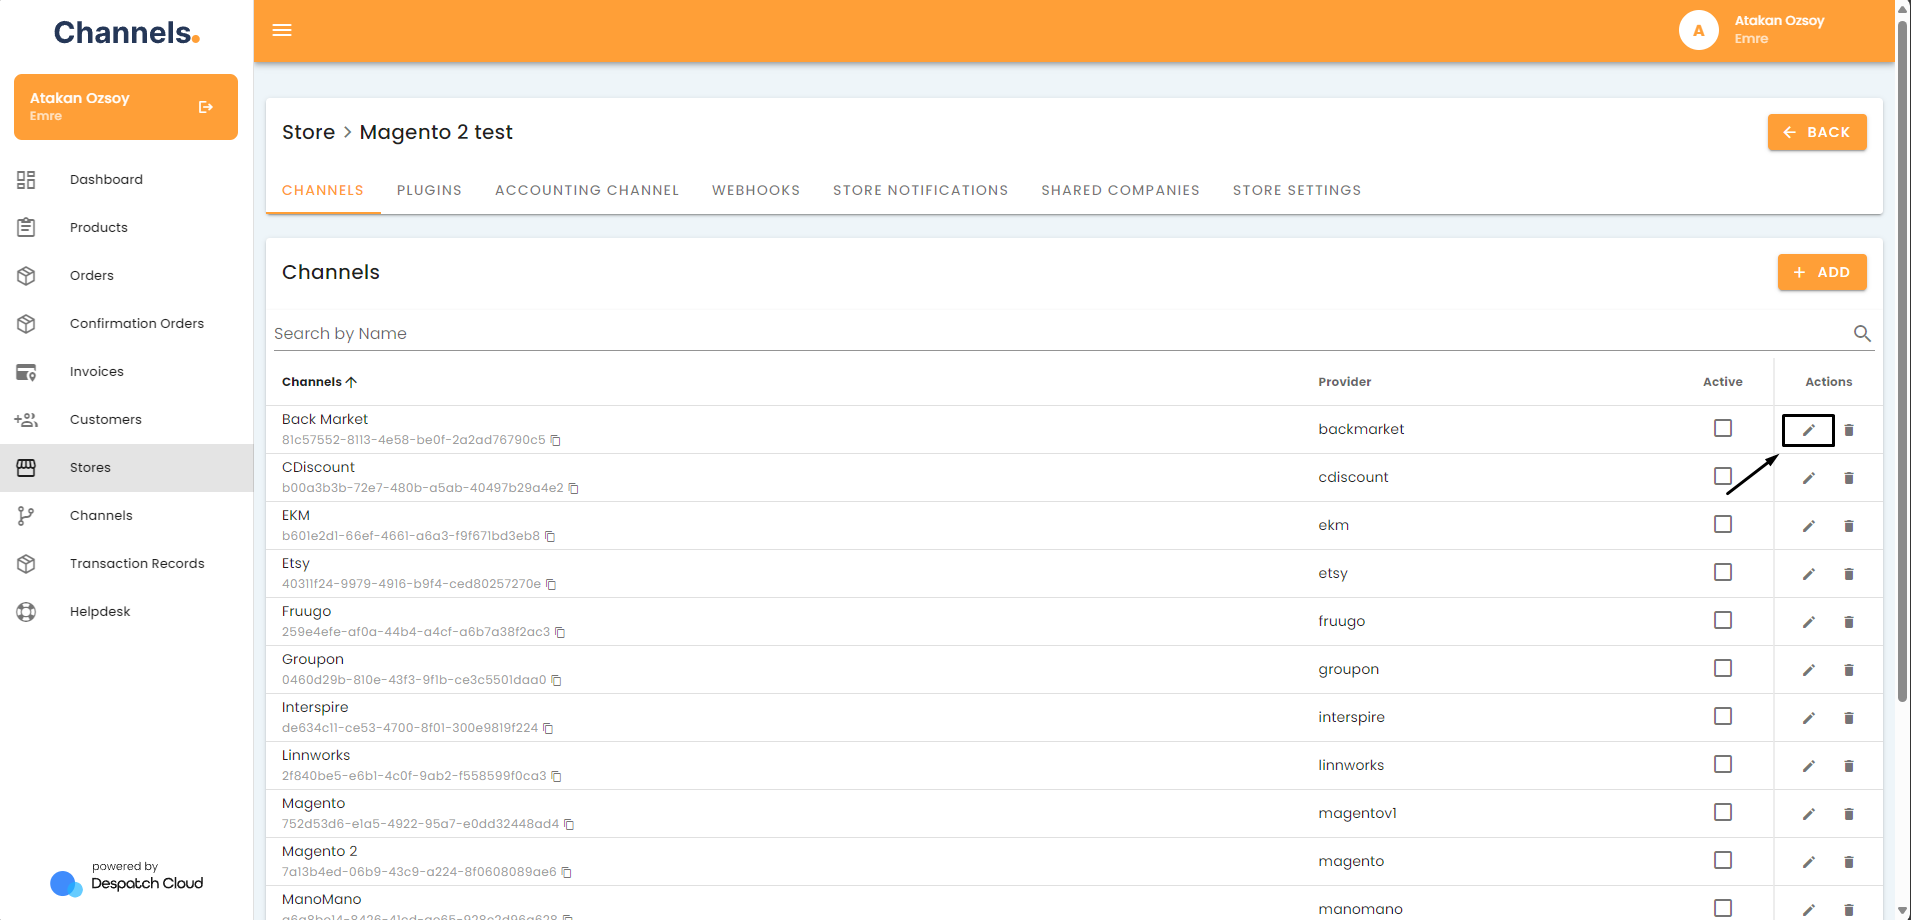
- Click on the pencil icon next to the channel you'd like to activate.

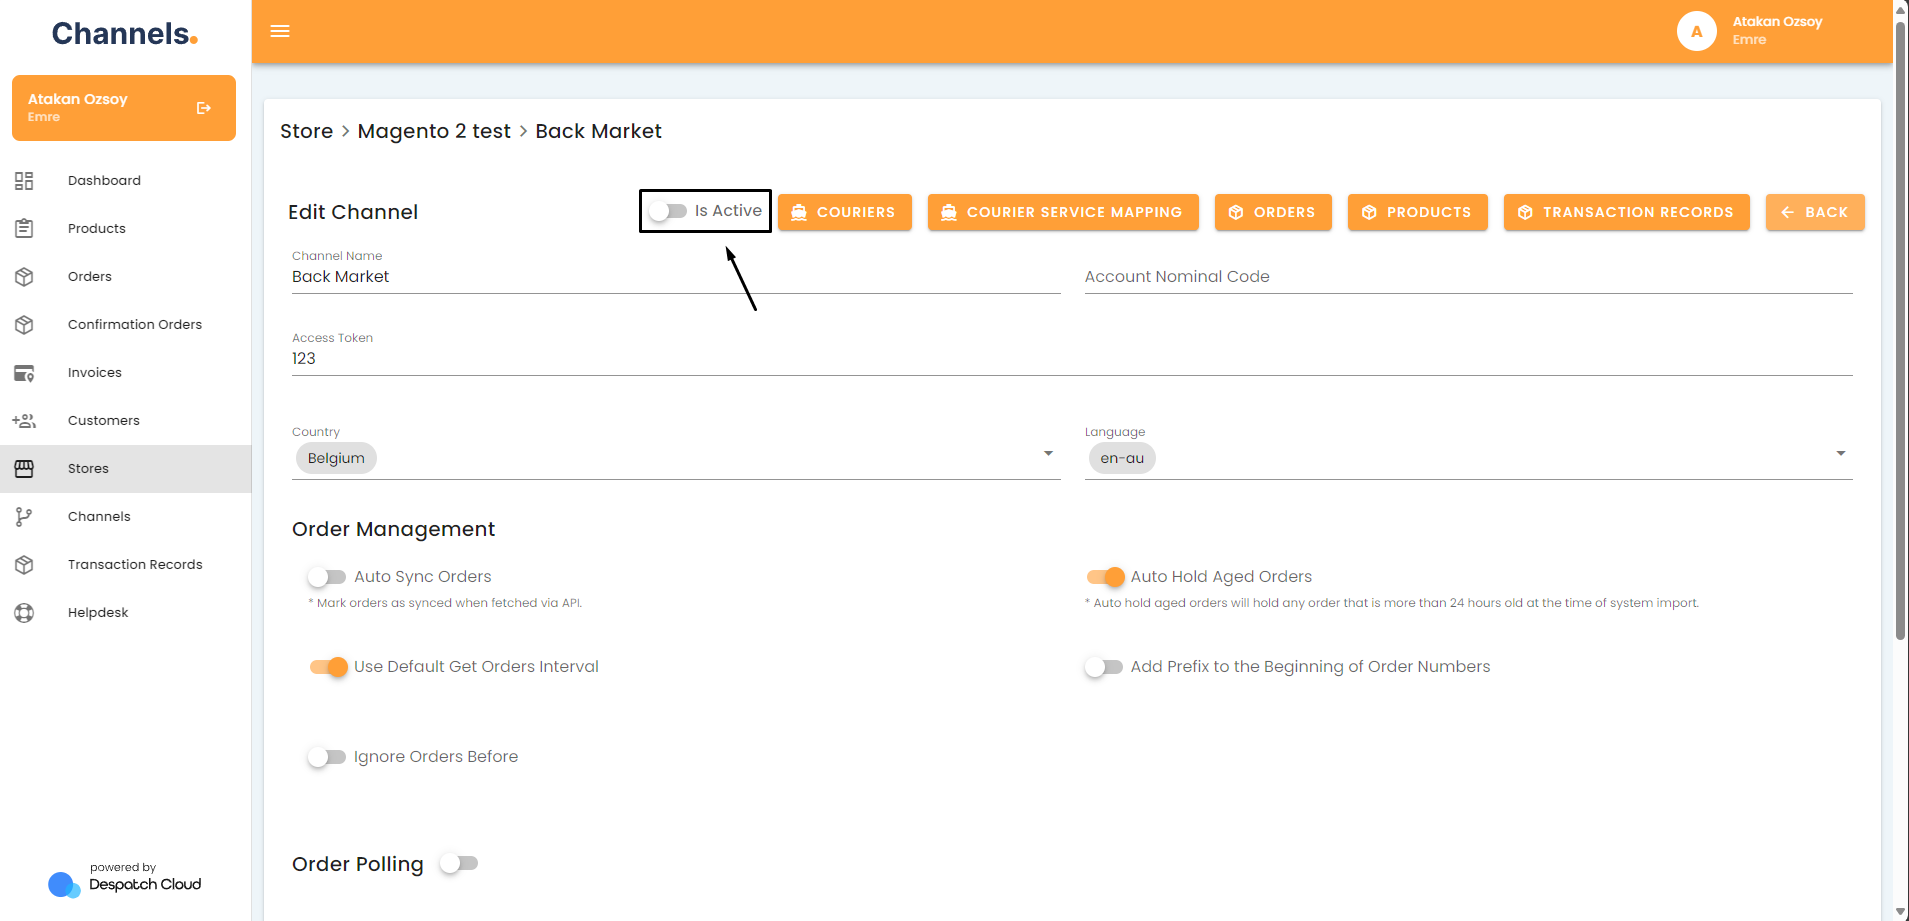
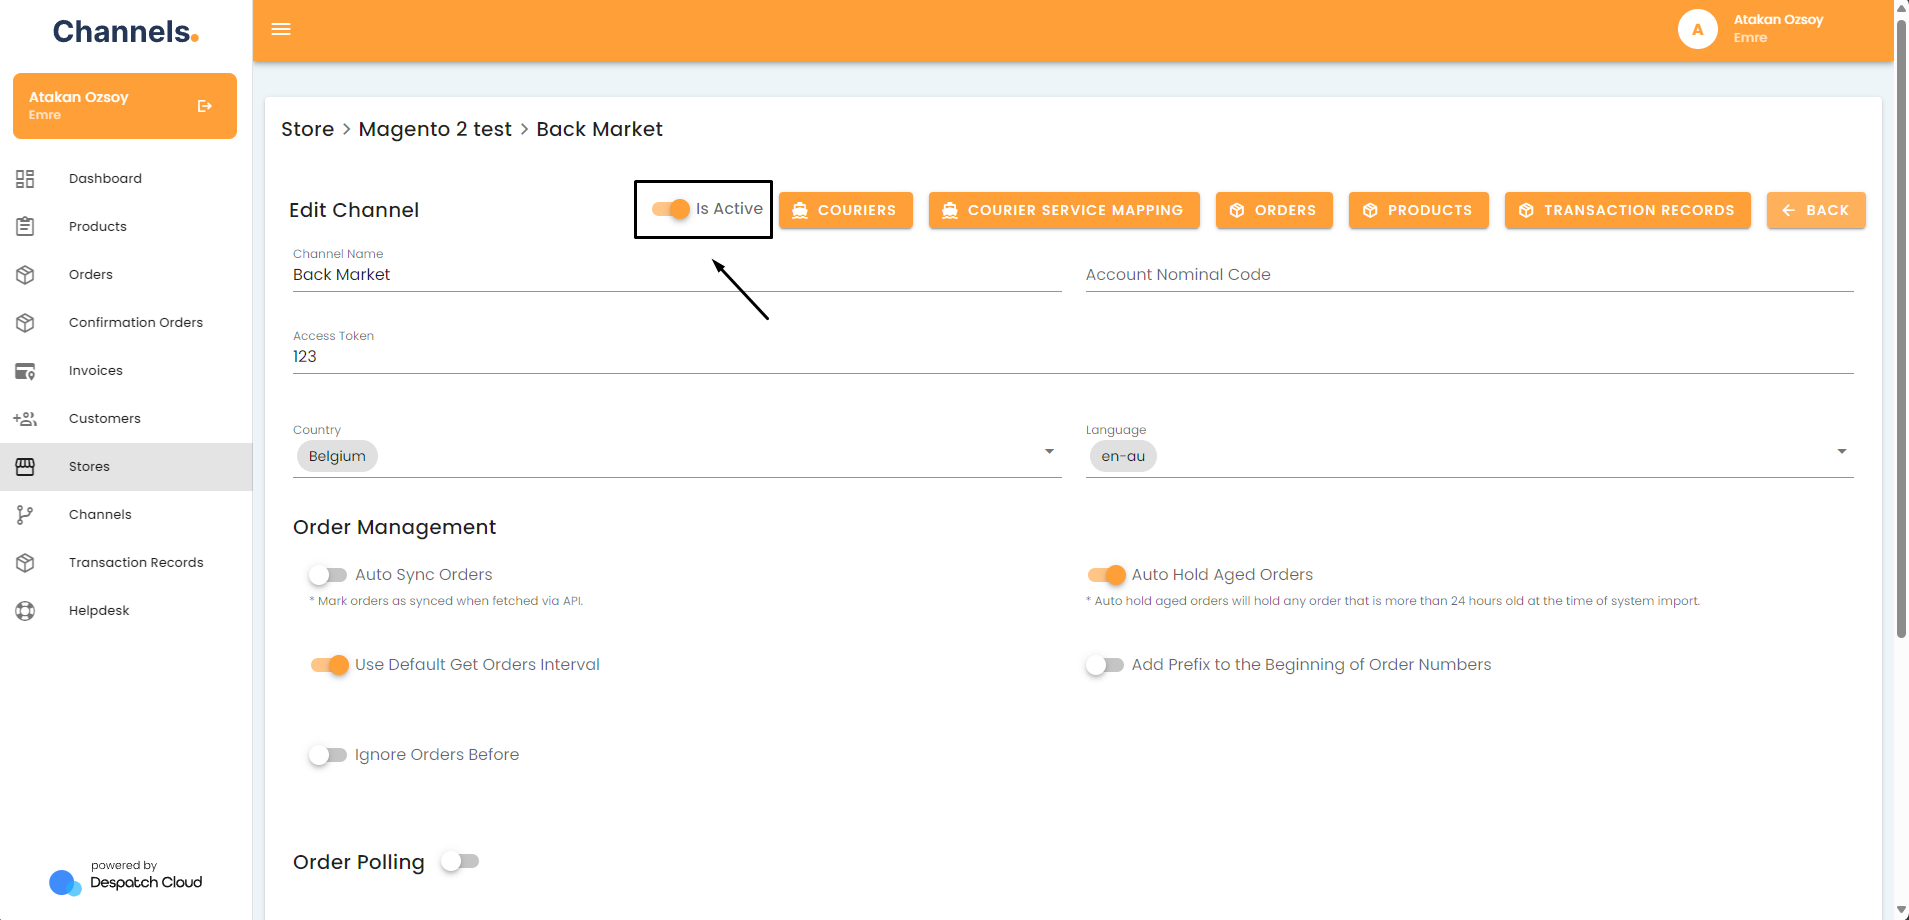
- Check if the “Is Active” option is checked.

- If not, then please activate your channel by clicking on the option.


Ensure That the Authentication for Your Channel is Done Correctly
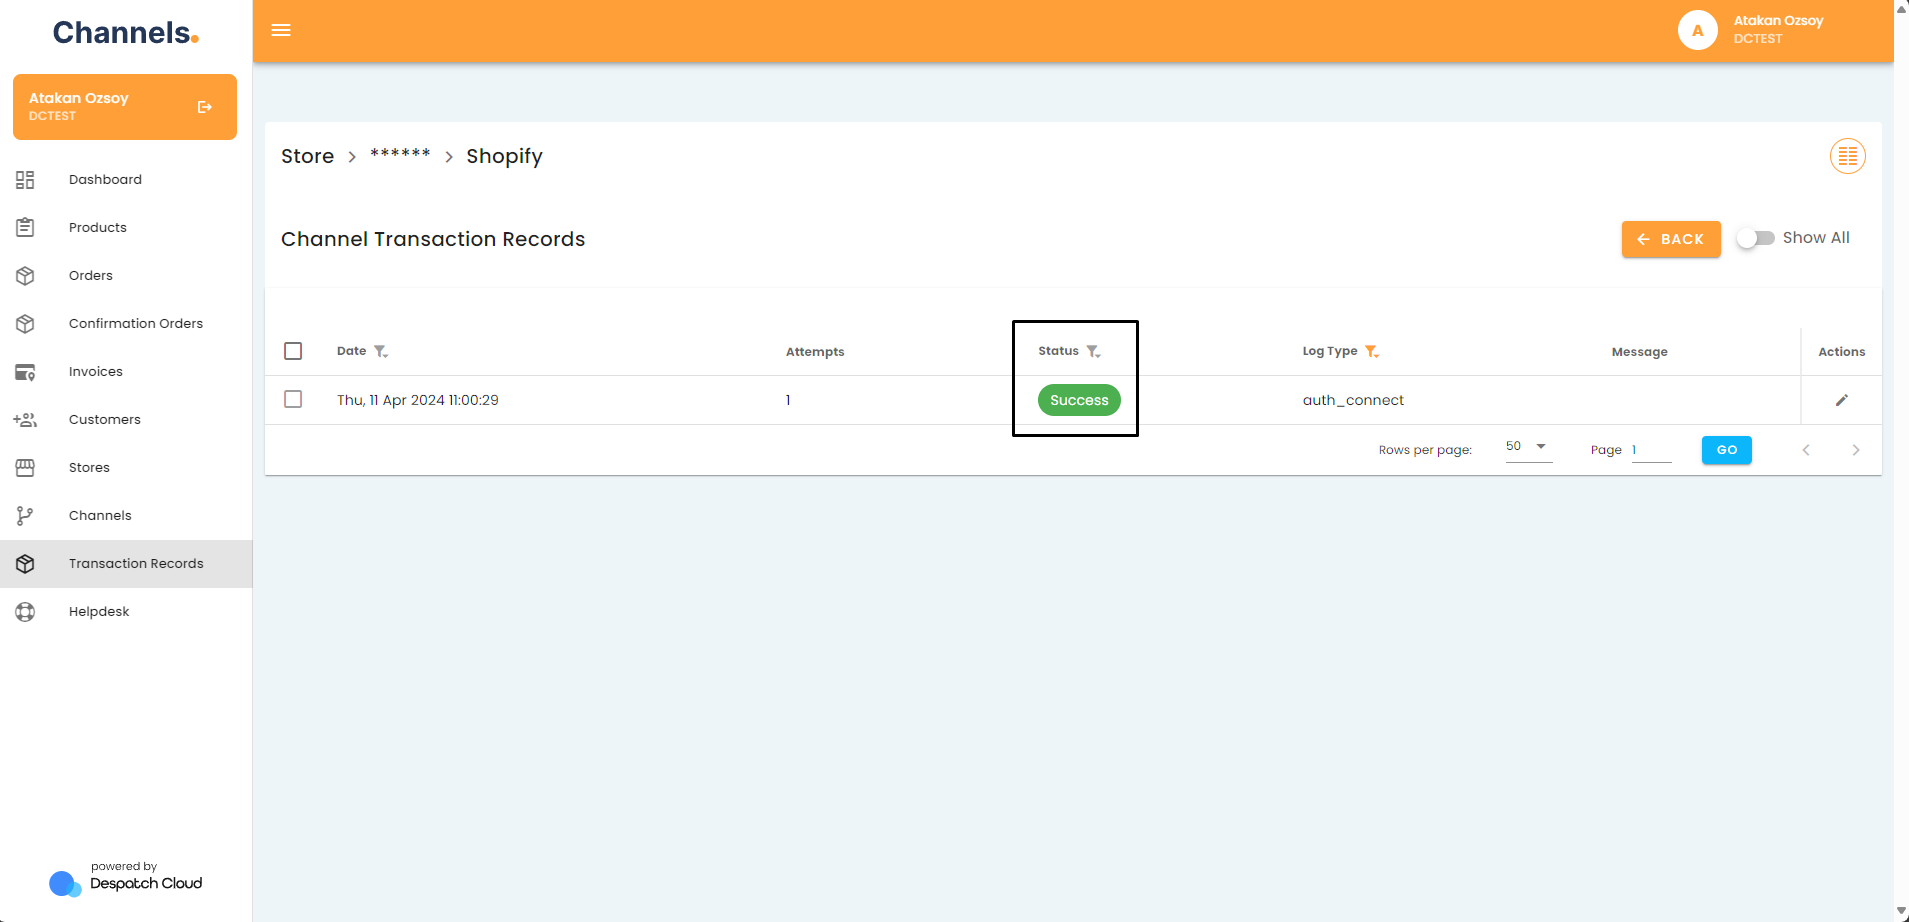
You need to make sure your channel connection is done properly and successfully. To do so you need to check whether the “auth_connect” job was completed for your channel.
- Access your account and go to the left side of the screen. Click the "Stores" button.

- Click on the pencil icon next to the store your channel is in.
- Click on the pencil icon next to the channel you'd like to check.
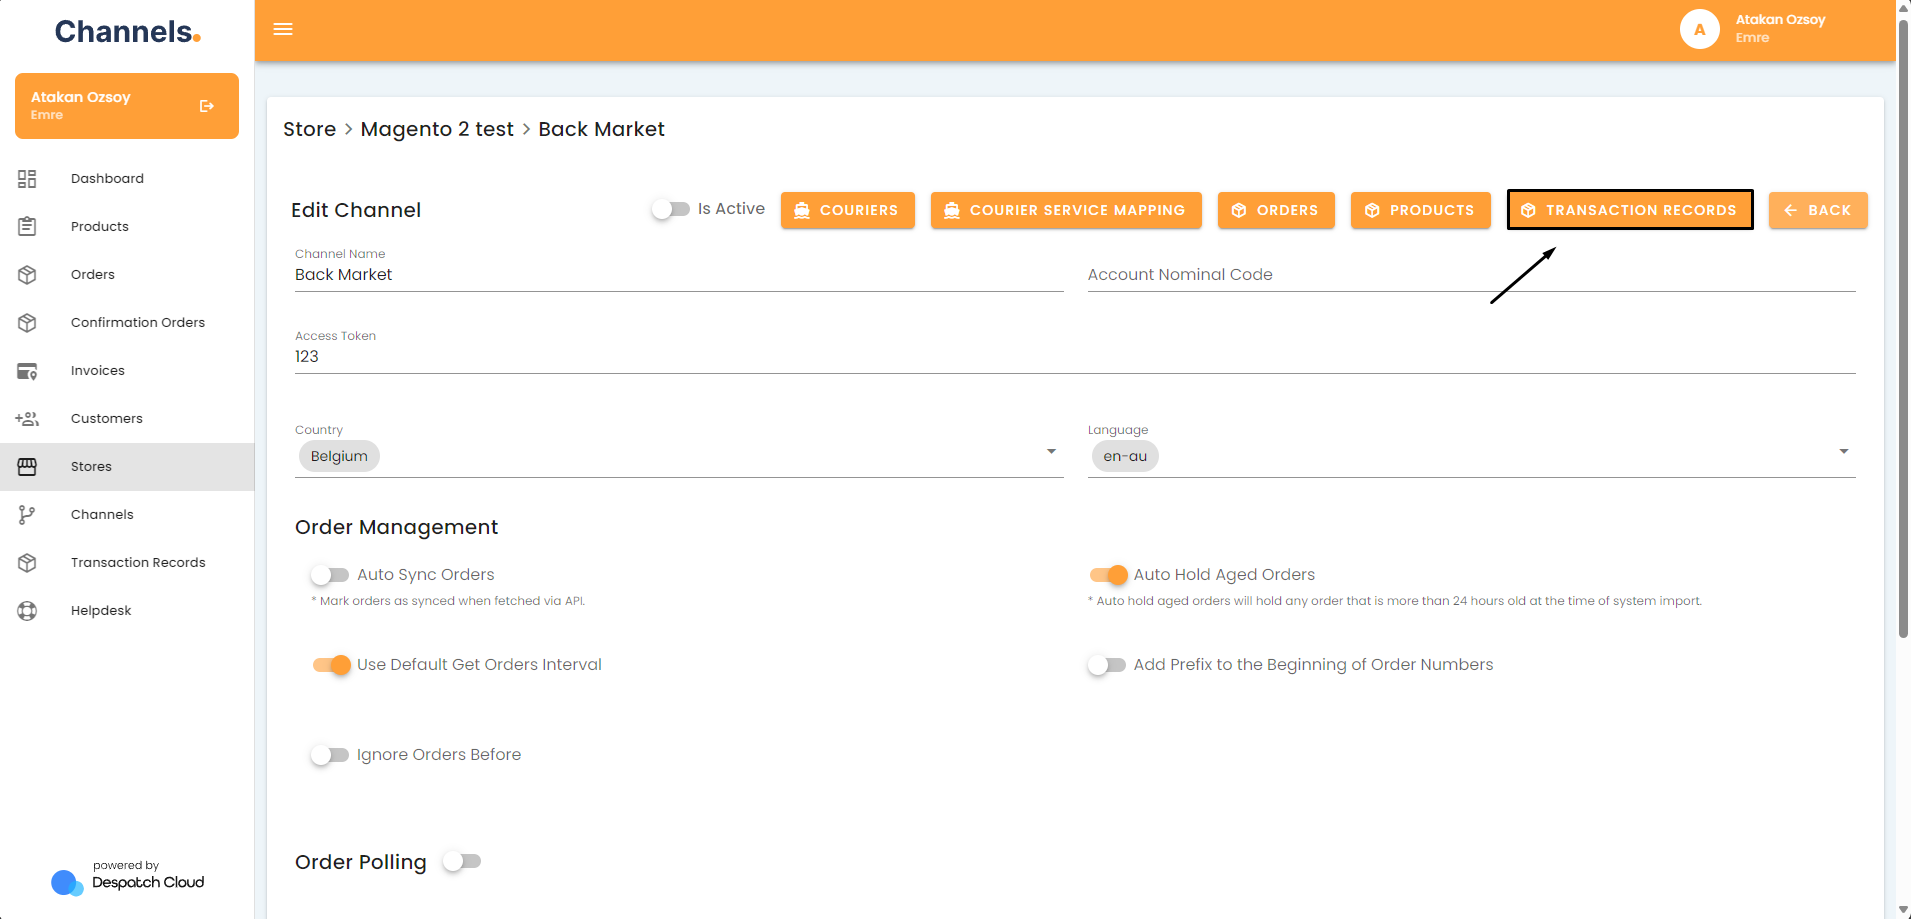
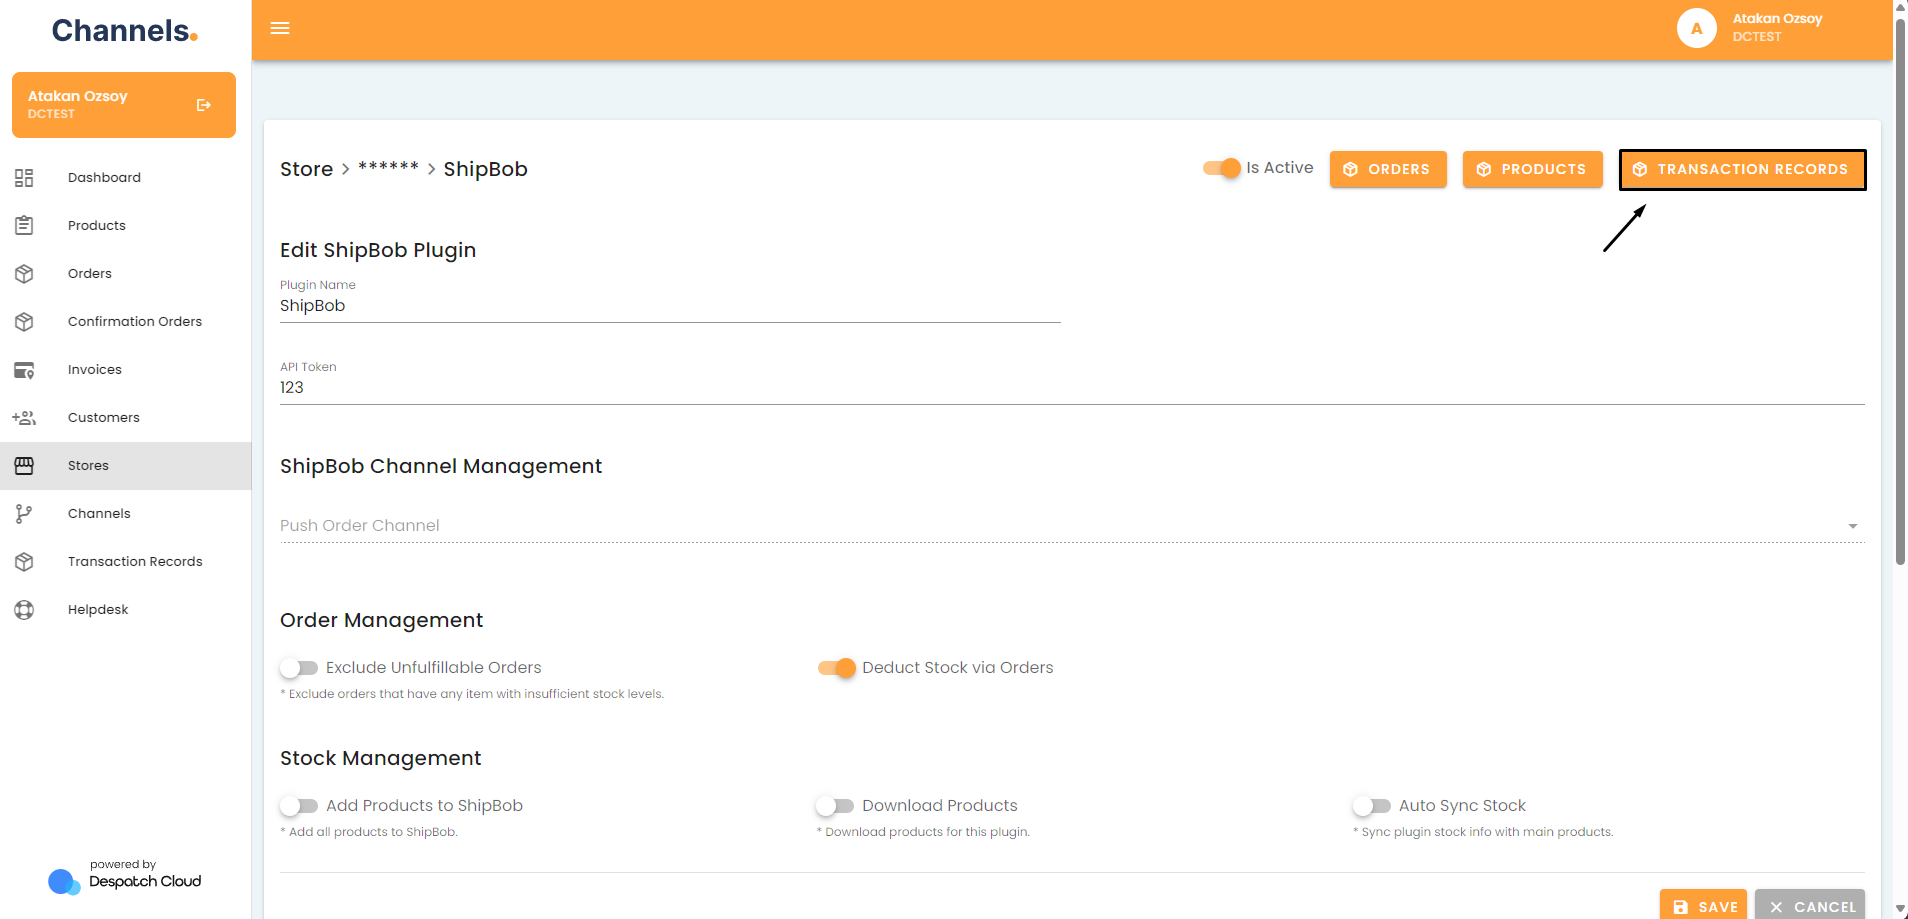
- Click on the “Transaction Records” button.

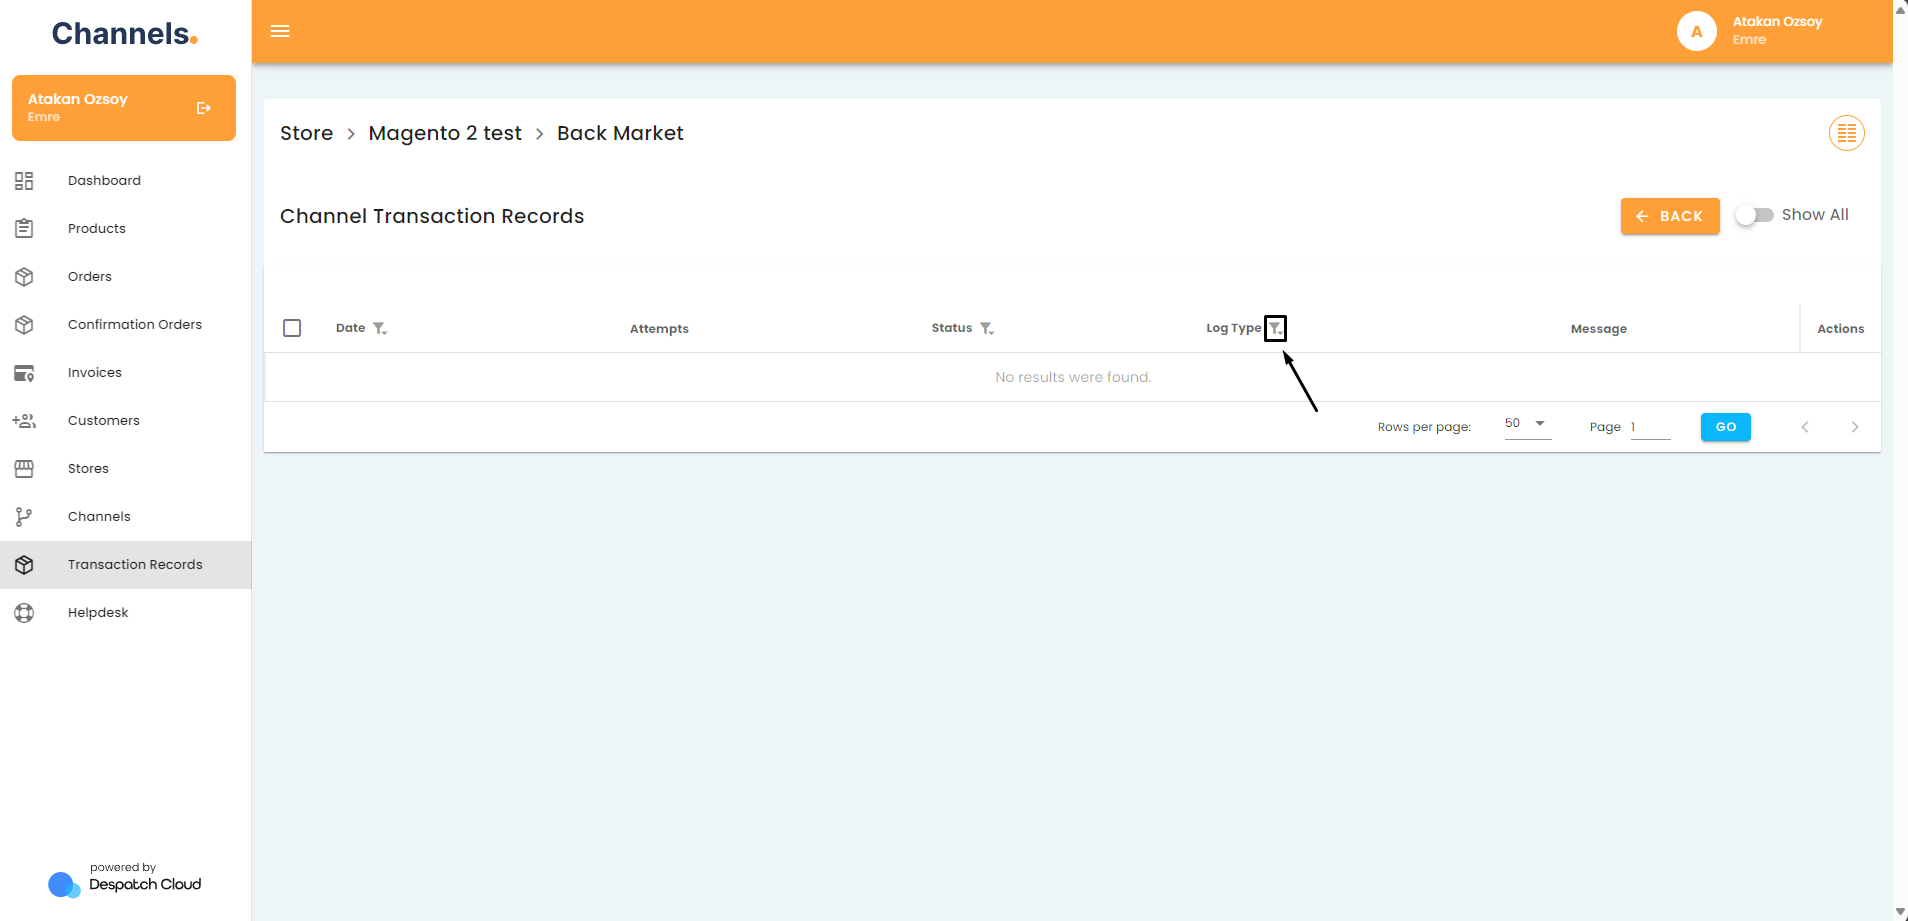
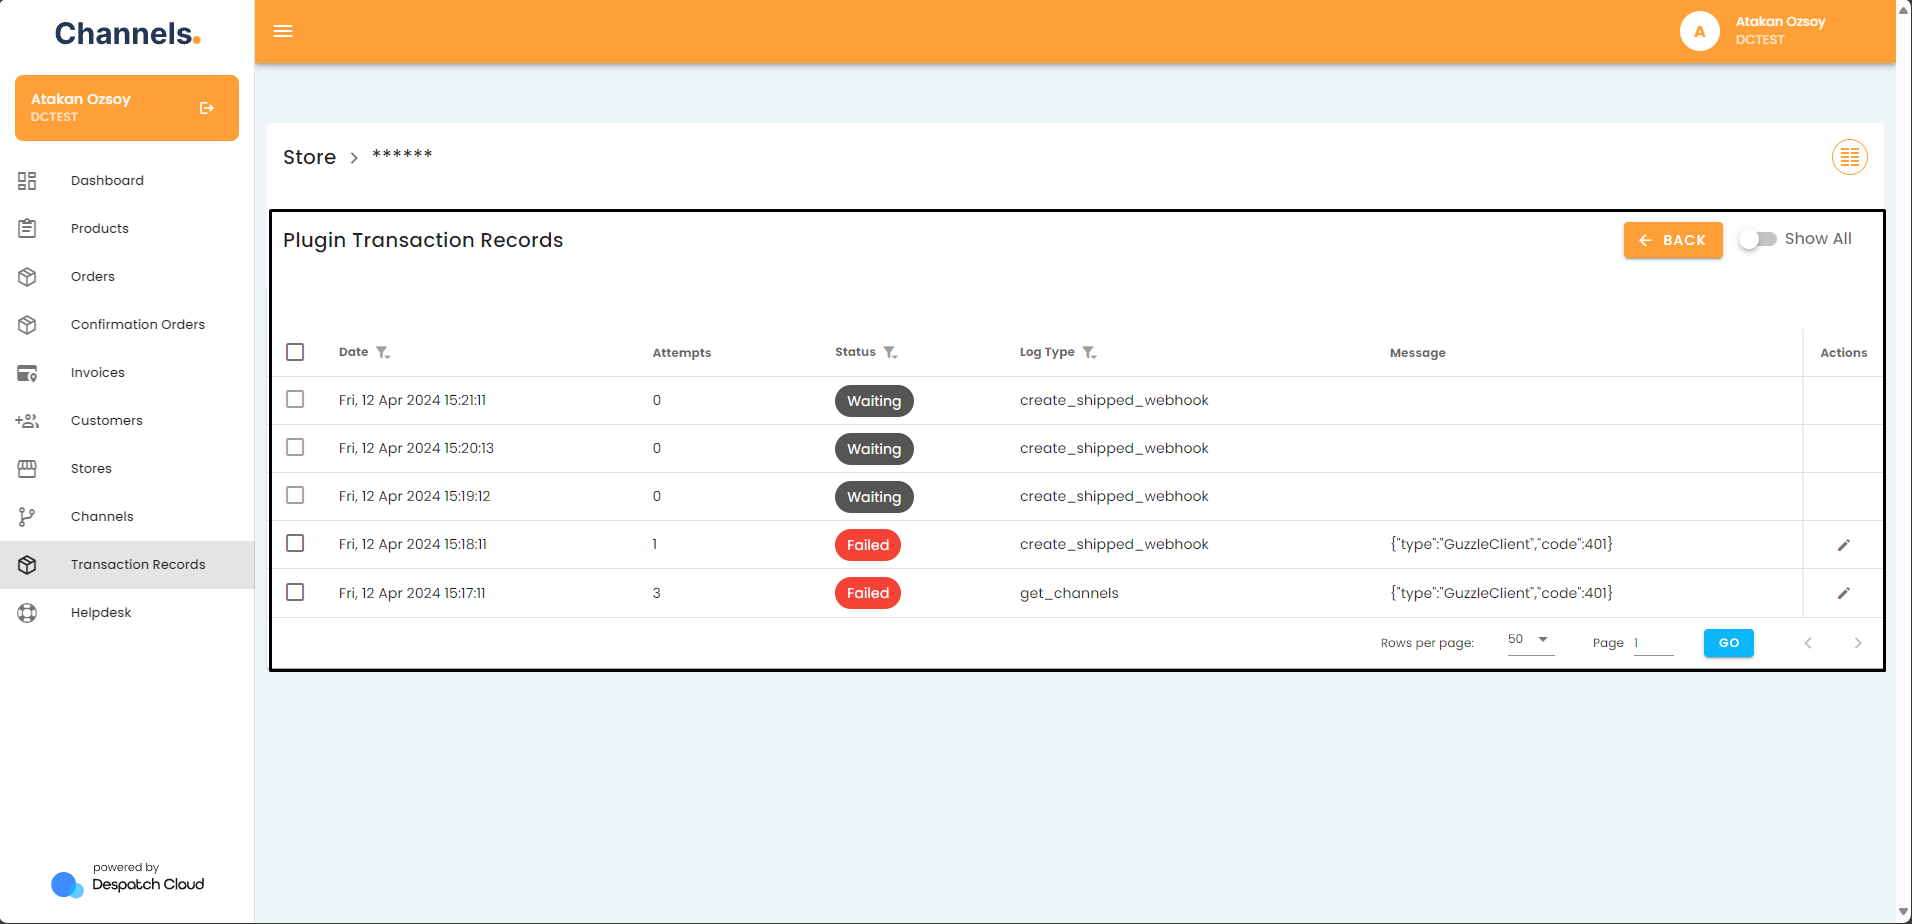
- Filter the list by “Log Type”.

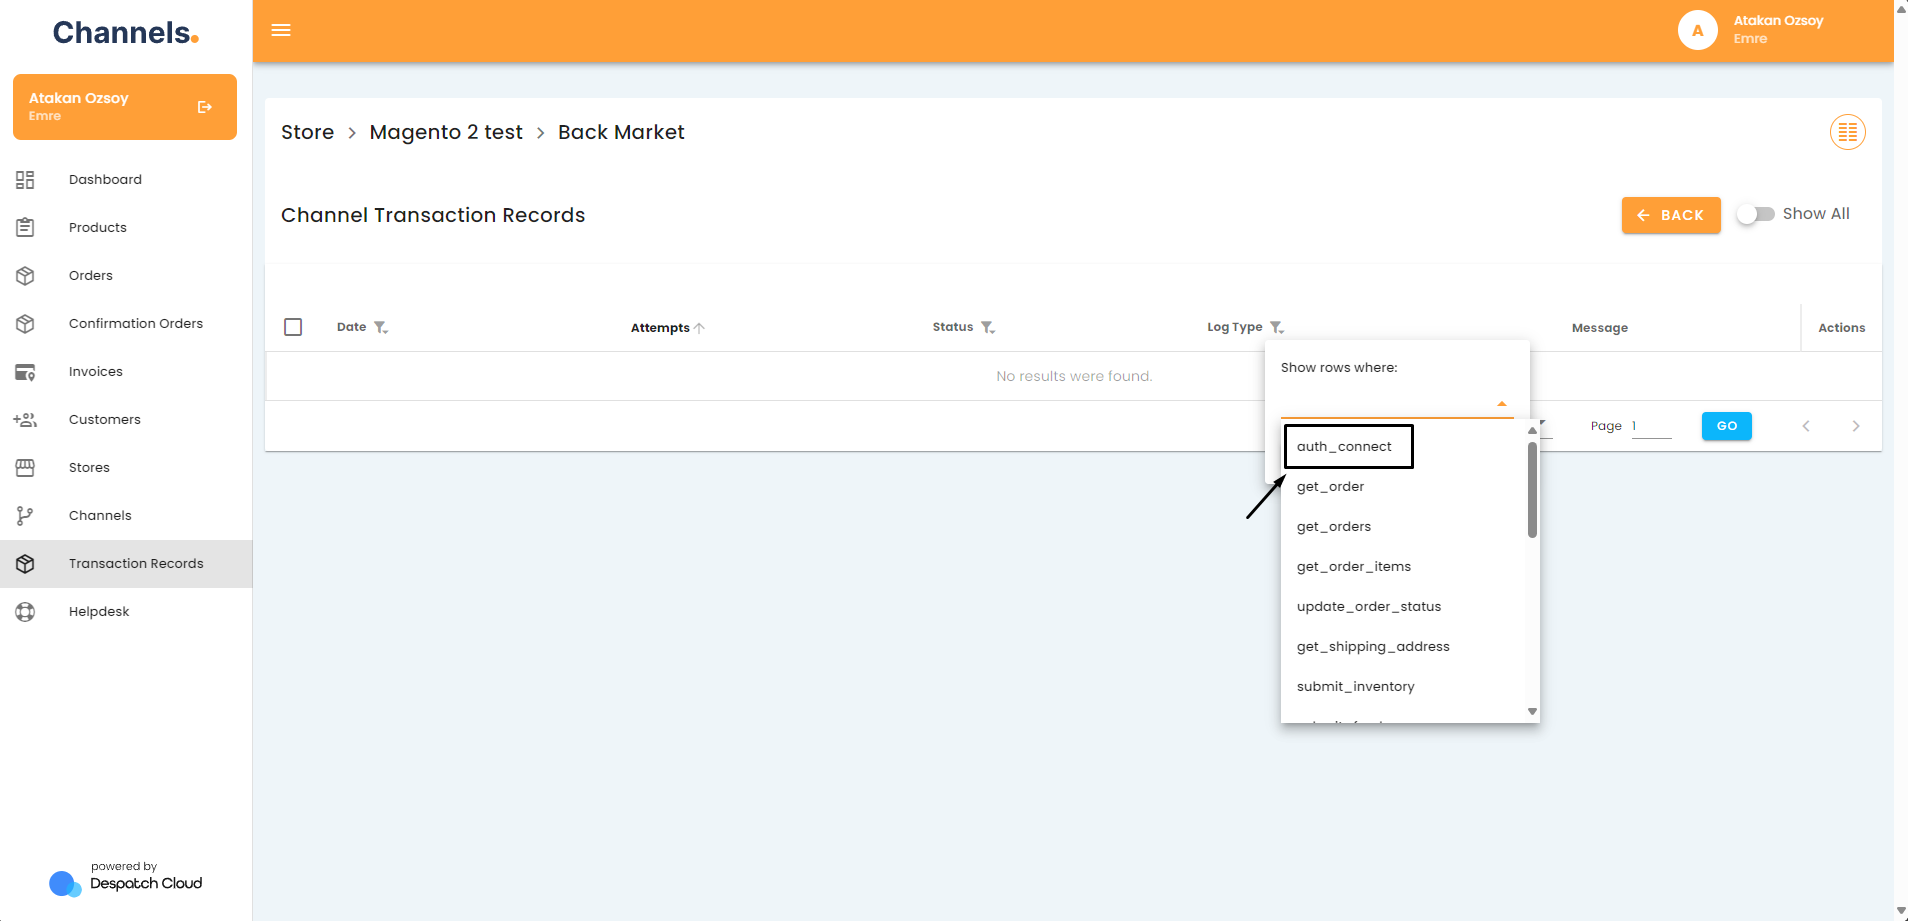
- Select the “auth_connect” log type and press the ”Add” button.

- Check if the response was successful.

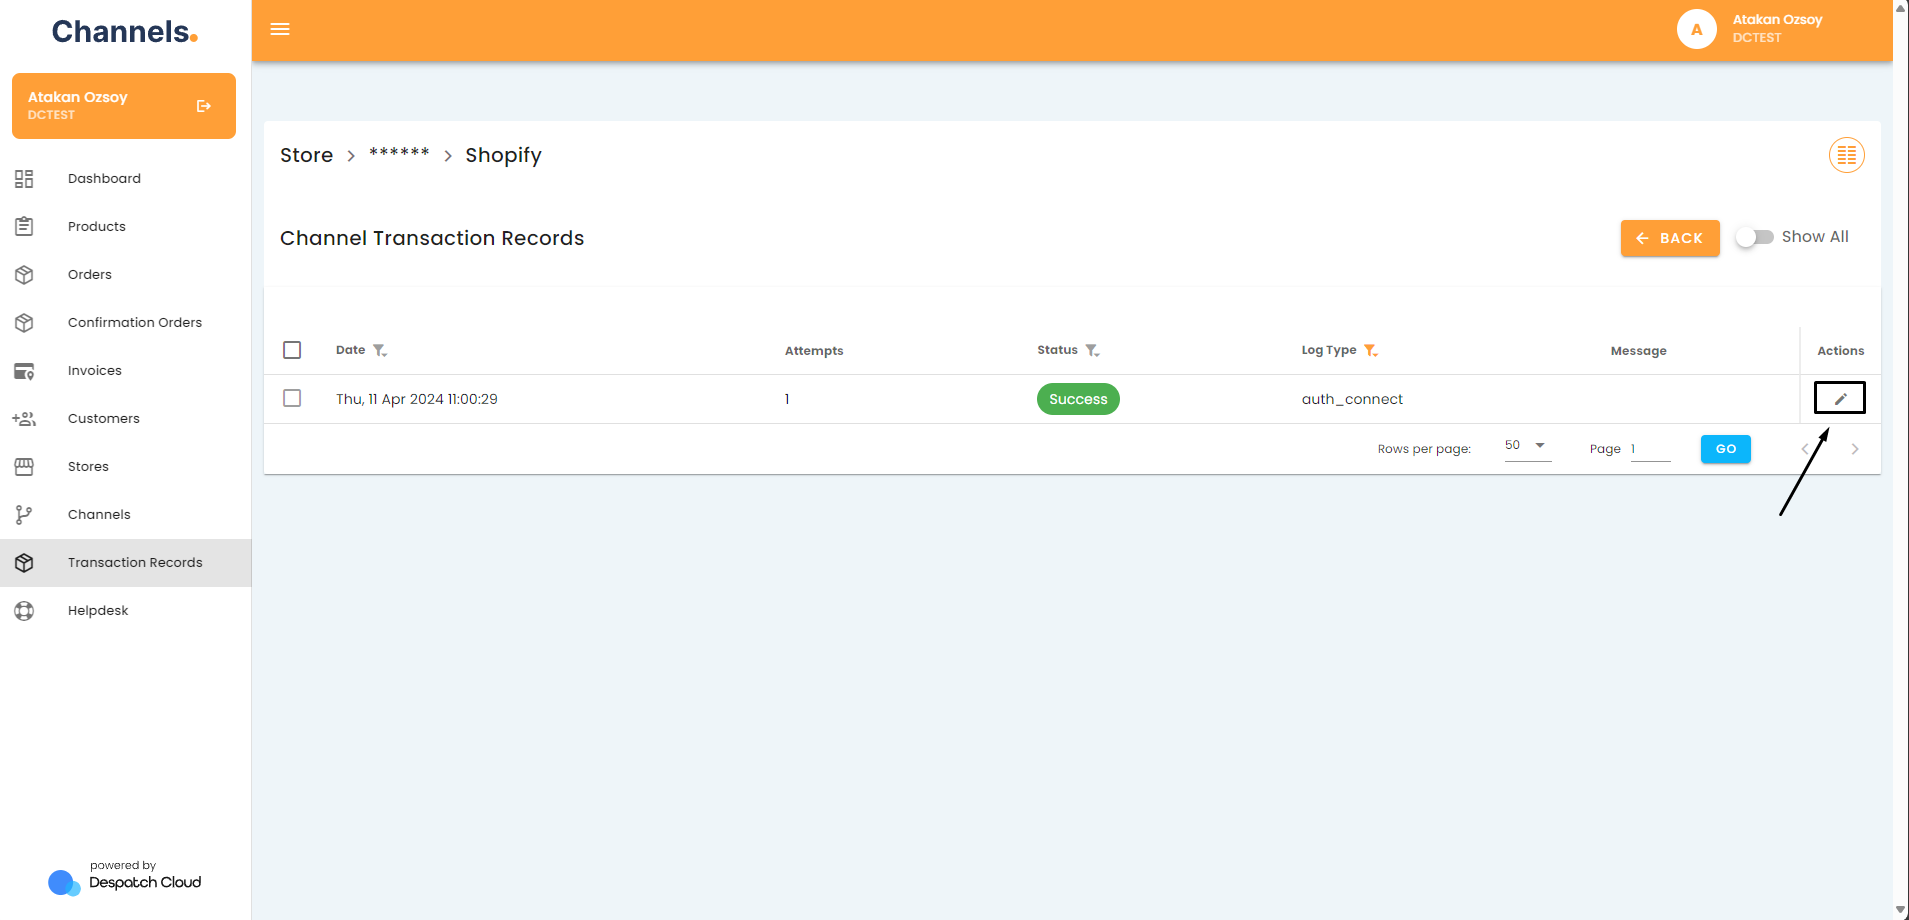
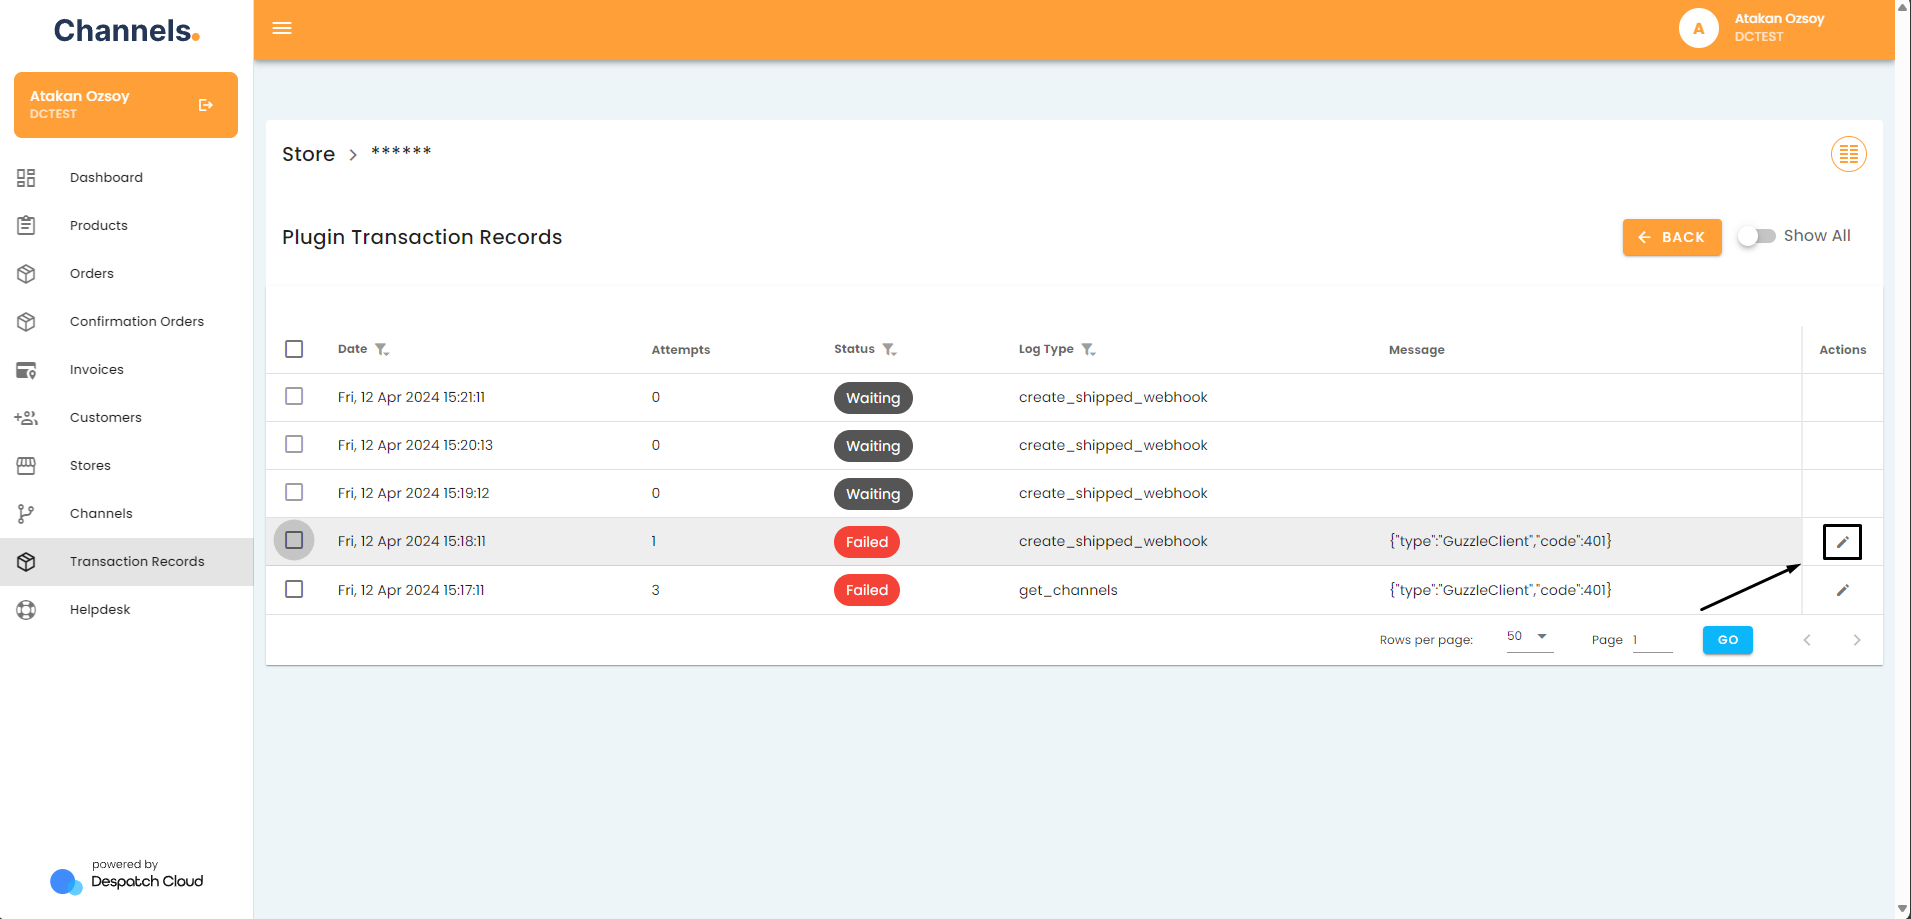
- If it is unsuccessful, check the log details to see what the error was by clicking the pencil icon.

- If the response is something about wrong authentication credentials or it is about credentials (token) being expired then you need to either reconnect your channel or check if the entered authentication credentials are still valid.
- After you update your credentials or reconnect your channel, please check again if the “auth_connect” job is successful. If the problem persists, please contact our support team and provide details of the problem.
The Sales Channels API Might Not Be Responding to Our "Get Orders" Calls
In some cases, the sales channel’s API might not be answering our API calls properly due to problems on their side. To check if this is the case please check whether the “Get_orders” jobs for the channel are working properly or not.
- Access your account and go to the left side of the screen. Click the "Stores" button.
- Click on the pencil icon next to the store your channel is in.
- Click on the pencil icon next to the channel you'd like to check.
- Click on the “Transaction Records” button.
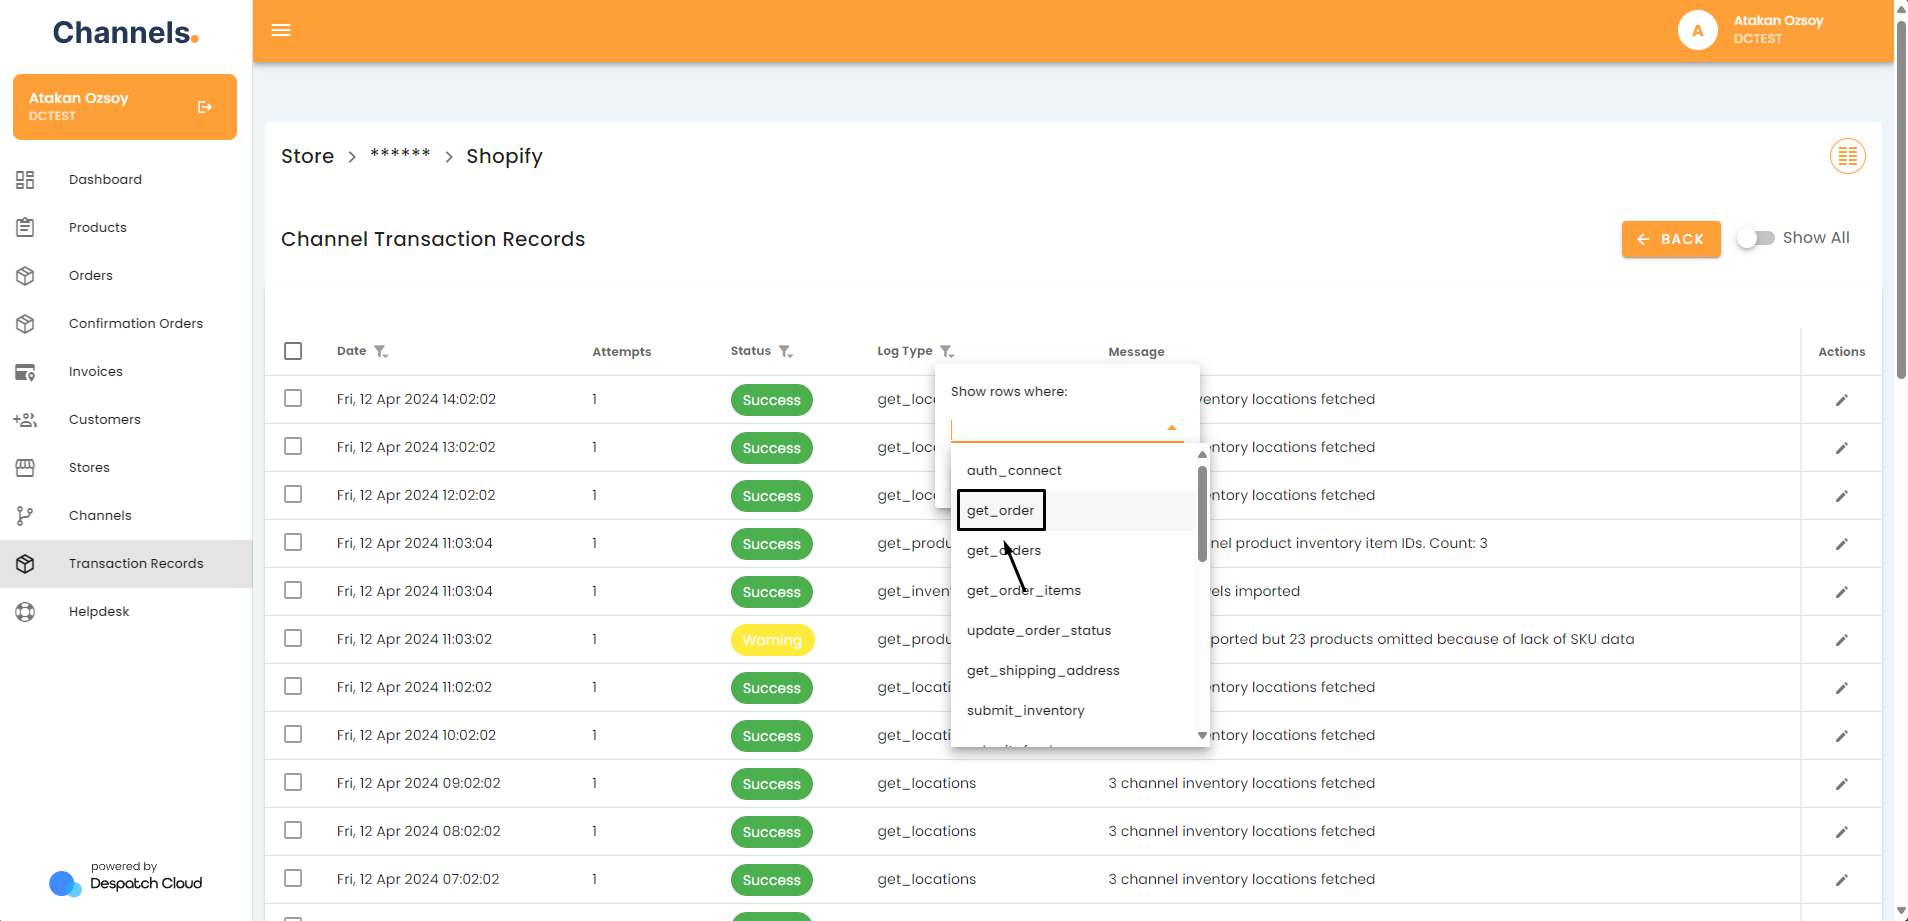
- Filter the list by “Log Type”.
- Select the “get_order” log type and press the ”Add” button.

- Check if the response was successful.
- If it is unsuccessful, click the pencil icon to check the log details and see what the error was.
-
Scroll down to the response part and see the response message and the error message received.
-
Try to take action based on the error message in the response or contact customer support directly.
Channel Set Up, but Orders Not Coming Through? What to Do
Check if the Channel is Active
- Go to your stores by clicking “Stores” on the side menu.
- Click on the pencil icon next to the store your channel is in.
- Click on the pencil icon next to the channel you want to activate.
- Check if the “Is Active” option is checked.
- If not, then please activate your channel by clicking on the option.
Check if the Authentication is Properly Done for Your Channel
You need to make sure your channel connection is done properly and successfully. To do so, you need to check whether the “auth_connect” job was completed for your channel.
- Access your account and go to the left side of the screen. Click the "Stores" button.
- Click on the pencil icon next to the store your channel is in.
- Click on the pencil icon next to the channel you want to check.
- Click on the “Transaction Records” button.
- Filter the list by “Log Type”.
- Select the “auth_connect” log type and press the ”Add” button.
- Check if the response was successful.
- If it is unsuccessful, check the log details to see what the error was by clicking the pencil icon.
- If the response is something about wrong authentication credentials or it is about credentials (token) being expired then you need to either reconnect your channel or check if the entered authentication credentials are still valid.
- After you update your credentials or reconnect your channel, please check if the “auth_connect” job is successful. If the problem persists, please contact our support team and provide details of the problem.
The Order Creation Date Might Be Before the Date the Sales Channel Was Connected to Channels
By default, we only pull the orders created after the sales channel setup date. But if you want to receive orders created before you set up the sales channel, you need to perform an order polling action under the channel settings.
- Access your account and go to the left side of the screen. Click the "Stores" button.
- Click on the pencil icon next to the store your channel is in.
- Click on the pencil icon next to the channel you want to check.
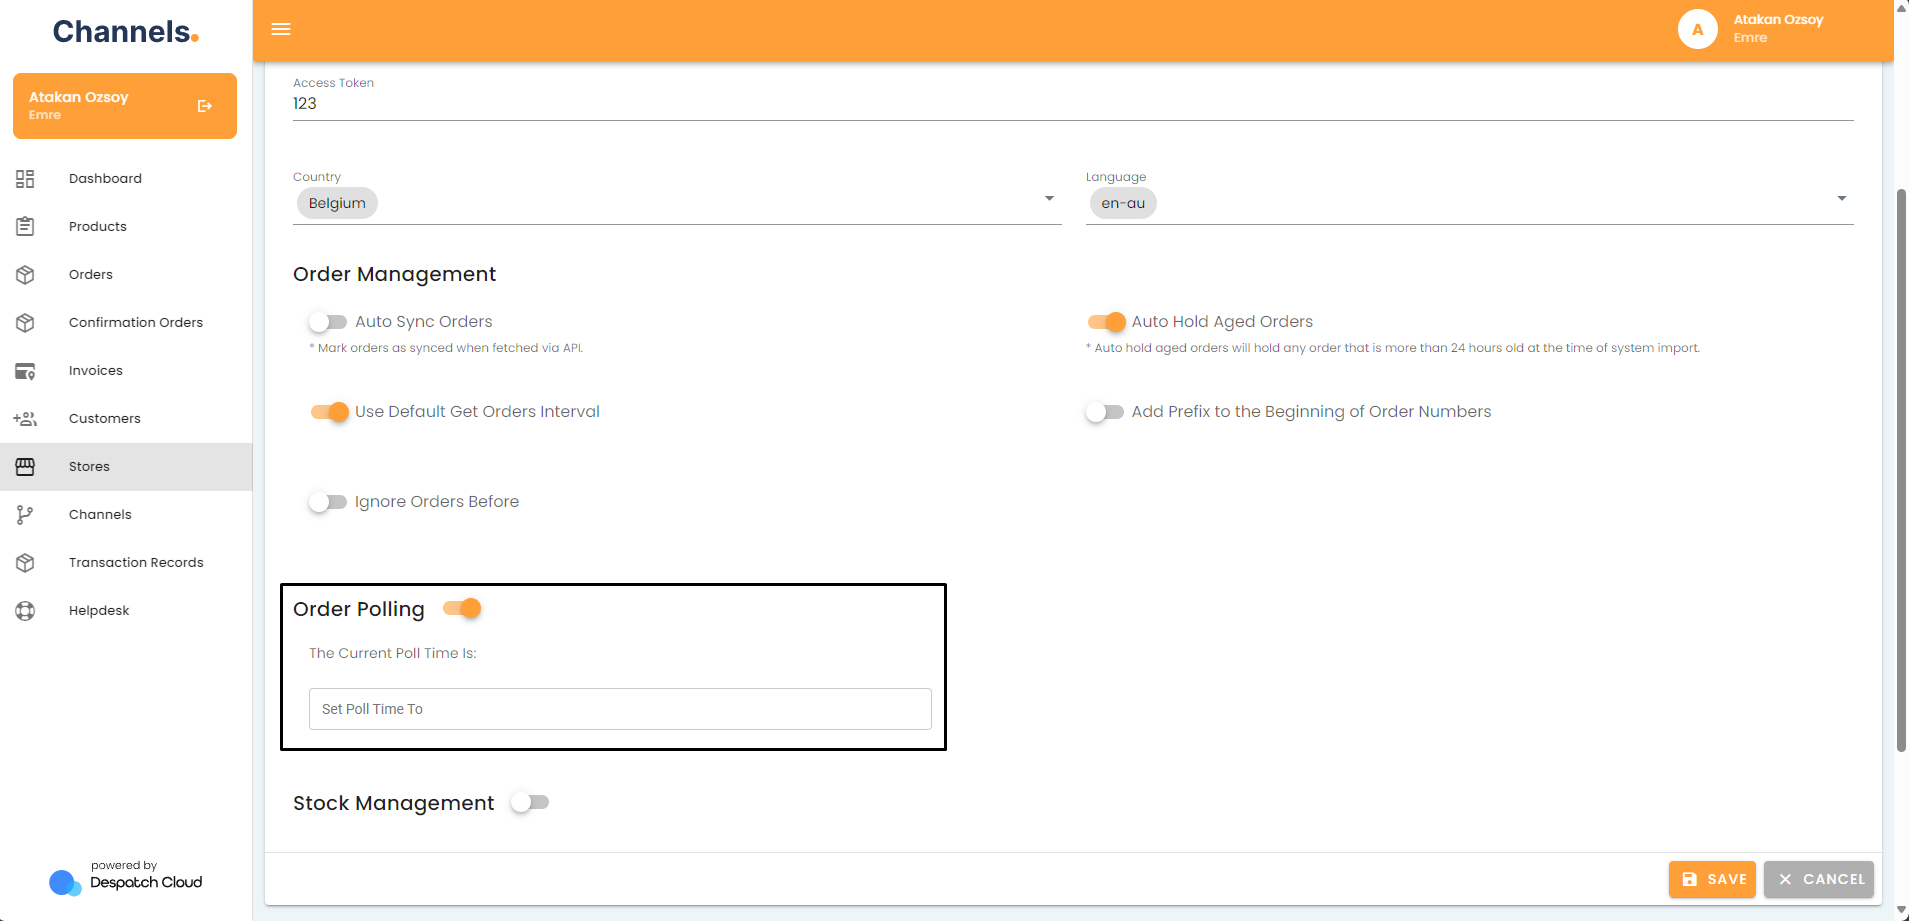
- Scroll down to the “Order Polling” section and switch it on

- Select the date from which point on the orders will start being polled.

- Click the Save button and wait around 3 to 10 minutes for orders to be imported into the system. If the orders you wanted are still not imported, move on to the next recommendation.


Check Whether Your Orders Are Already Fulfilled or Whether They're Paid or Not
Please make sure the orders you are trying to import are unfulfilled and paid. By default, our system doesn't import fulfilled and unpaid orders unless you've configured your sales channel to import orders with different statuses. If you want to import your fulfilled, cancelled, or unpaid orders, you can switch on the necessary settings under “Order Management” and do an order polling. You can check our FAQ on order polling for more instructions.
The Sales Channels API Might Not Be Answering Our Get Orders Calls
In some cases, the sales channel’s API might not be answering our API calls properly due to problems on their side. To check if this is the case please check whether the “Get_orders” jobs for the channel are working properly or not.
- Access your account and go to the left side of the screen. Click the "Stores" button.
- Click on the pencil icon next to the store your channel is in.
- Click on the pencil icon next to the channel you want to check.
- Click on the “Transaction Records” button.
- Filter the list by “Log Type”.
- Select the “get_orders” log type and press the ”Add” button.
- Check if the response was successful.
- If it is "Failed," click the pencil icon to check the log details and see what the error was.
- Try to take action based on the error message, or contact customer support directly.
Orders on Hold After Sales Channel Setup: What Does It Mean?
About the "On Hold" Status
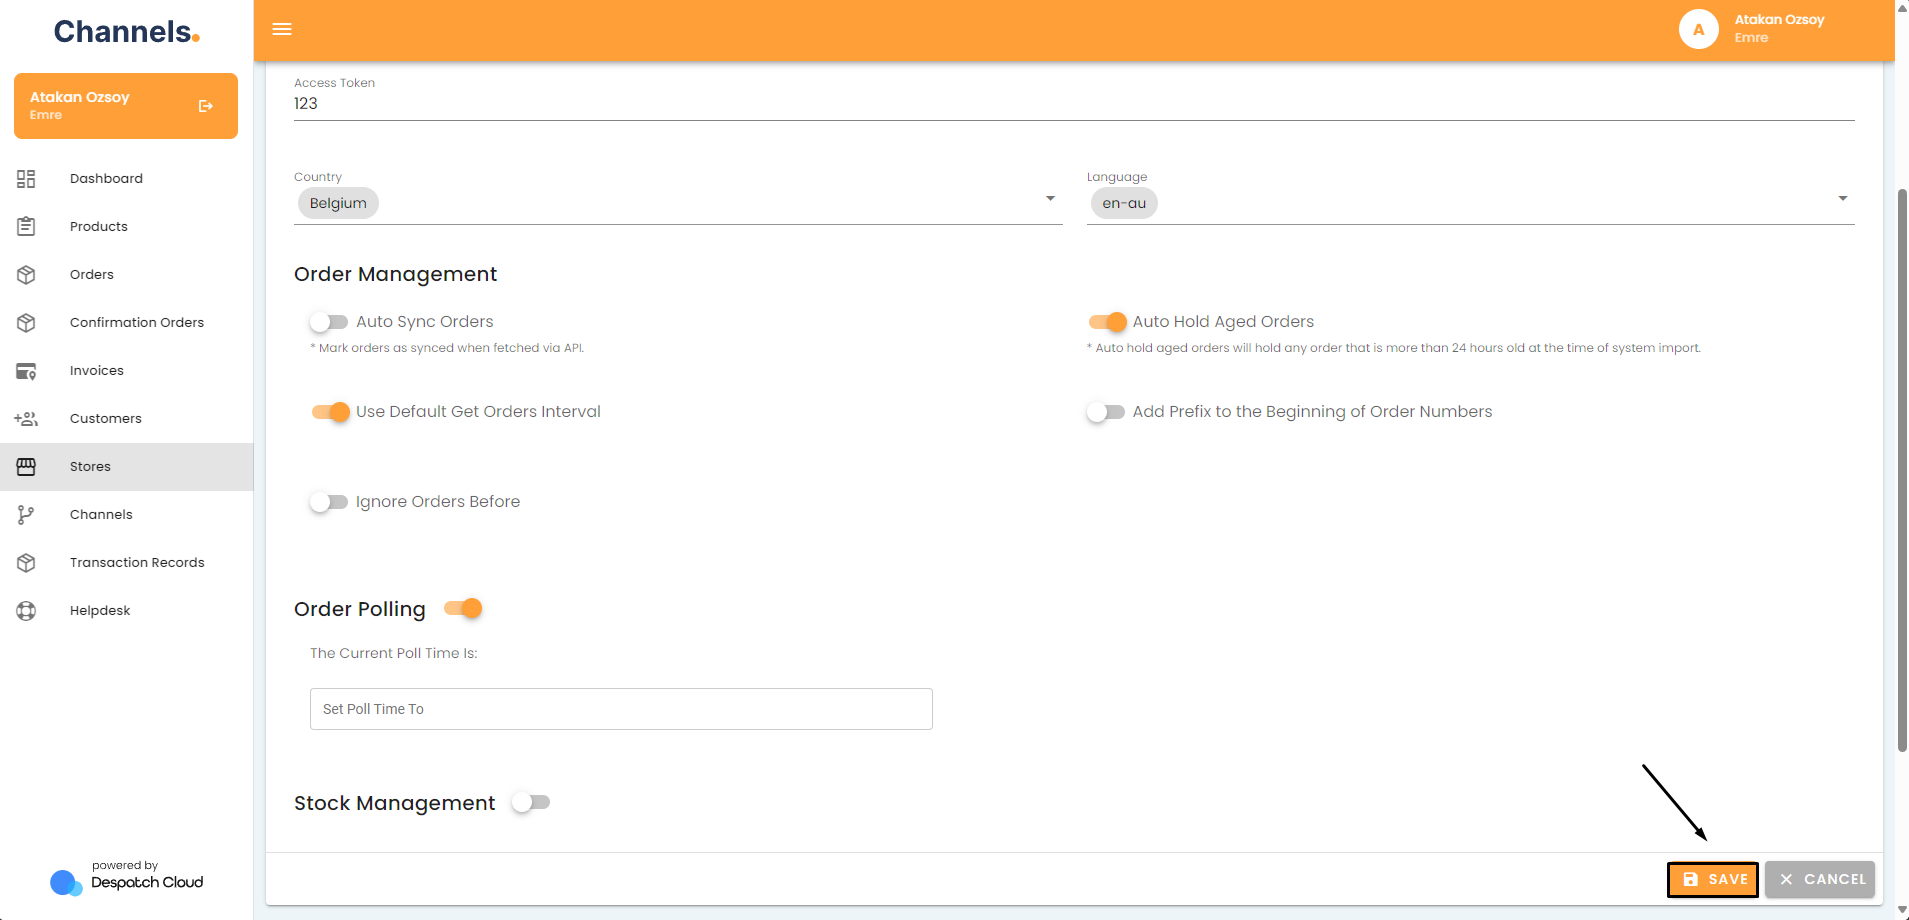
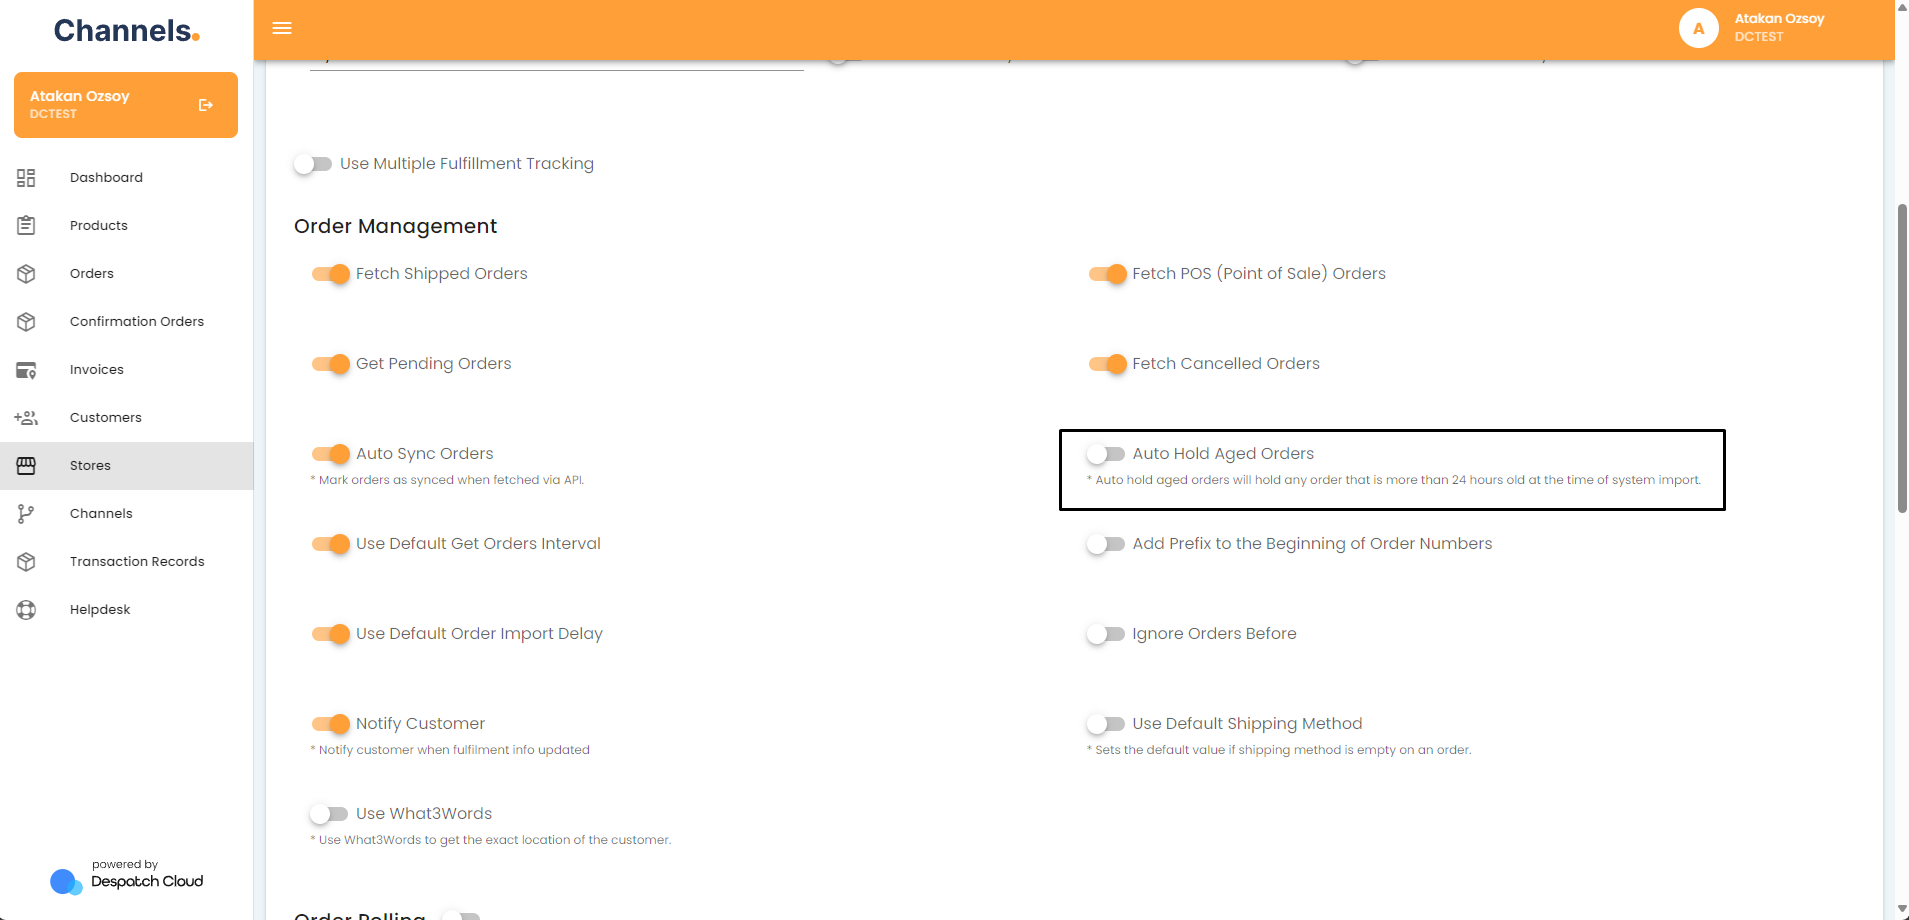
On-hold status means these orders will not be processed. By default, we switch on the setting “Auto Hold Aged Orders” when a sales channel is created on our system. You can switch that setting off by going into the channel settings.
When this setting is on, it marks the sync status of orders that have been in existence for 24 hours or more from the order creation date.
- Access your account and go to the left side of the screen. Click the "Stores" button.
- Click on the pencil icon next to the store your channel is in.
- Click on the pencil icon next to the channel you'd like to check.
- Switch off the “Auto Hold Aged Orders” setting under Order Management.

Fulfillment Not Sent to Sales Channel: What to Do?
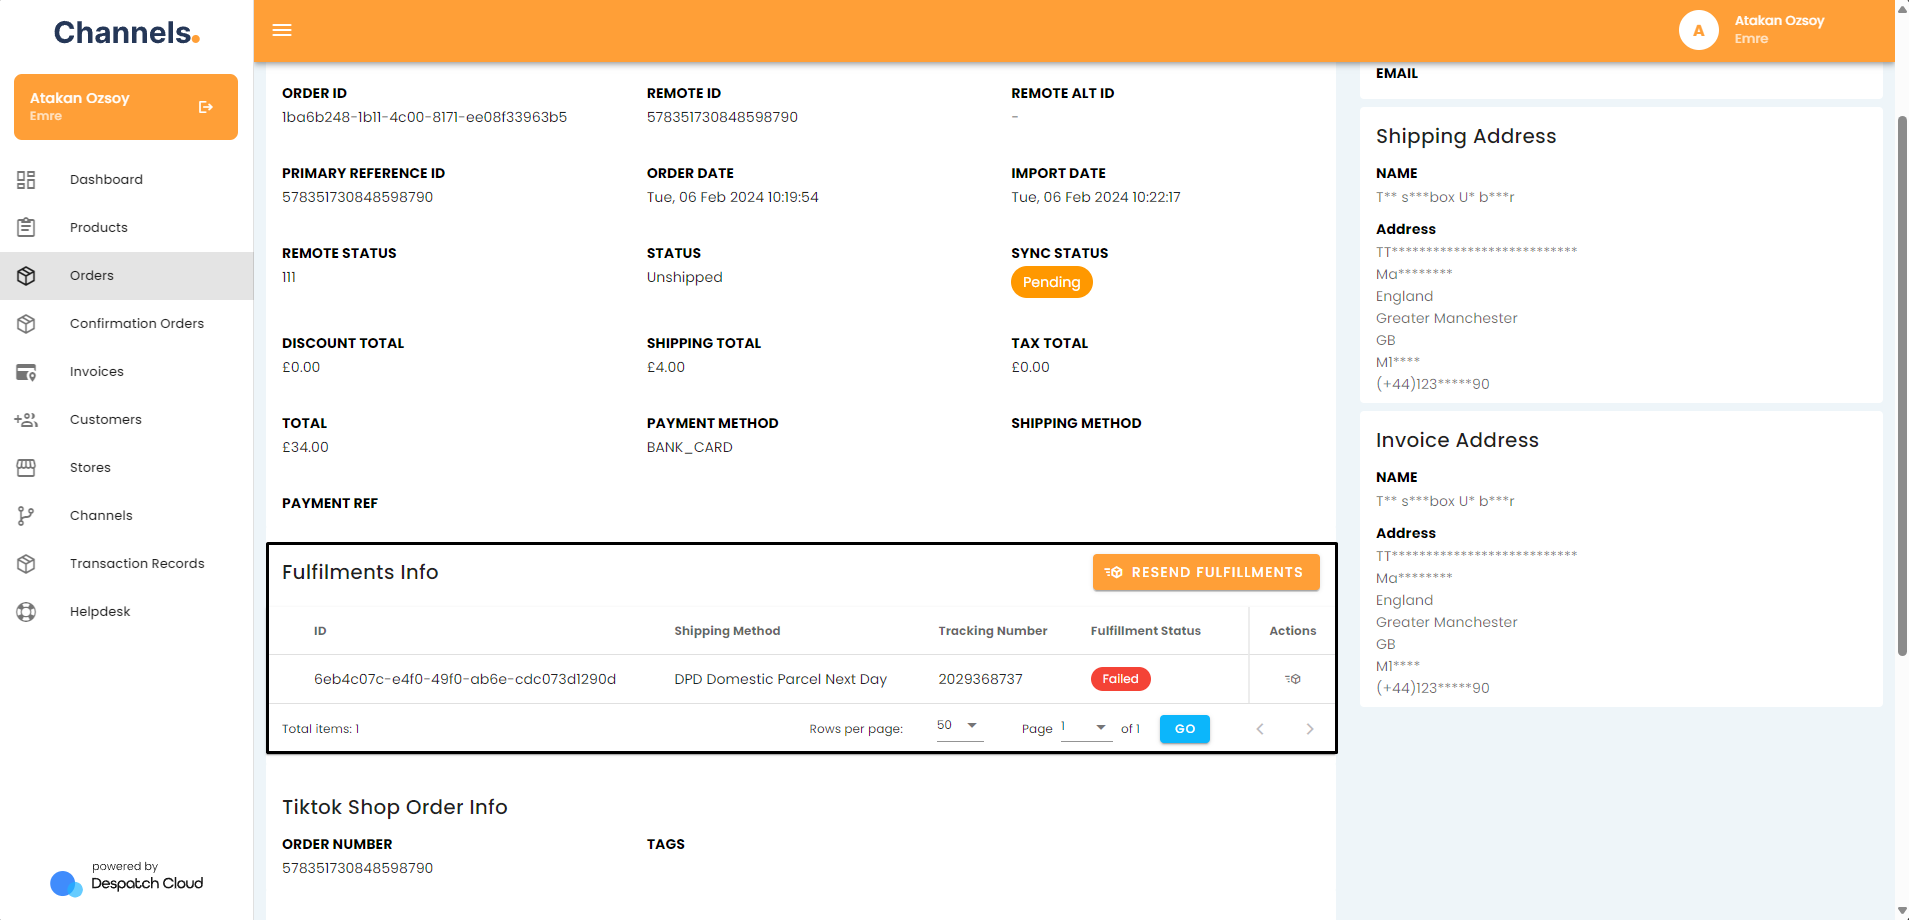
Make Sure the Fulfillment is Created Successfully for the Order in Question
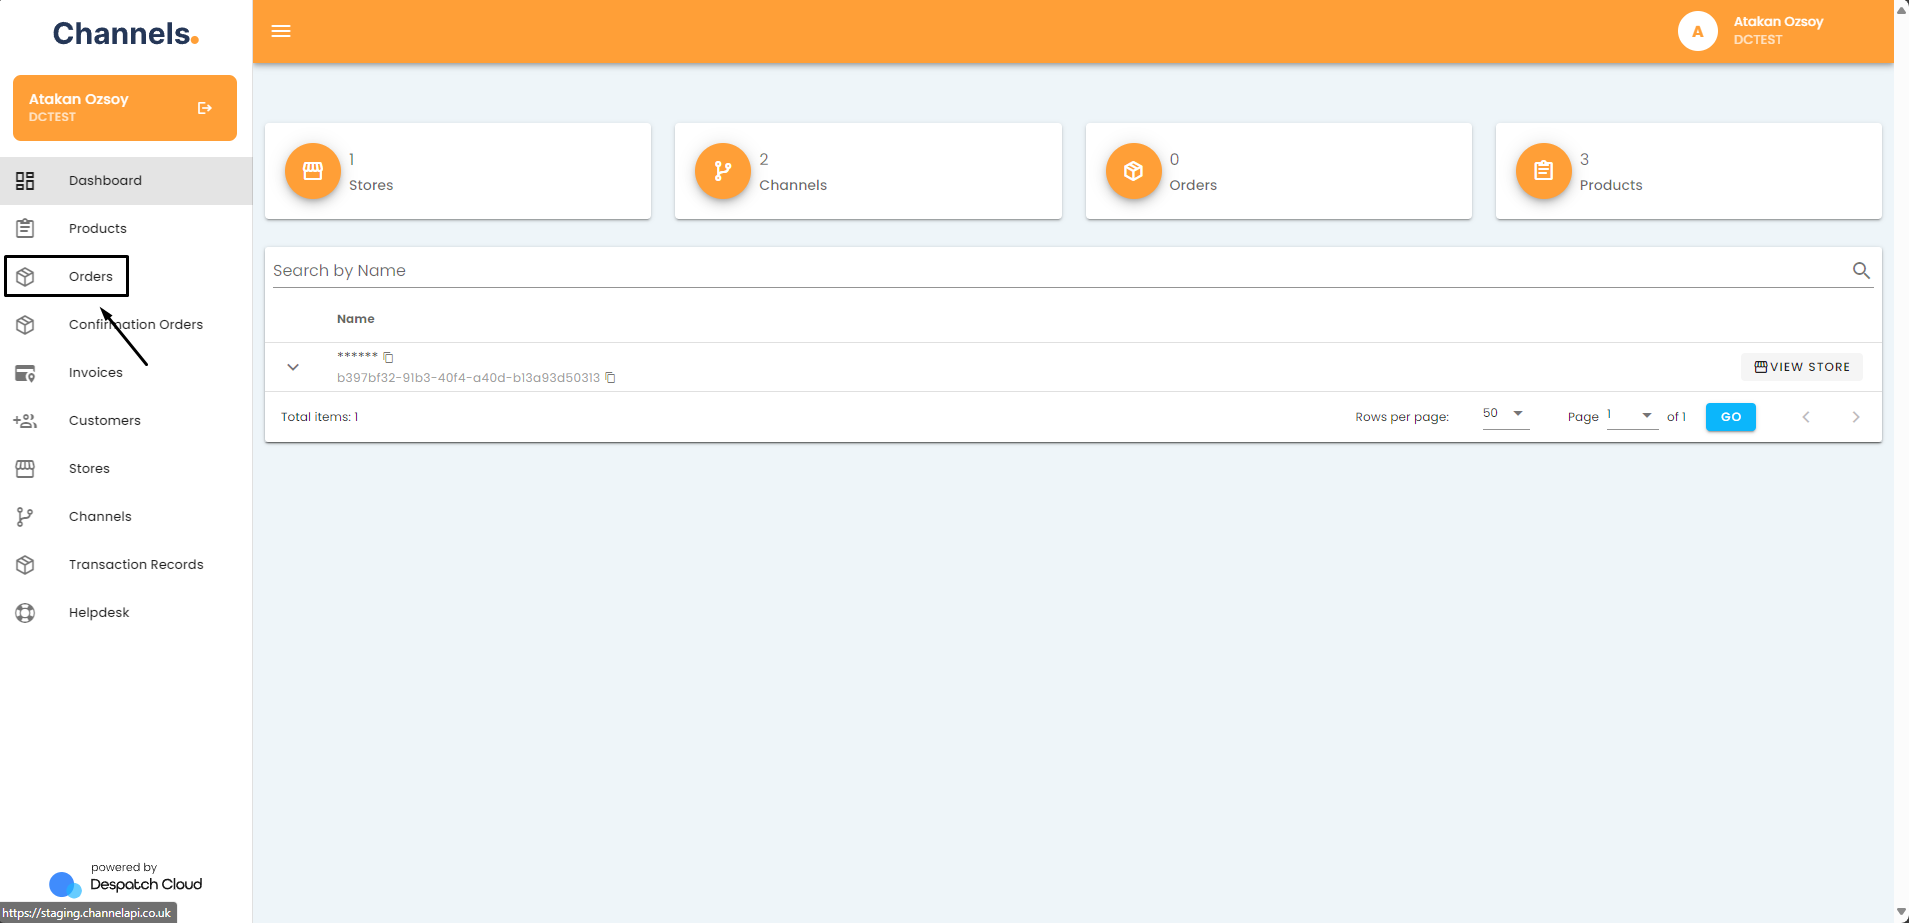
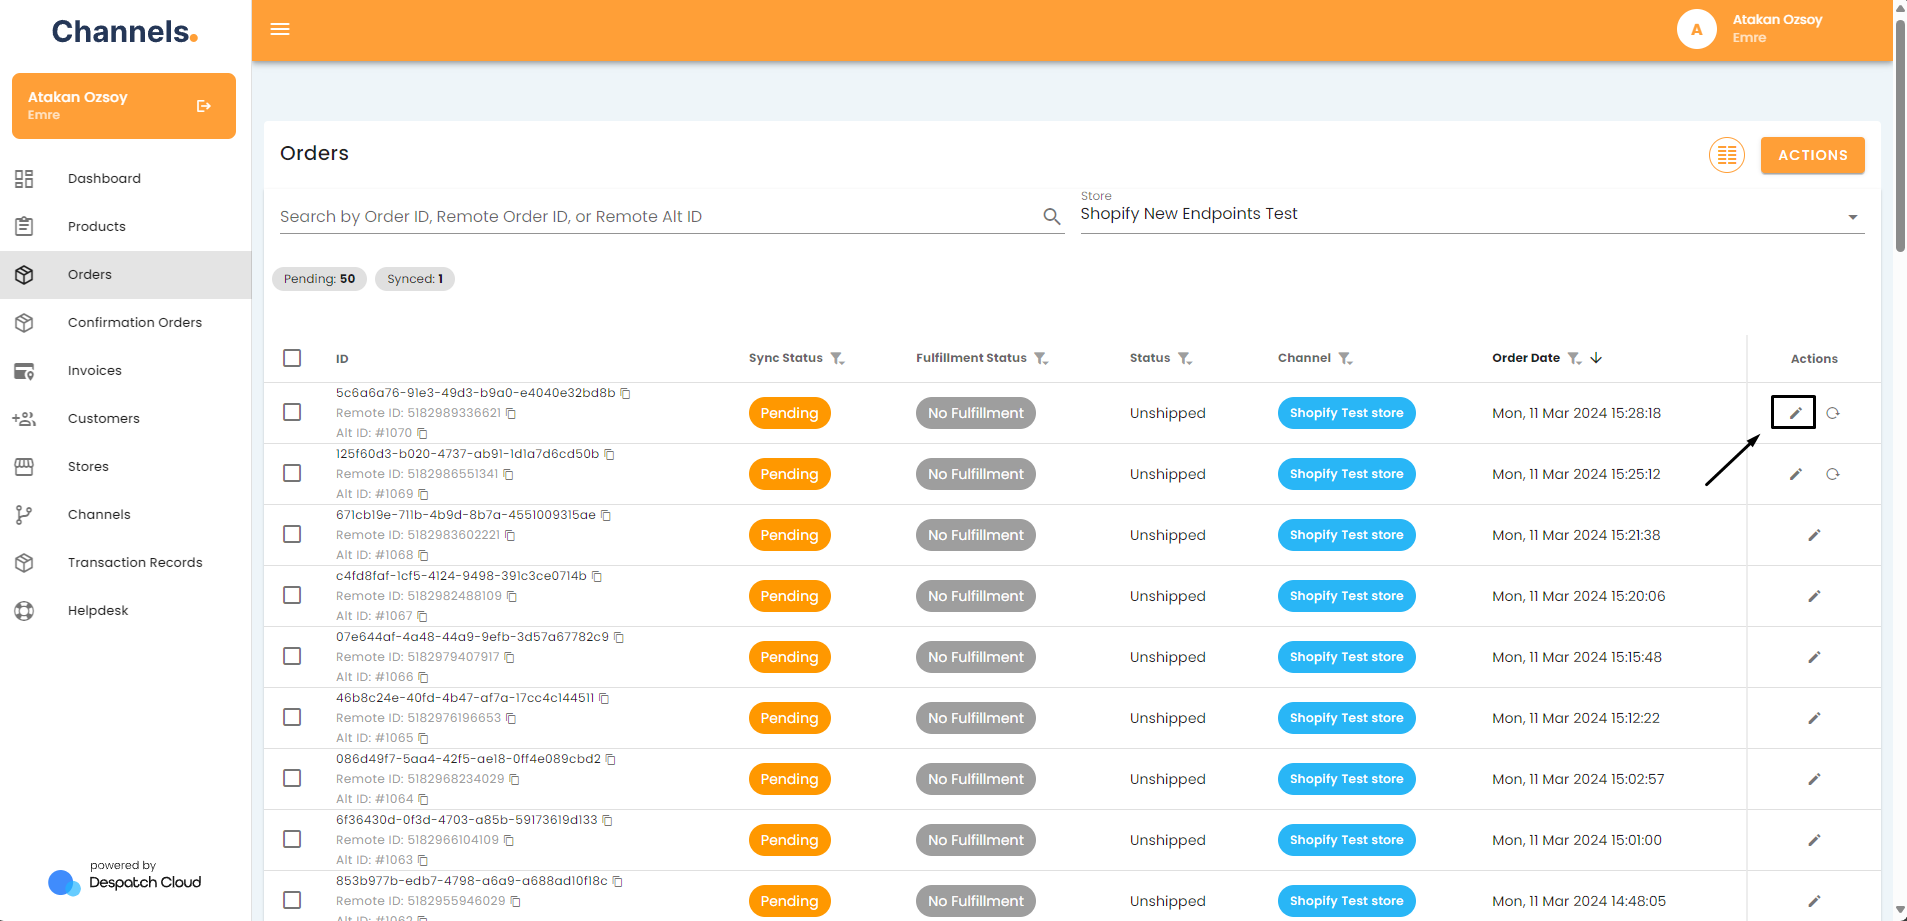
- Access your account and go to the left side of the screen. Click the "Orders" button.

- Find the order you want to check and click the pencil icon to view it's details.

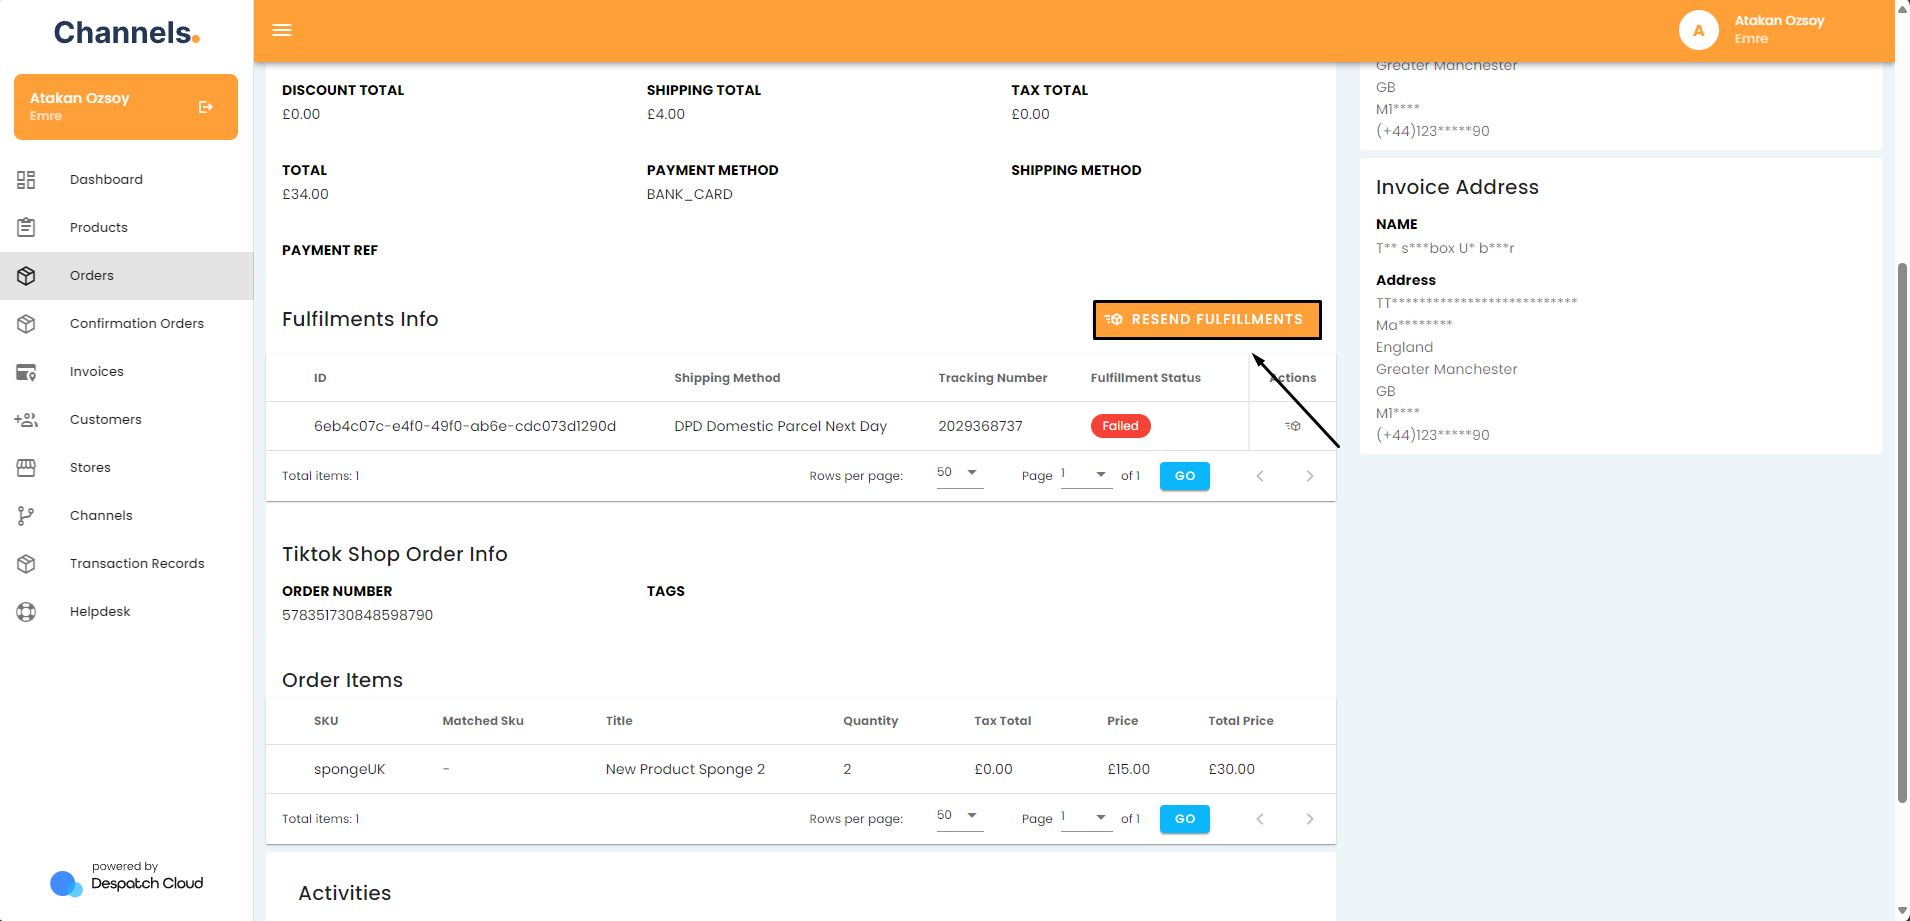
- Scroll down to the “Fulfilment Info” part and ensure you correctly see the fulfilment information you created. If you do not see that, you didn’t create a fulfilment for that order. Please create one using Channel API.

- If you see the fulfilment information correctly and see that the Fulfilment sync status is “Failed” please scroll down to order activities table at the bottom of the page and check “fulfillment_replied” activity detail by clicking the edit button to understand why the sync attempt is failed.

- You can check the fulfilment sync request sent to the sales channel and view the response received from the sales channel API.
- Try to take action based on the error message in the response or contact customer support directly.
- If the response error message is about the courier not being found in the system, please ensure you have the courier mappings done correctly.

Make Sure the Courier Mappings are Done Correctly
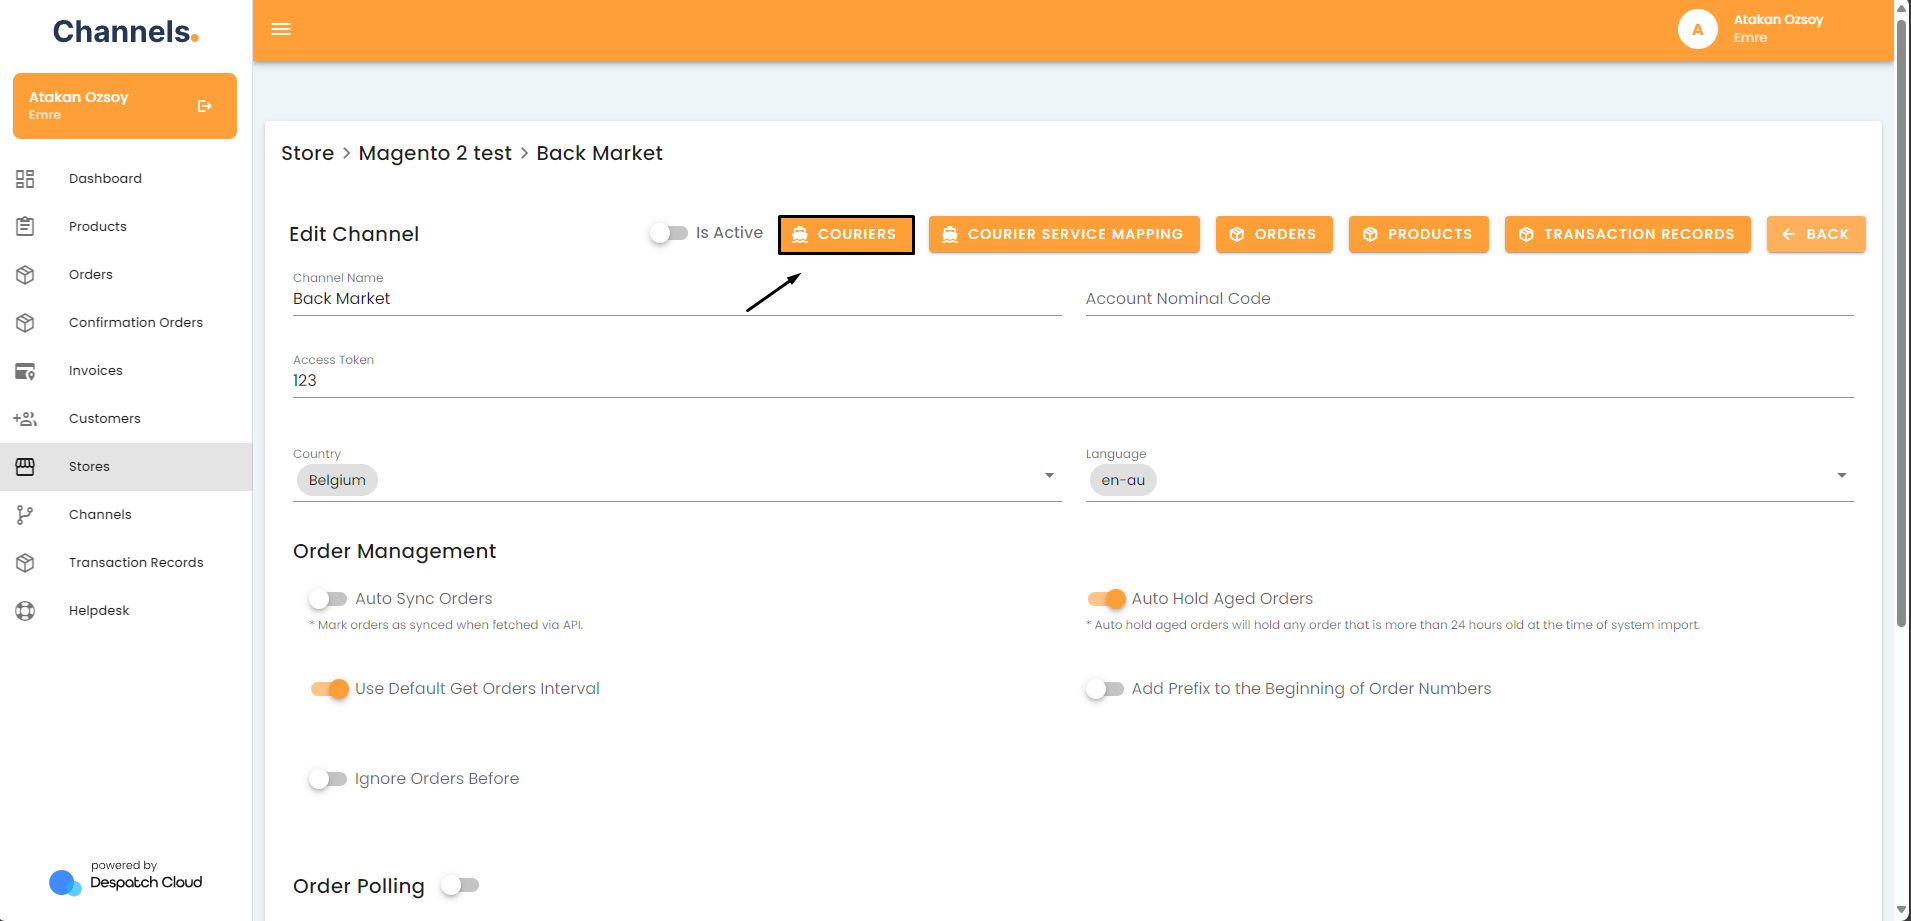
Most of the time, fulfillments fail because courier mapping is not done for sales channels. You need to make sure that you have the correct mappings for your sales channels. To do the courier mappings, please go to the channel settings courier mapping page.
- Access your account and go to the left side of the screen. Click the "Stores" button.
- Click on the pencil icon next to the store your channel is in.
- Click on the pencil icon next to the channel you want to check.
-
Click on the “Couriers” button.

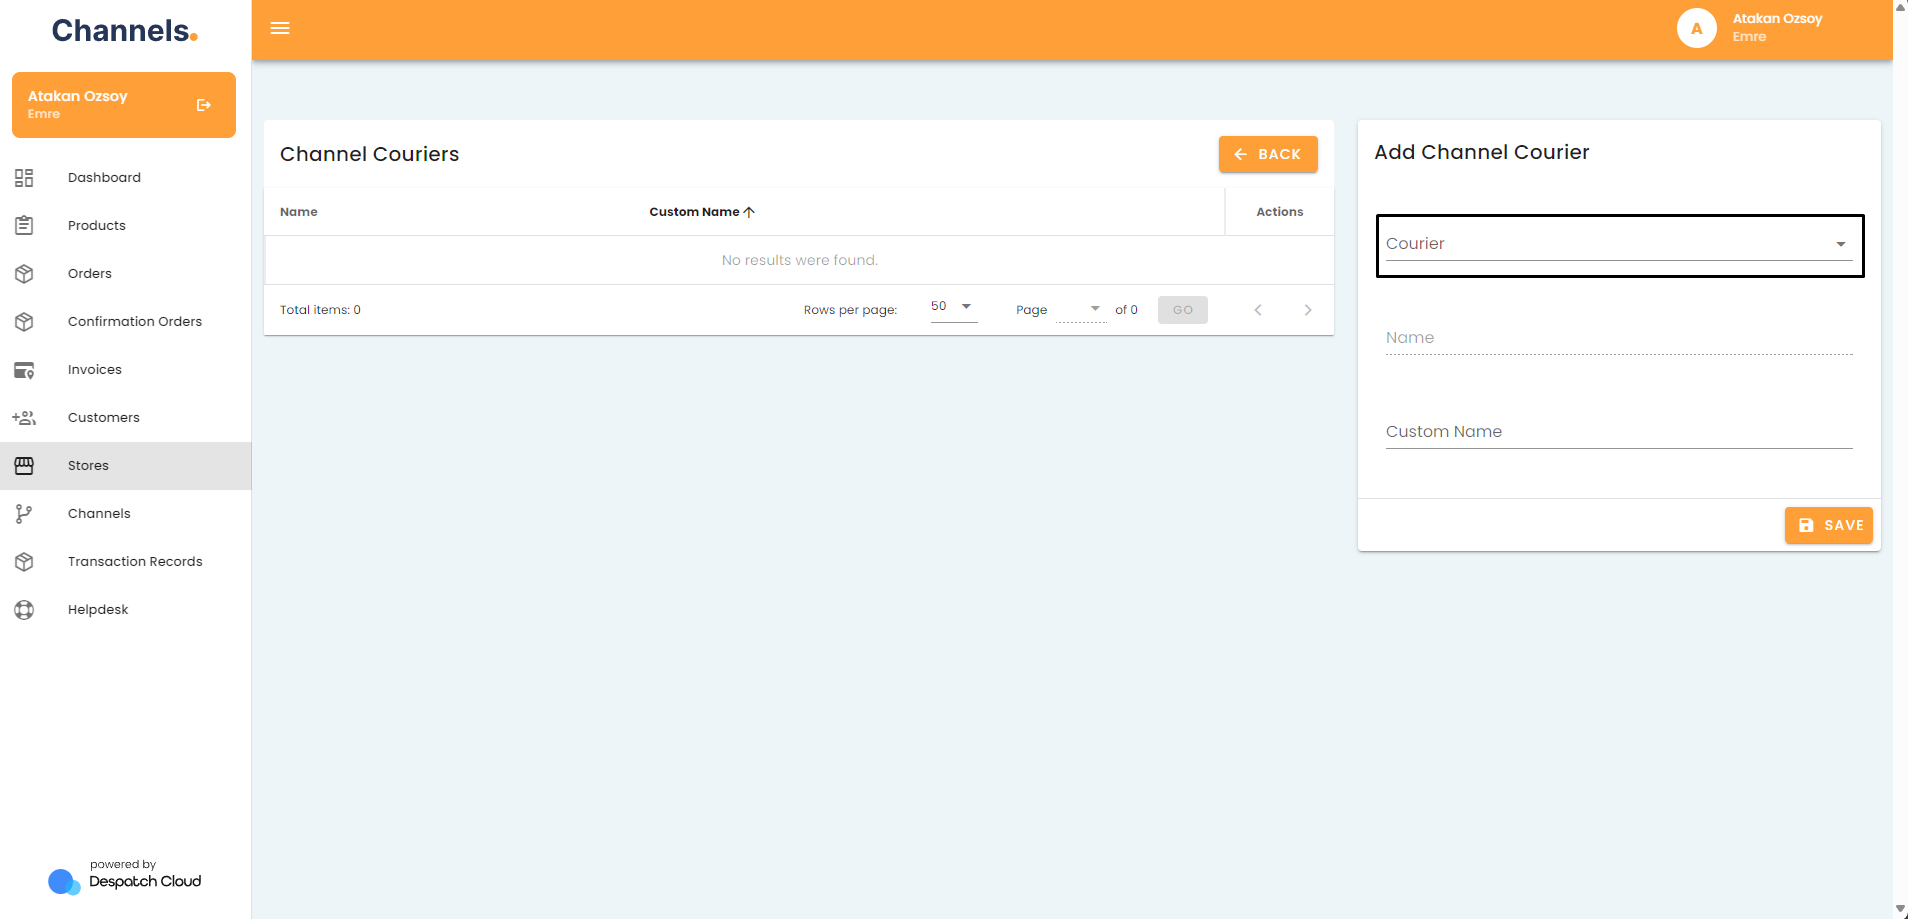
-
Select the courier name you sent in the fulfilment creation request.

-
Enter the custom name as the Channel accepts the selected courier. Please contact your sales channel account manager to get the courier codes and names list for the channel in question.

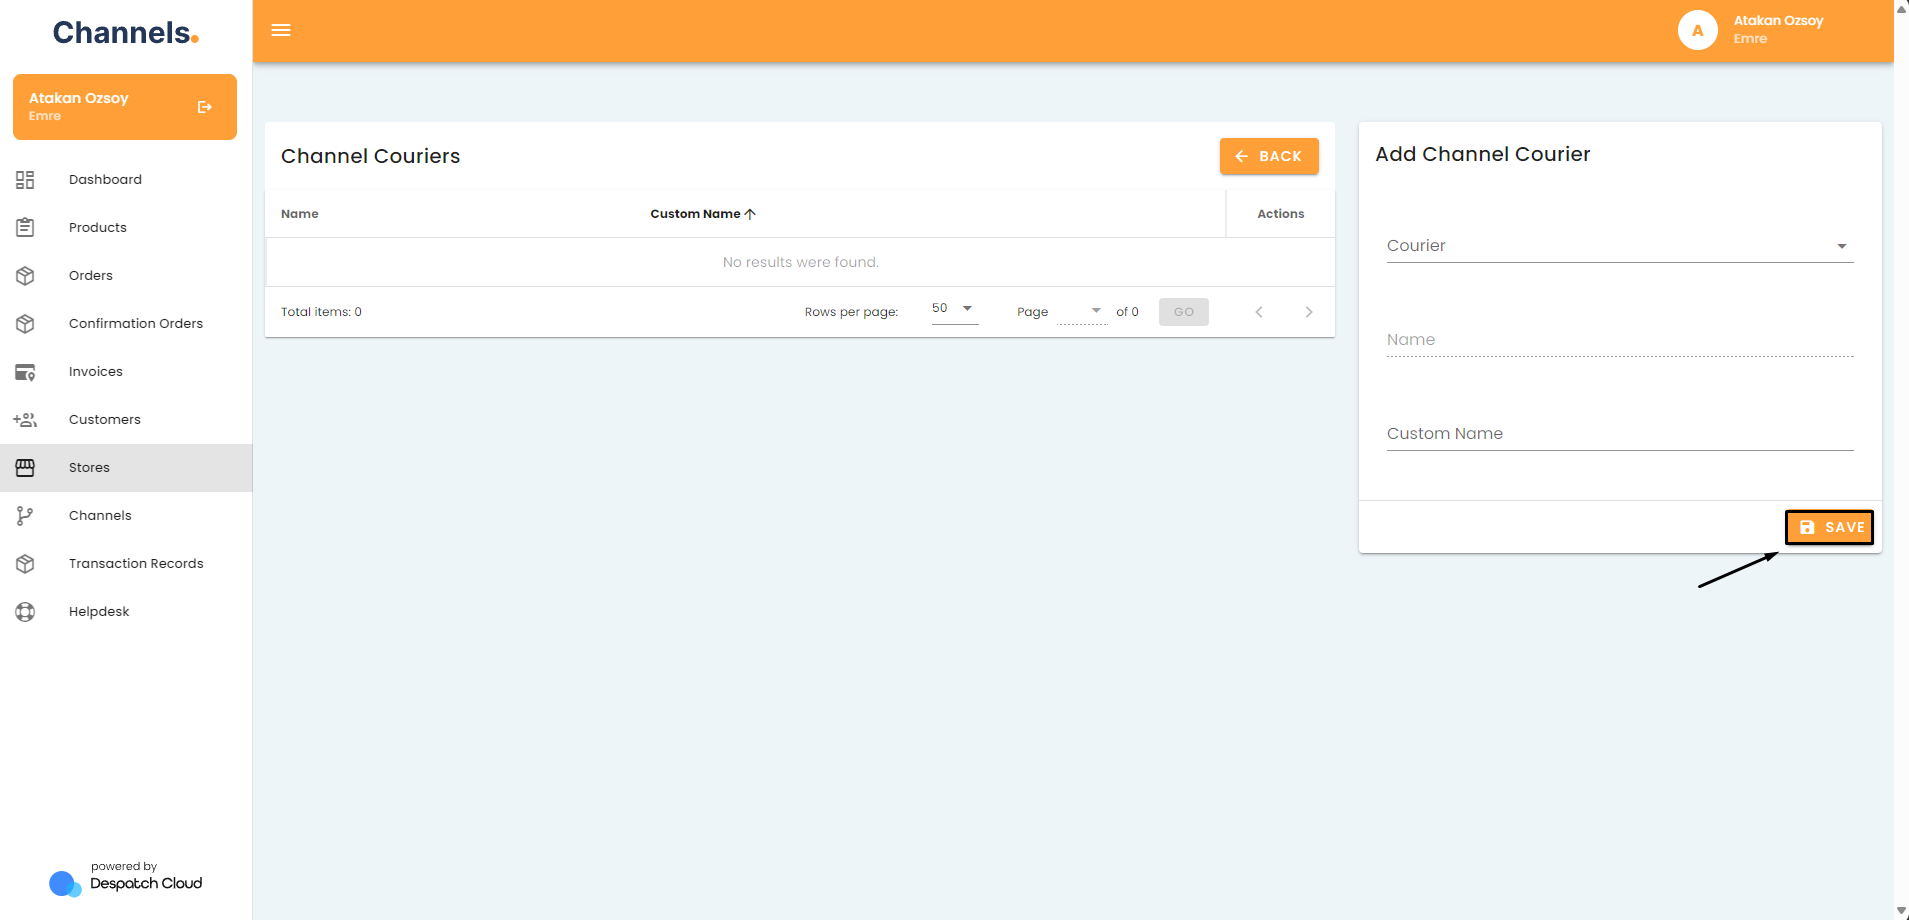
-
Click Save.

-
Go to the order detail that has the failed fulfillment sync.
-
Click on the “Resend Fulfillments” button.

-
Please check if the fulfilment status has changed to “Synced” in 5 minutes. If not, follow this guide again or contact customer support.

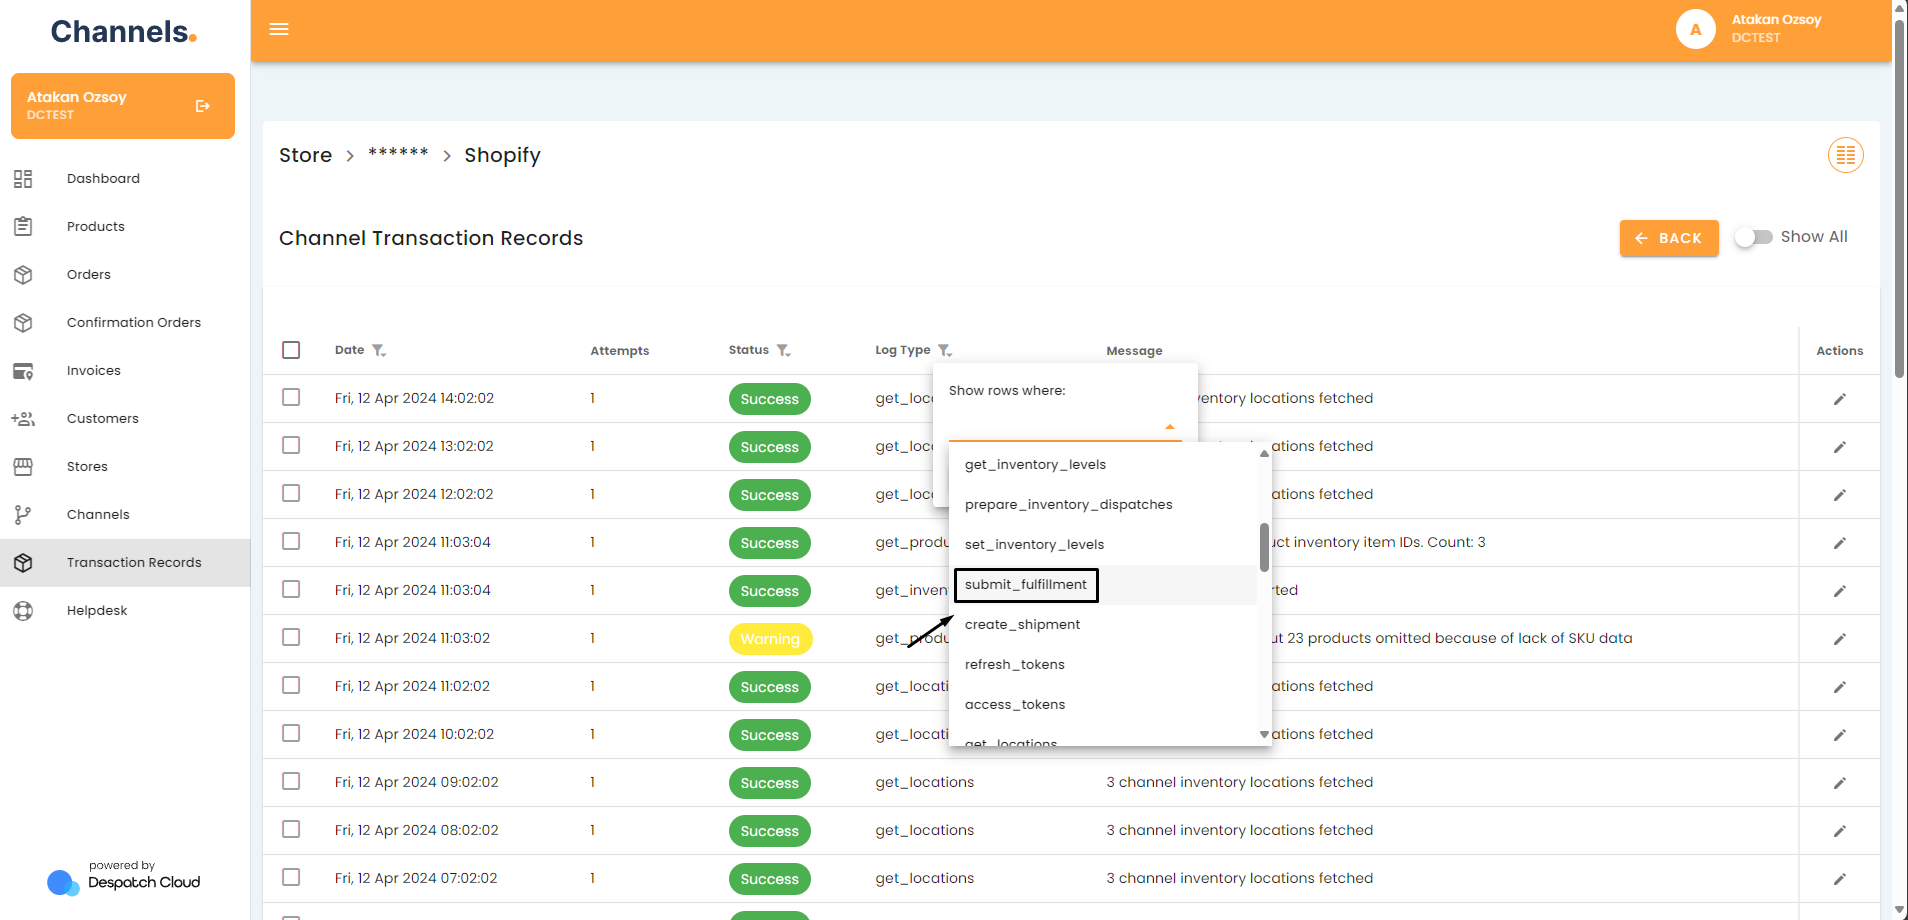
Check the Channel Transaction Records for Fulfillment Errors
- Access your account and go to the left side of the screen. Click the "Stores" button.
- Click on the pencil icon next to the store your channel is in.
- Click on the pencil icon next to the channel you want to check.
- Click on the “Transaction Records” button.
- Filter the list by “Log Type”.
- Select the “submit_fulfillment” log type and press the ”Add” button.

- Check if there are any recent failures.
- If there is, check the log details by clicking the pencil icon to see what the error was.
- Scroll down to the response part and see the response and error messages received.
- Try to take action based on the error message in the response or contact customer support directly.
- If the response error message is about the courier not being found in the system, please ensure you have the courier mappings done correctly.
Webhooks Set Up, But Not Working
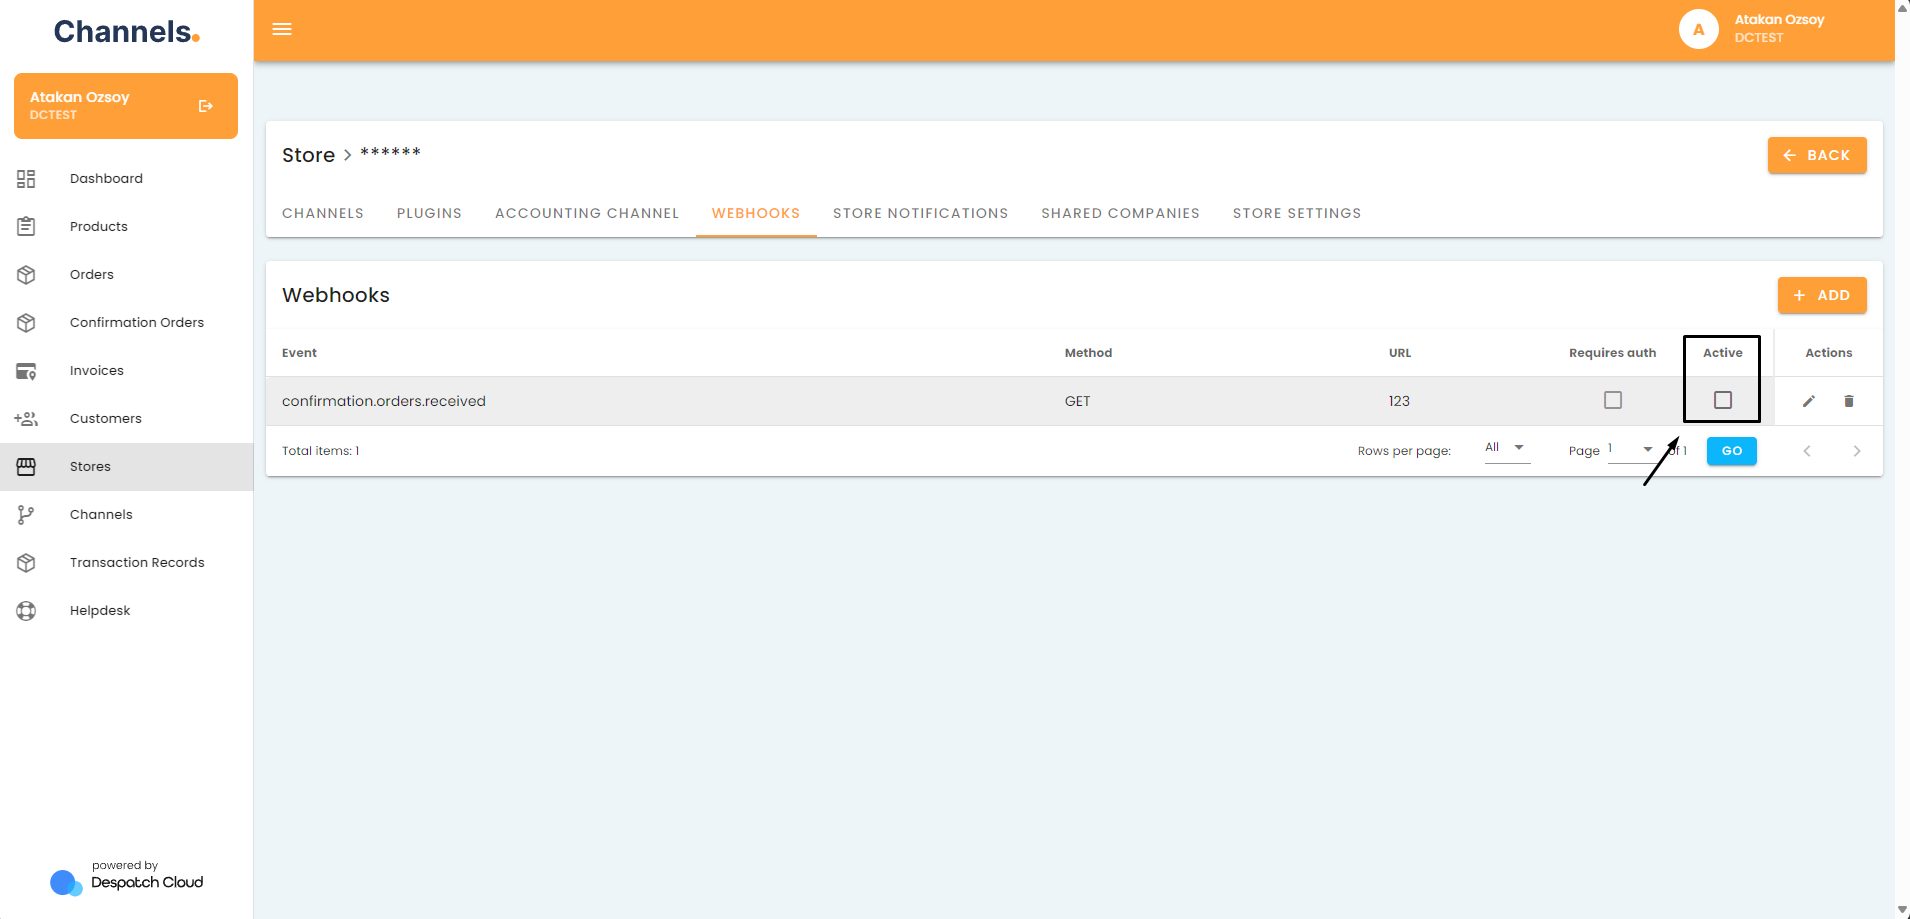
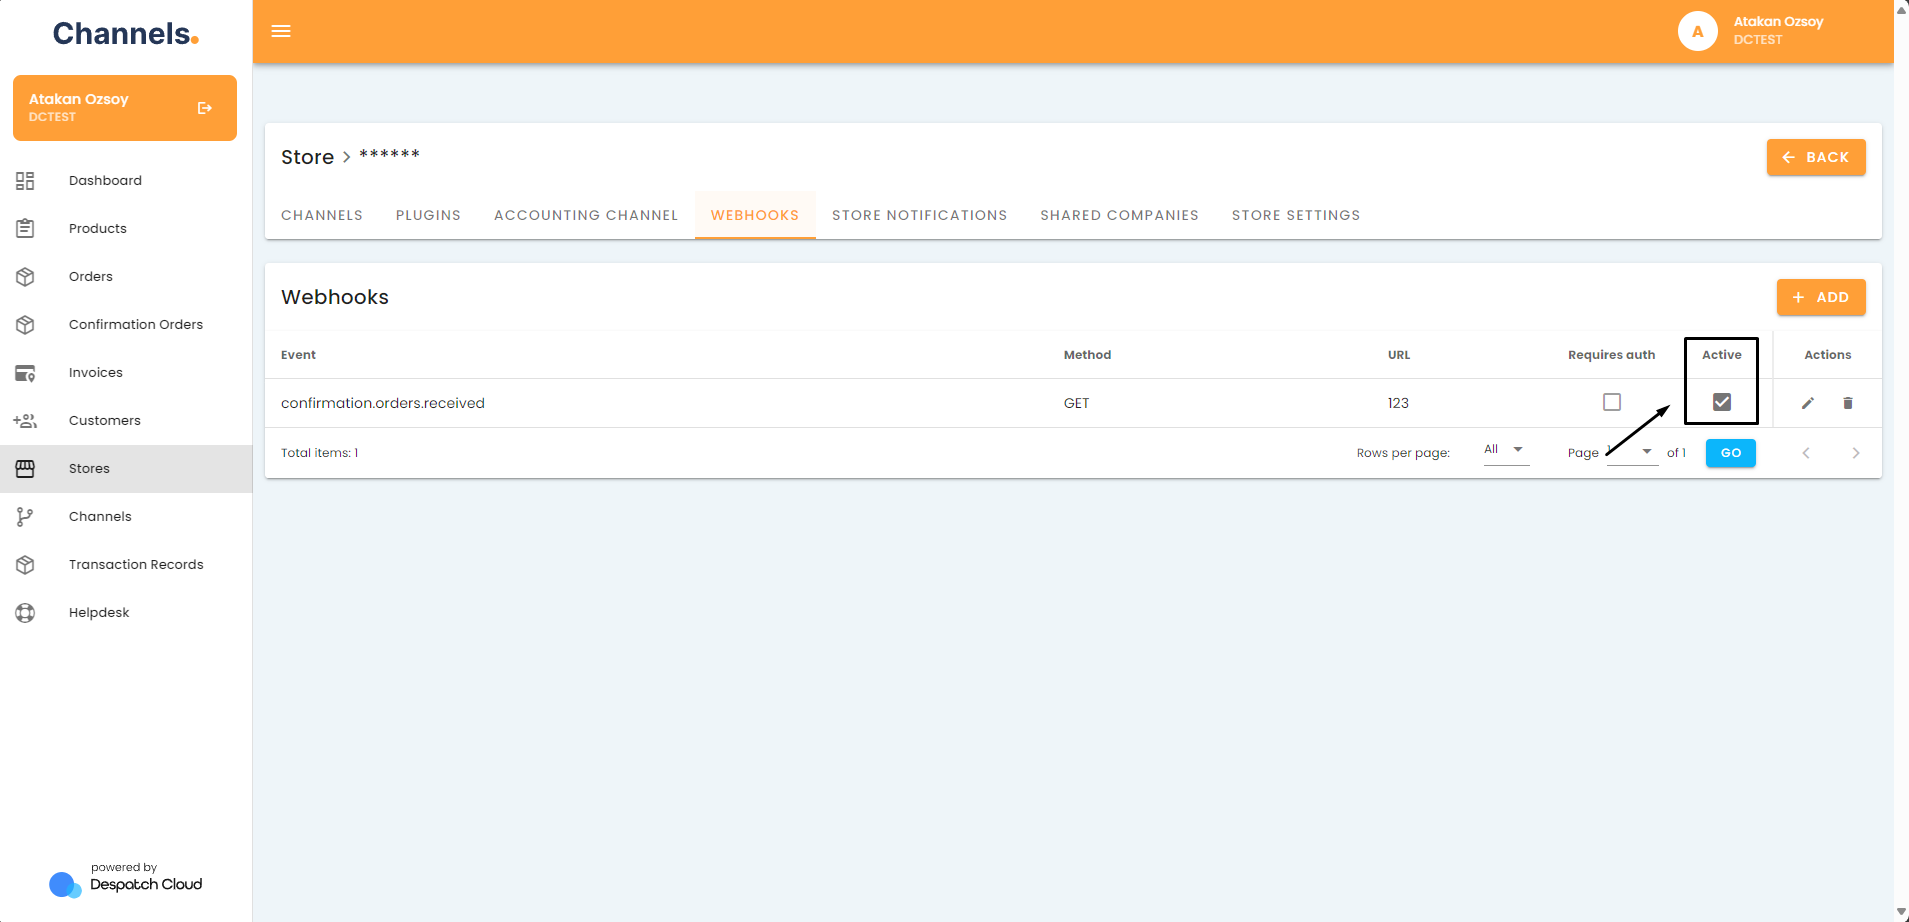
Check If the Webhook Is Activated
- Access your account and go to the left side of the screen. Click the "Stores" button.
- Click on the pencil icon next to the store your webhook is in.
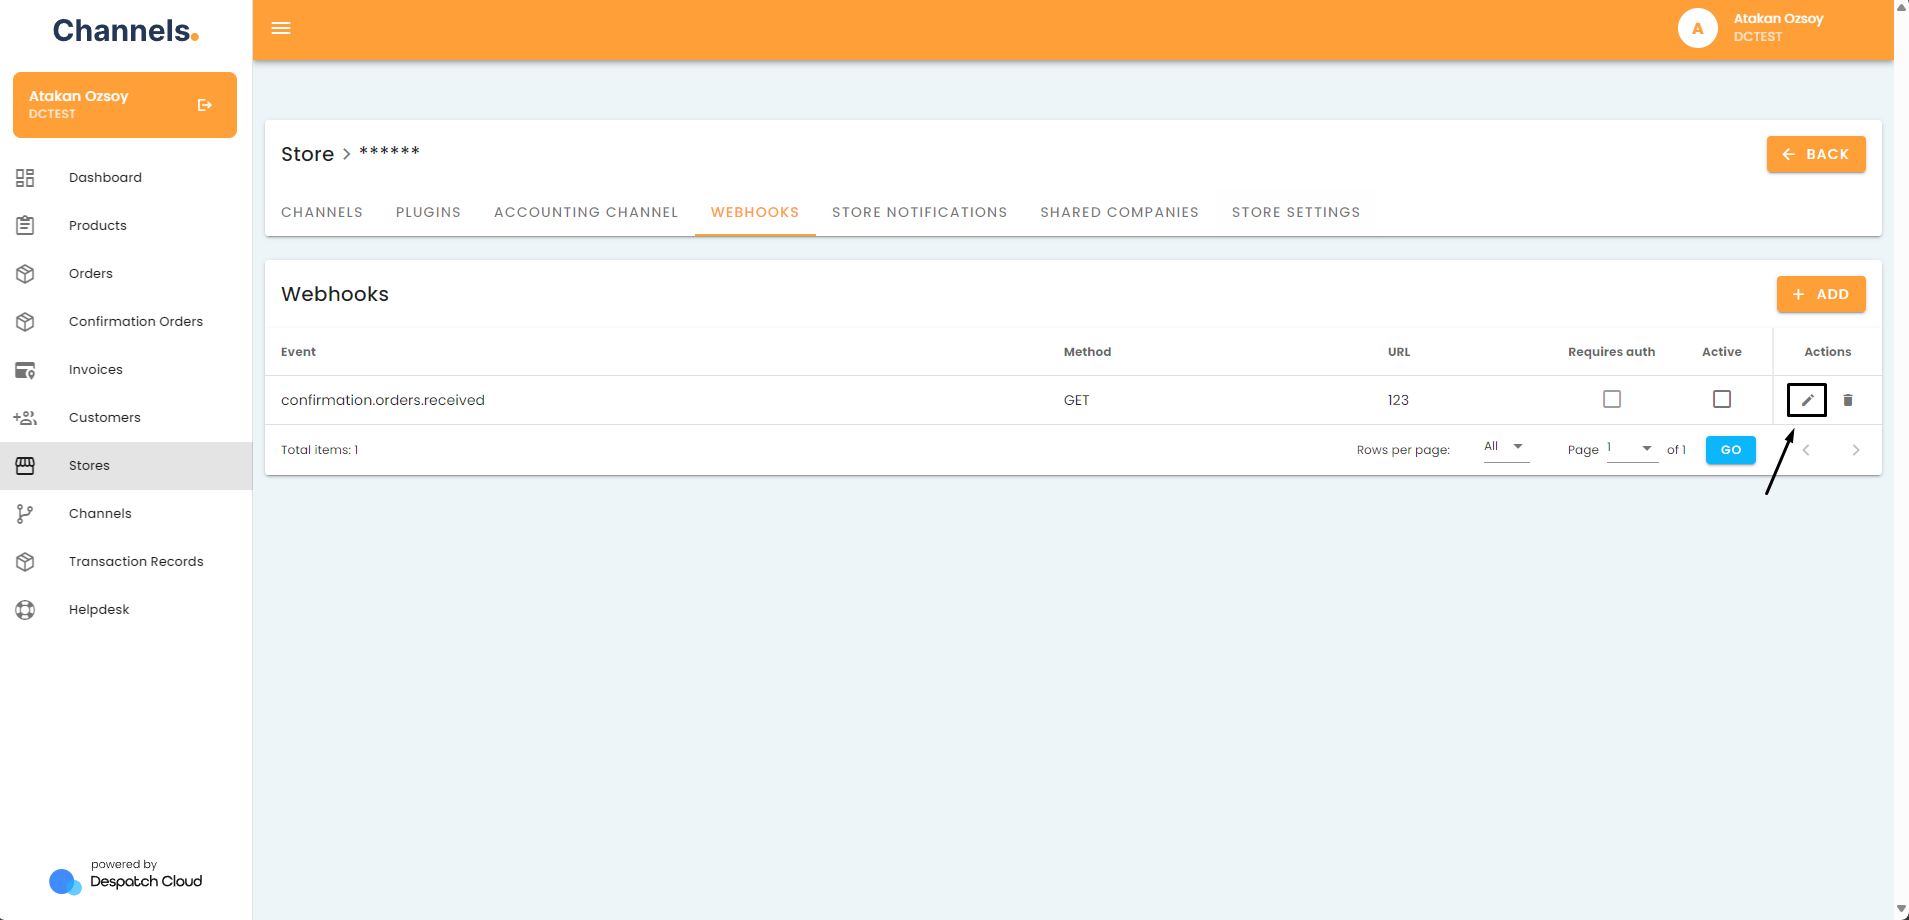
- Go to the Webhooks tab.

- See if the webhook you created has a checkmark under the “Is Active” column.

- If it doesn’t have a checkmark, it means the webhook is not active. Please click on the checkbox to activate the webhook.


Verify if the Webhook URL Is Entered Correctly
- Access your account and go to the left side of the screen. Click the "Stores" button.
- Click on the pencil icon next to the store your webhook is in.
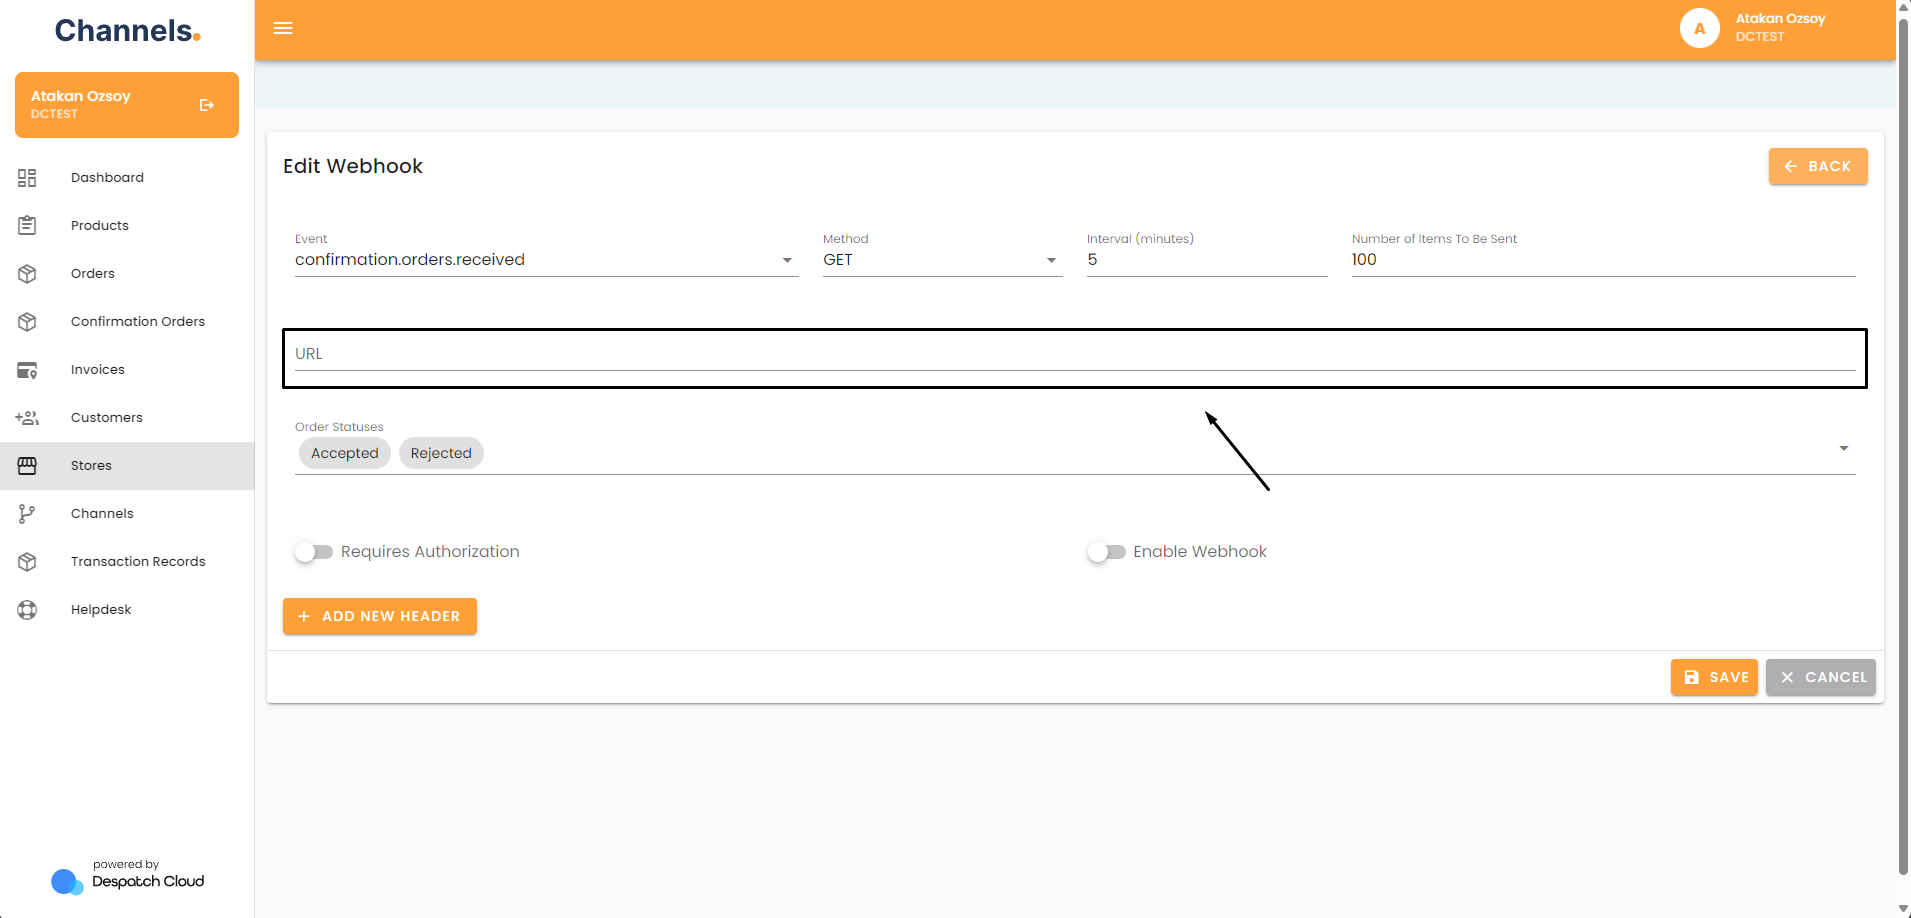
- Go to the Webhooks tab.
- Go to the webhook’s settings by clicking on the edit button.

- Check if the URL is entered correctly.

Check Whether the Receiver URL Is Working Properly
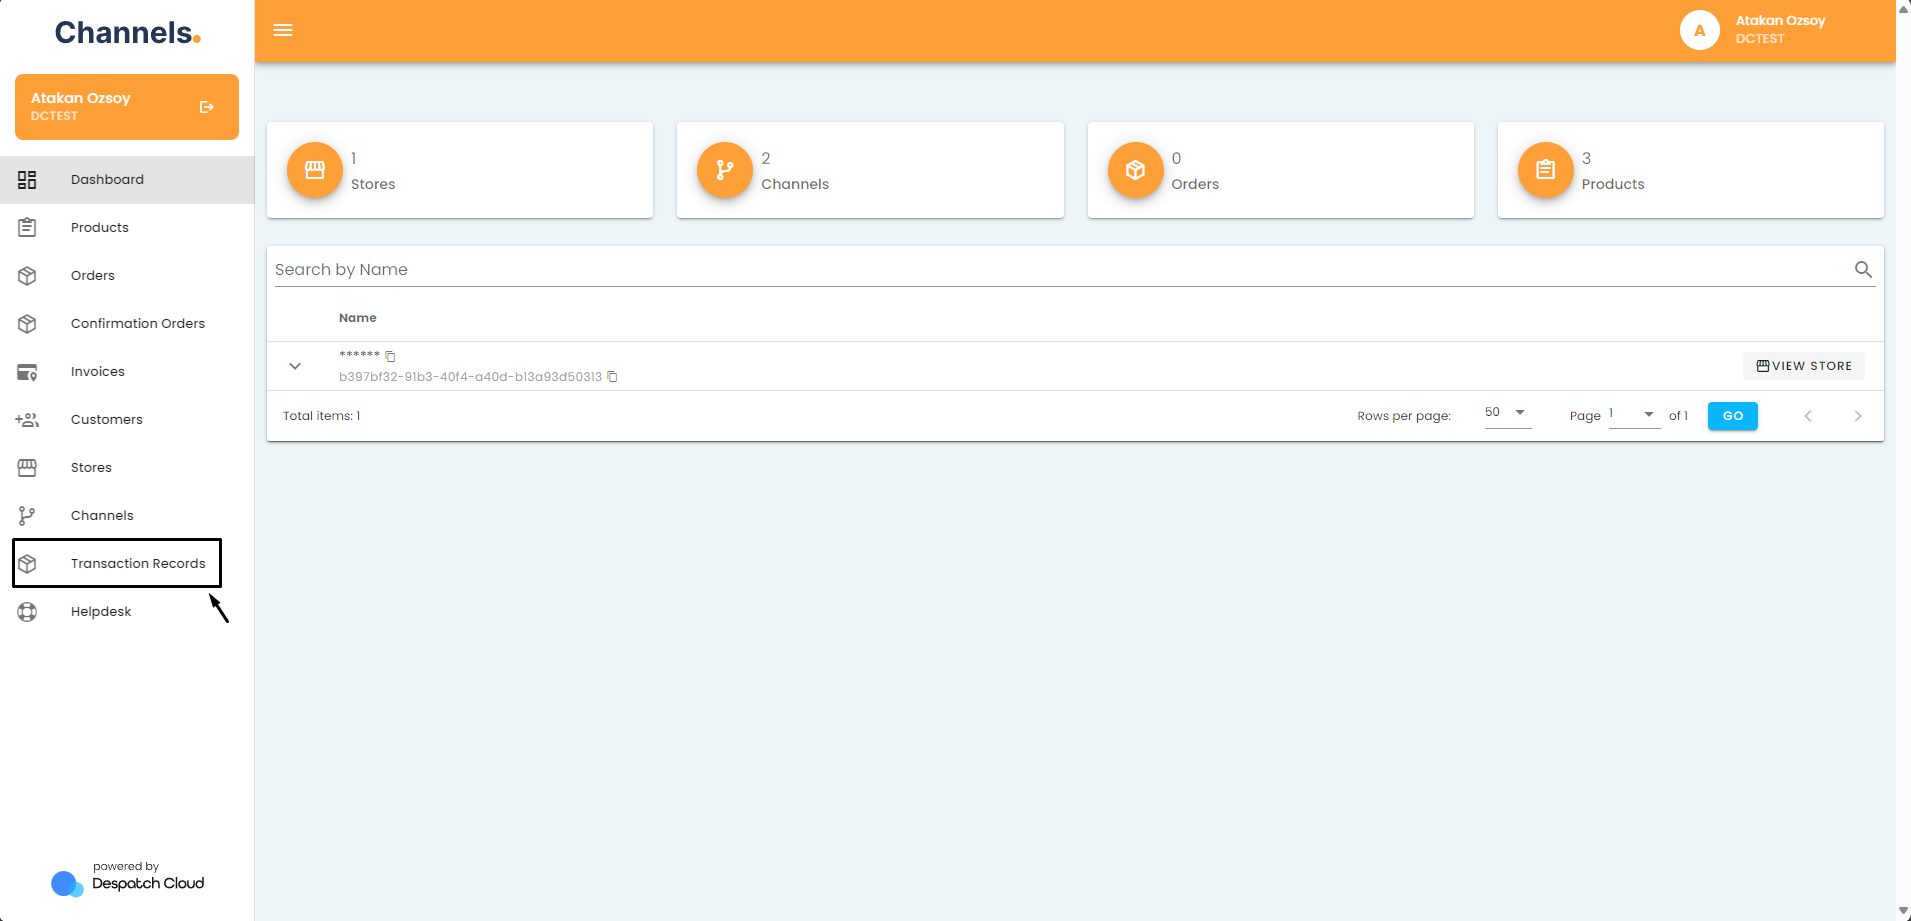
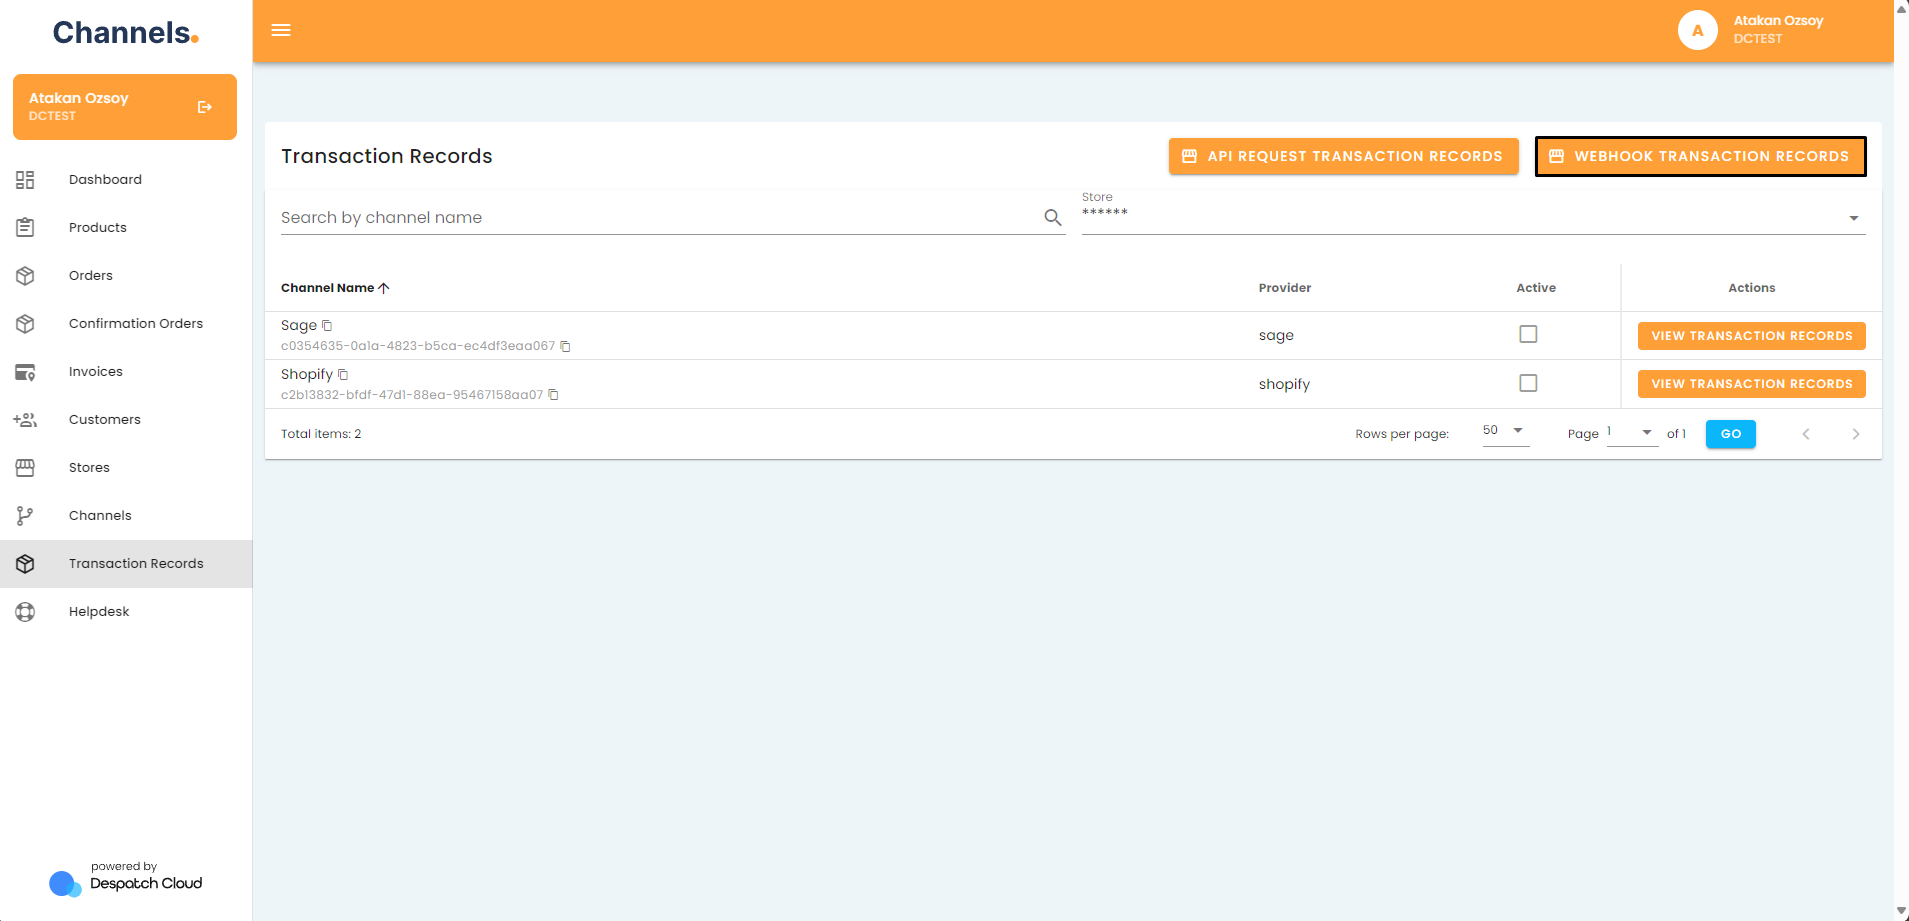
- Go to the “Transaction Records” page.

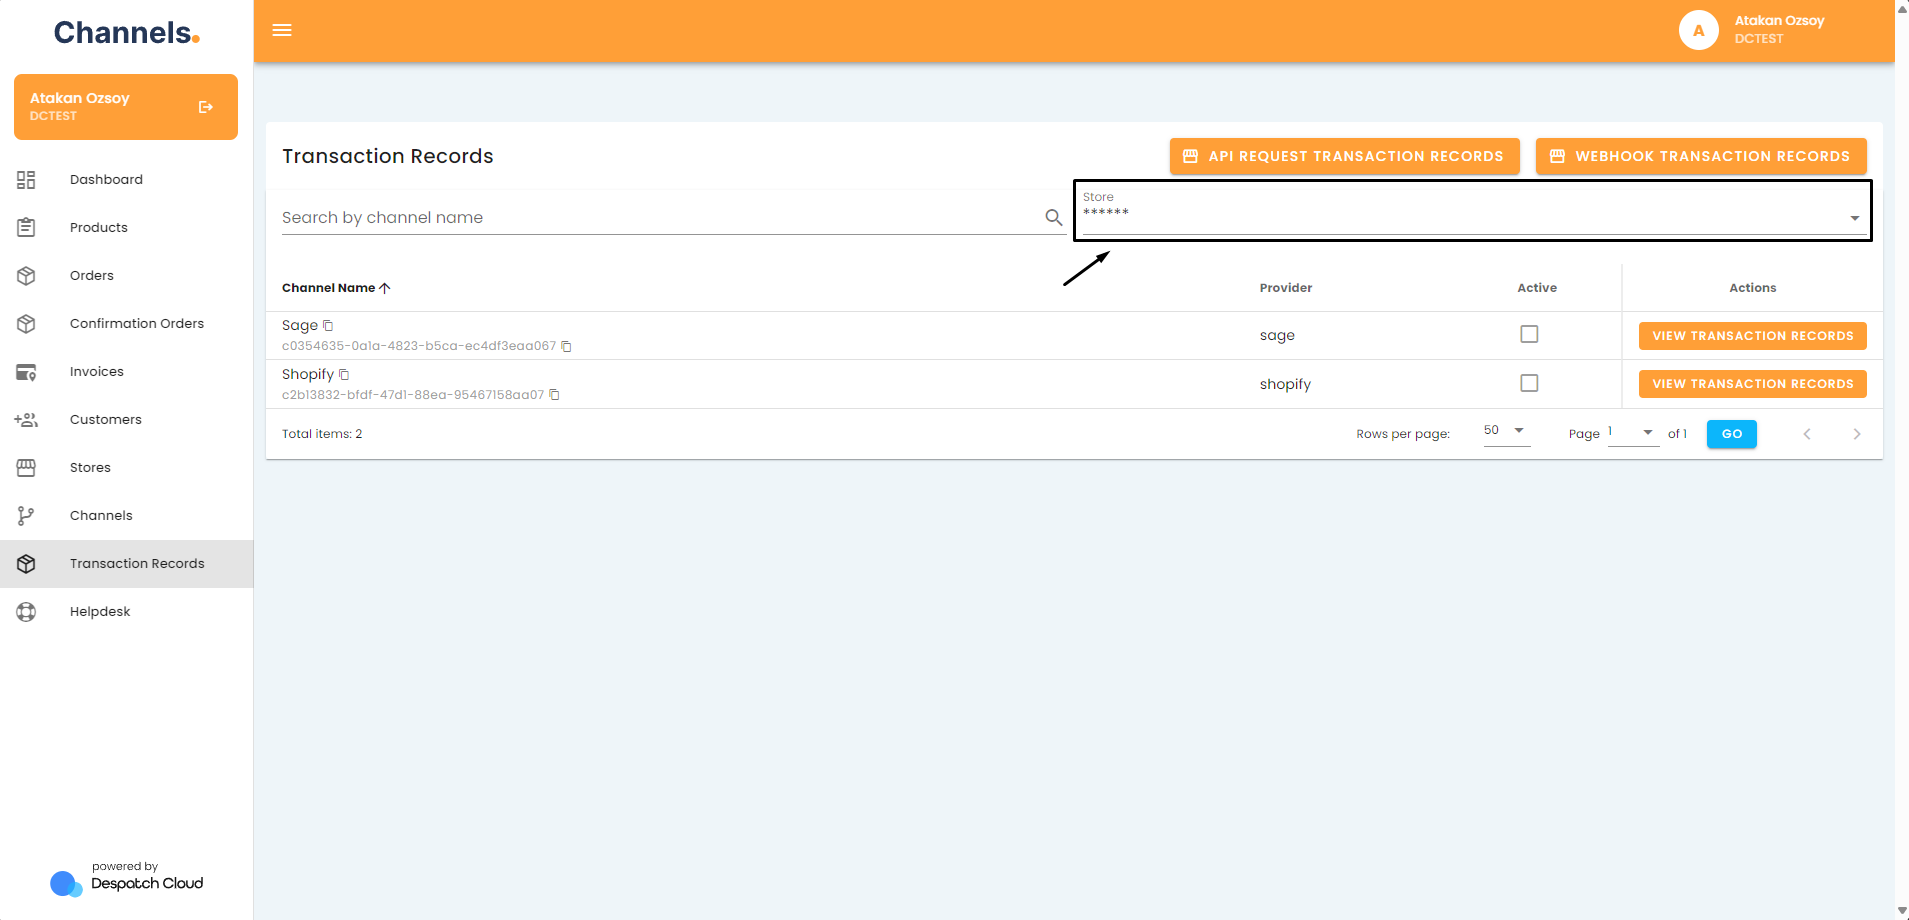
- Select your store.

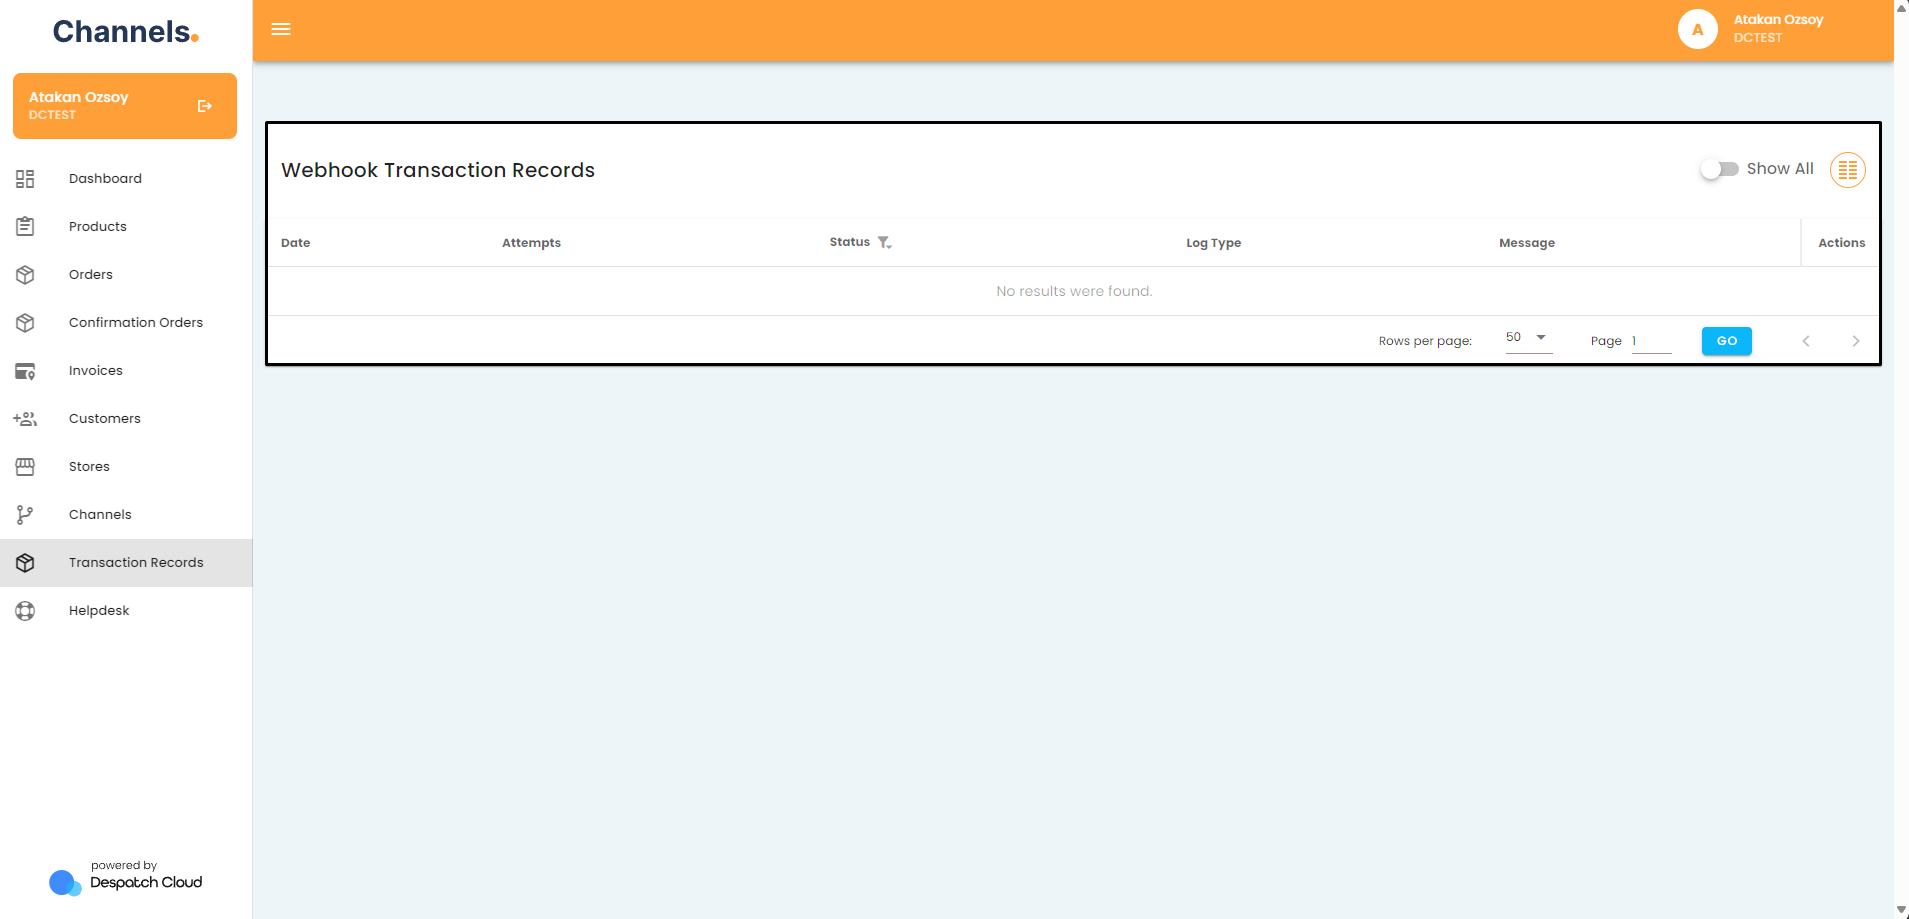
- Click on the “Webhook Transaction Records”.

- Check if there have been failed transactions recently.

- If there are failed transactions, click the edit button for the most recent failed one.
- Check the error message in the response part of the transaction.
- Try to take action based on the error message in the response or contact customer support directly.
Plugin Set Up, But Orders Not Sent: What to Do?
Check If the Plugin Is Active
- Access your account and go to the left side of the screen. Click the "Stores" button.
- Click on the pencil icon next to the store your webhook is in.
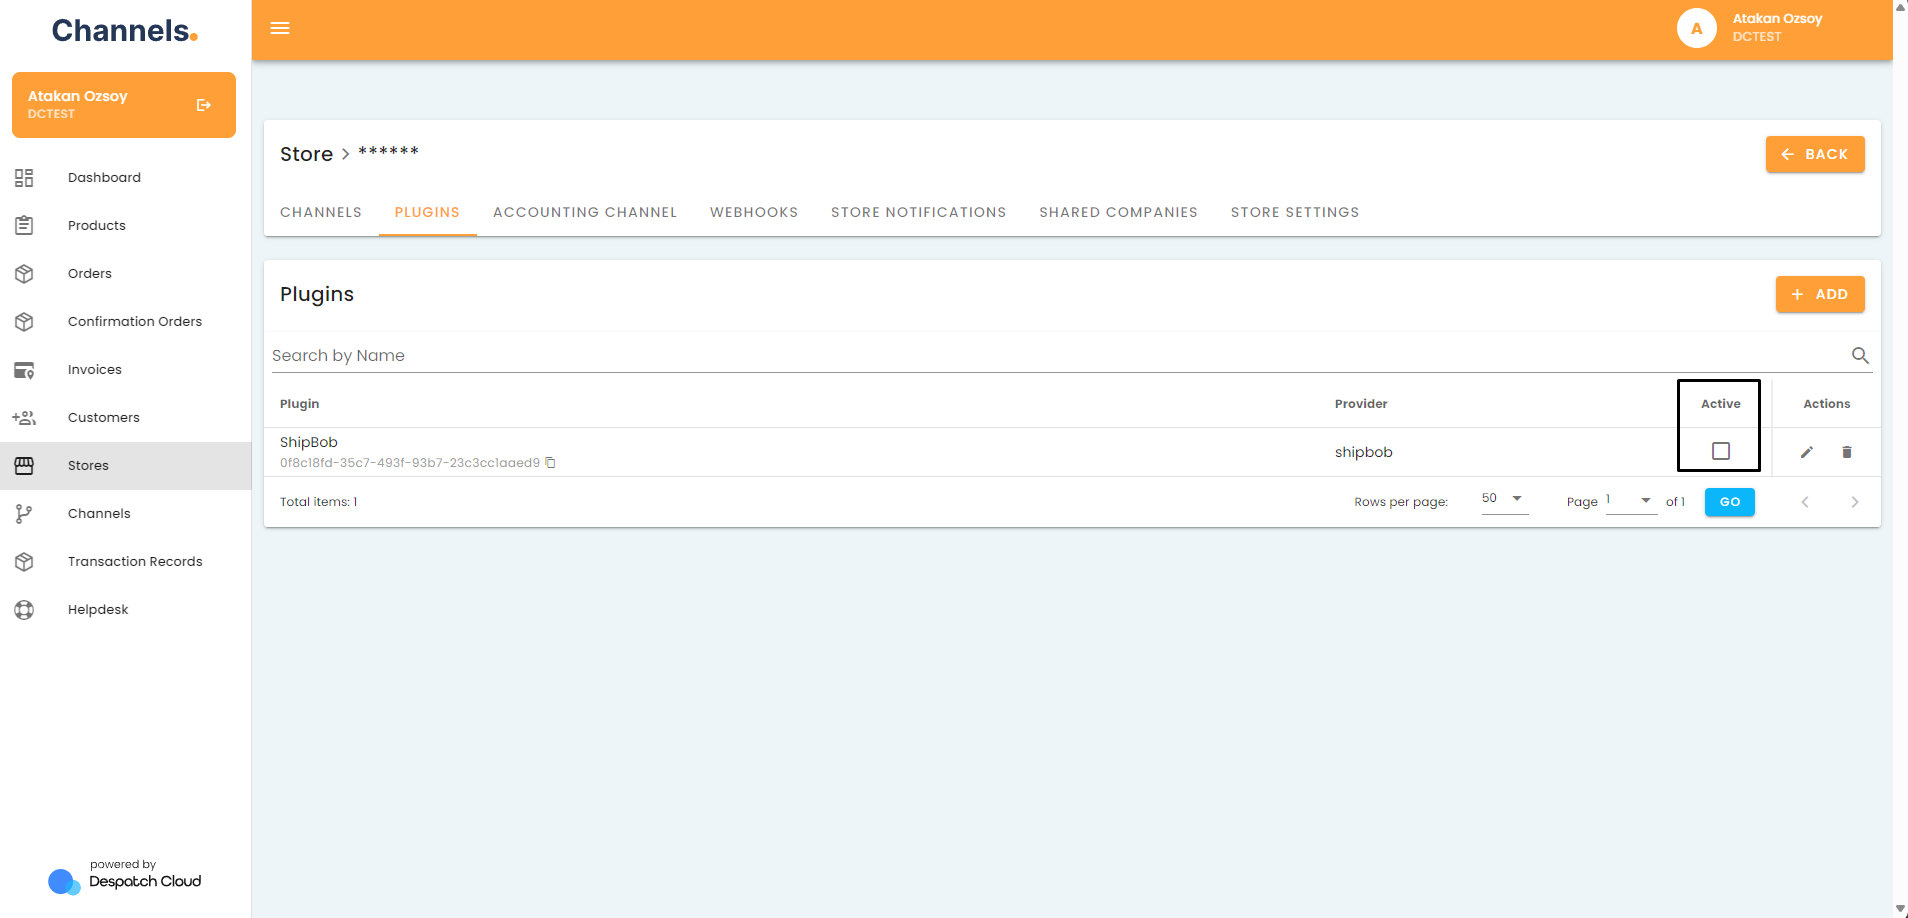
- Go to the plugins tab.

- Check if your plugin has a checkmark under the “Is Active” column.

- If not, please click on the checkbox to activate your plugin.


Check If the Authentication Information Is Correct
If you receive authentication errors under plugin transaction records, you must ensure the entered authentication information is correct under plugin settings.
- Access your account and go to the left side of the screen. Click the "Stores" button.
- Click on the pencil icon next to the store your webhook is in.
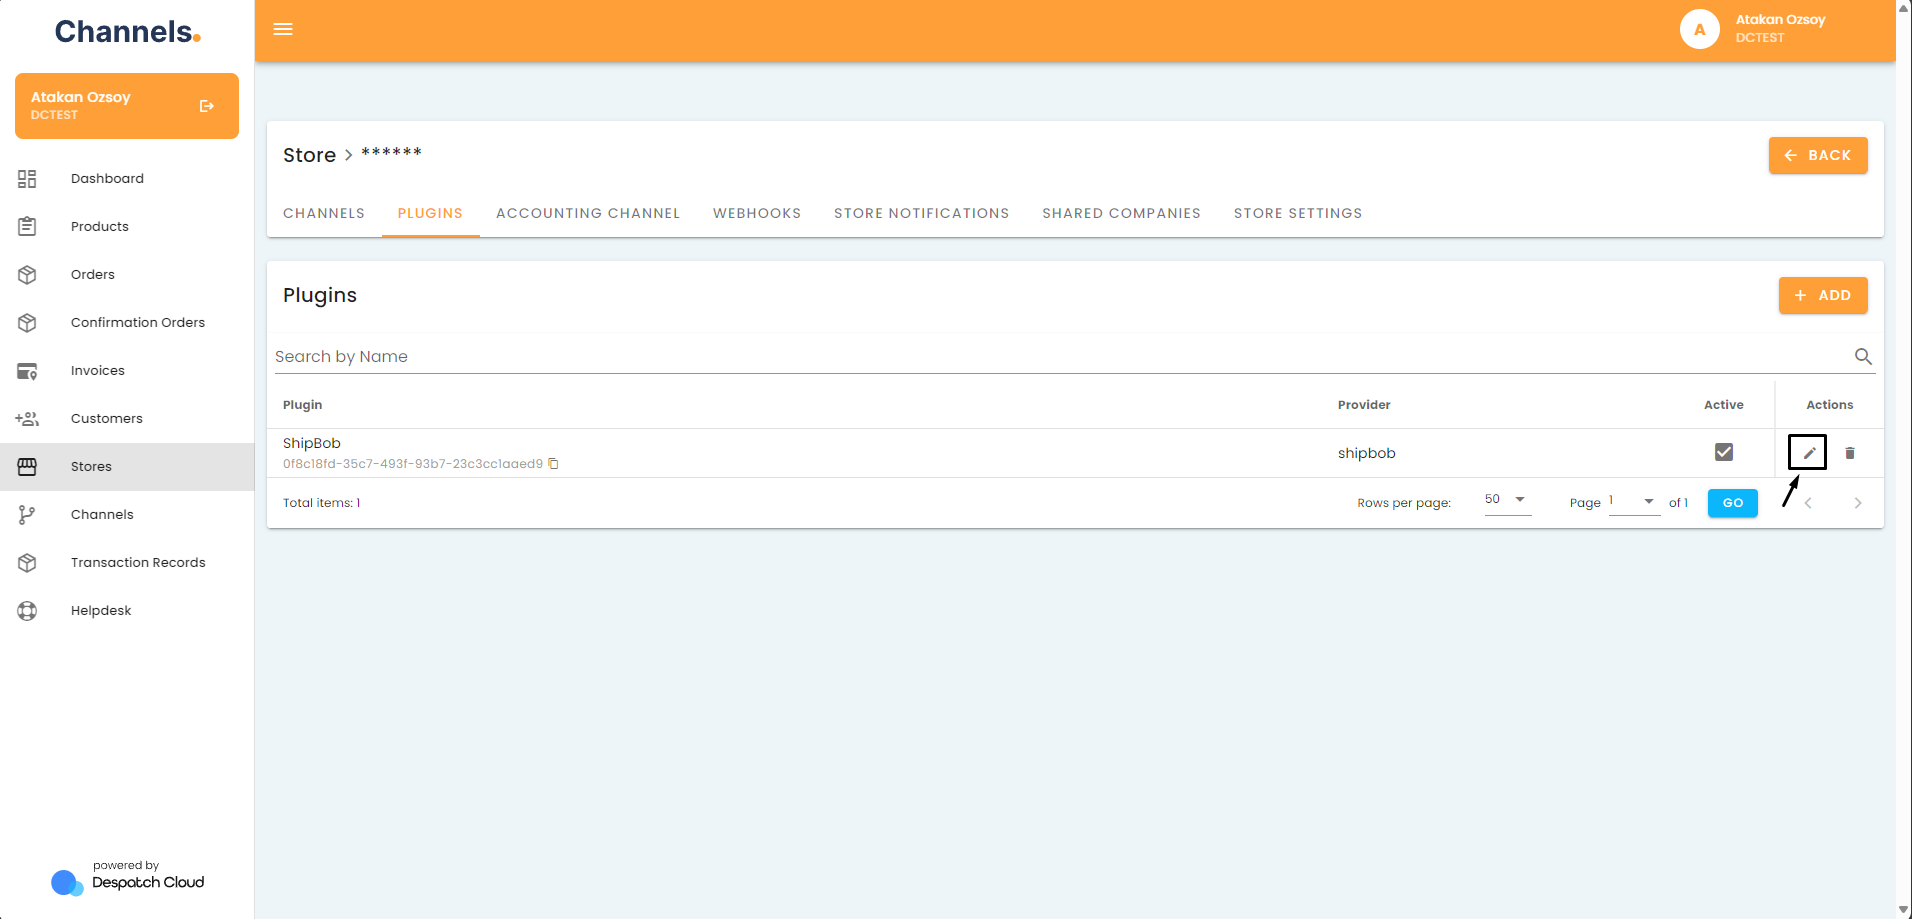
- Go to the plugins tab.
- Click on the pencil icon for the plugin you'd like to check.

- Click on the “Transaction Records” button.

- Check if you've been receiving continued failed transactions recently.

- If so, click on the edit button for the most recent failed transaction to view its details.

- Scroll down to the response part and see the error message received in the response.
- If the message is about incorrect authentication information, please confirm the entered authentication information is correct.
- If not, try to take action based on the error message in the response or contact customer support directly.
Check If the Plugin's API Is Responding
- Access your account and go to the left side of the screen. Click the "Stores" button.
- Click on the pencil icon next to the store your webhook is in.
- Go to the plugins tab.
- Click on the pencil icon for the plugin you'd like to check.
- Click on the “Transaction Records” button.
- Check if you've been receiving continued failed transactions recently.
- If so, click on the edit button for the most recent failed transaction to view its details.
- Scroll down to the response part and see the error message received in the response.
- If the message is about incorrect authentication information, please confirm the entered authentication information is correct.
- If not, try to take action based on the error message in the response or contact customer support directly.
Product Quantities Not Synced to Sales Channels: What to Do?
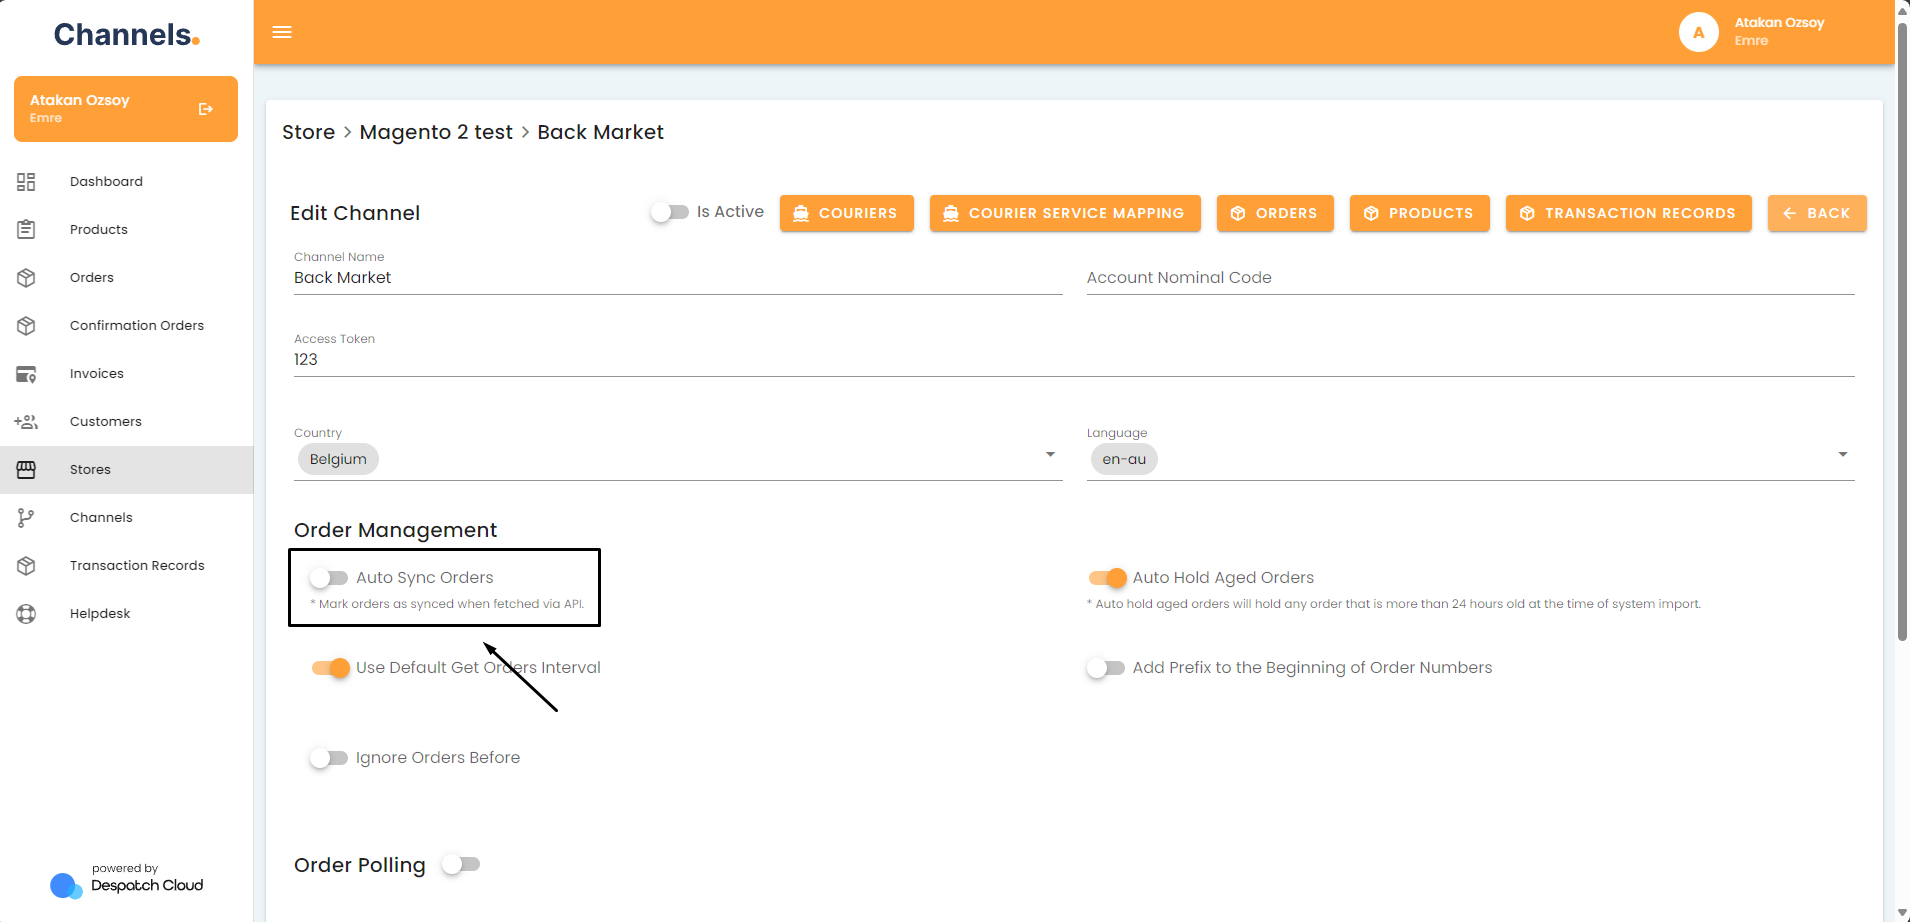
Check If Auto-Sync Setting Is On
- Go to your stores by clicking “Stores” on the side menu.
- Click on the pencil icon next to the store your channel is in.
- Click on the pencil icon next to the channel you'd like to activate.
-
Check if the “Auto Sync Stock Levels” setting is on. If it's not, please turn it on.

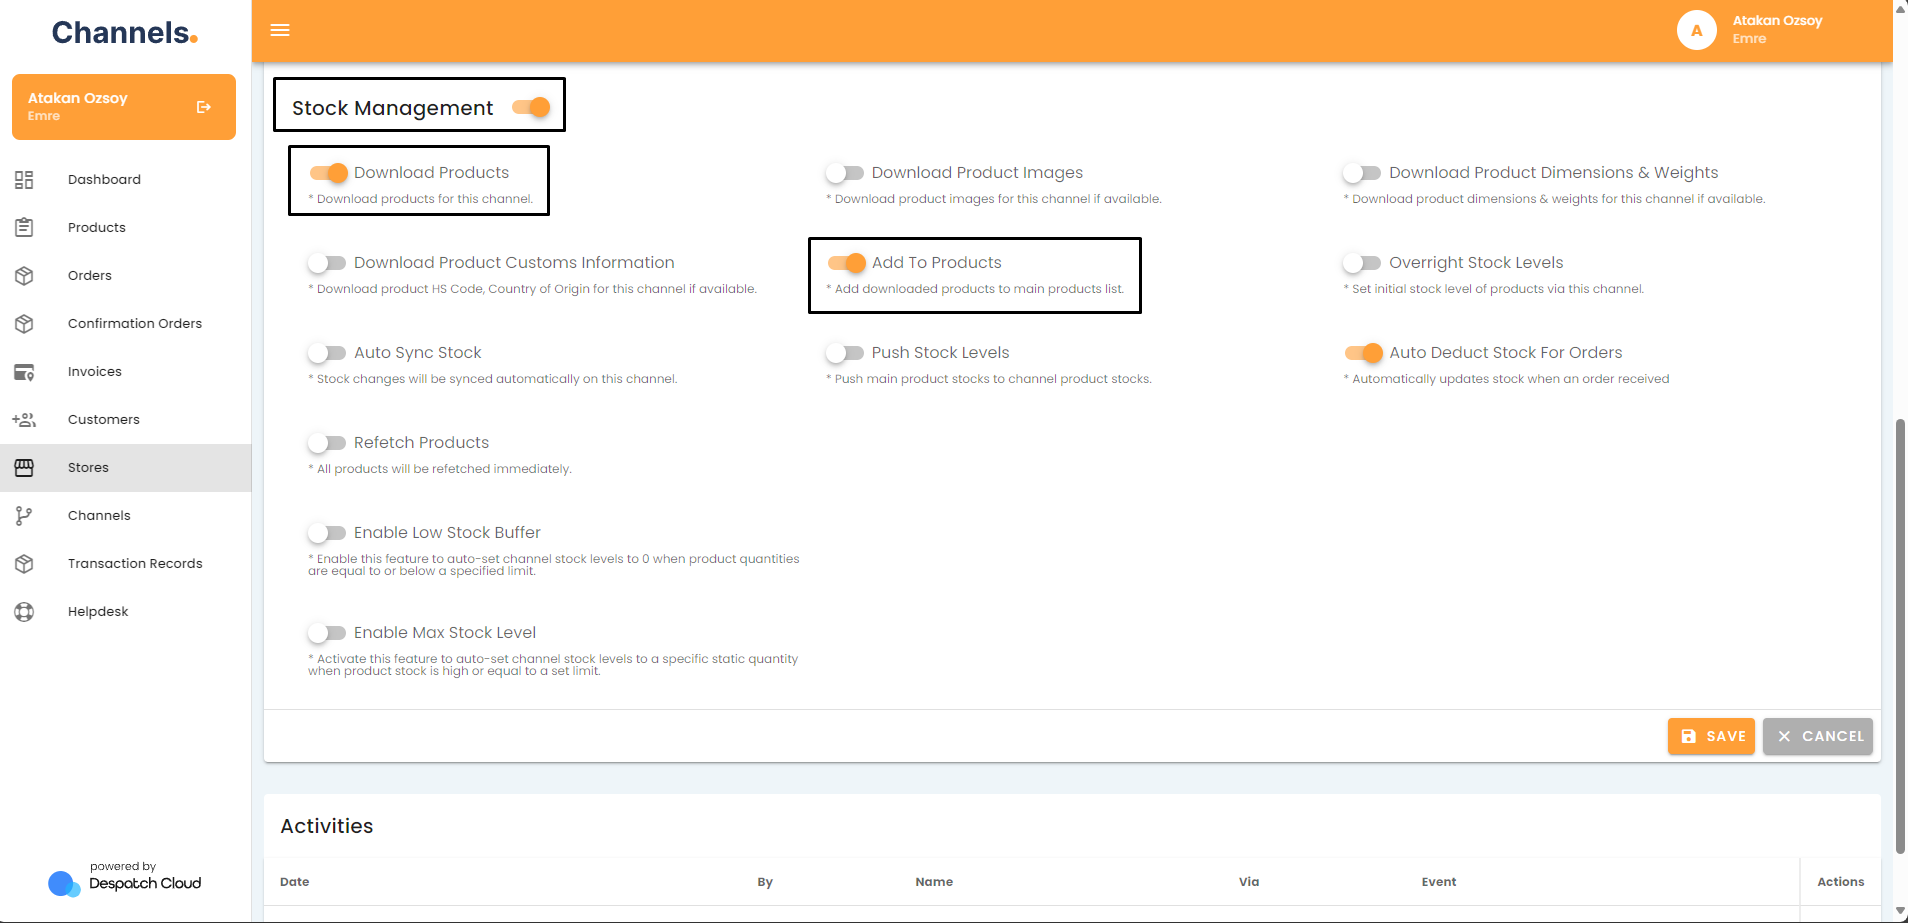
Check If the Products Are in the Main Products
- Go to your stores by clicking “Stores” on the side menu.
- Click on the pencil icon next to the store your channel is in.
- Click on the pencil icon next to the channel you'd like to activate.
- Switch on Stock Management, Download Products and Add To Products.

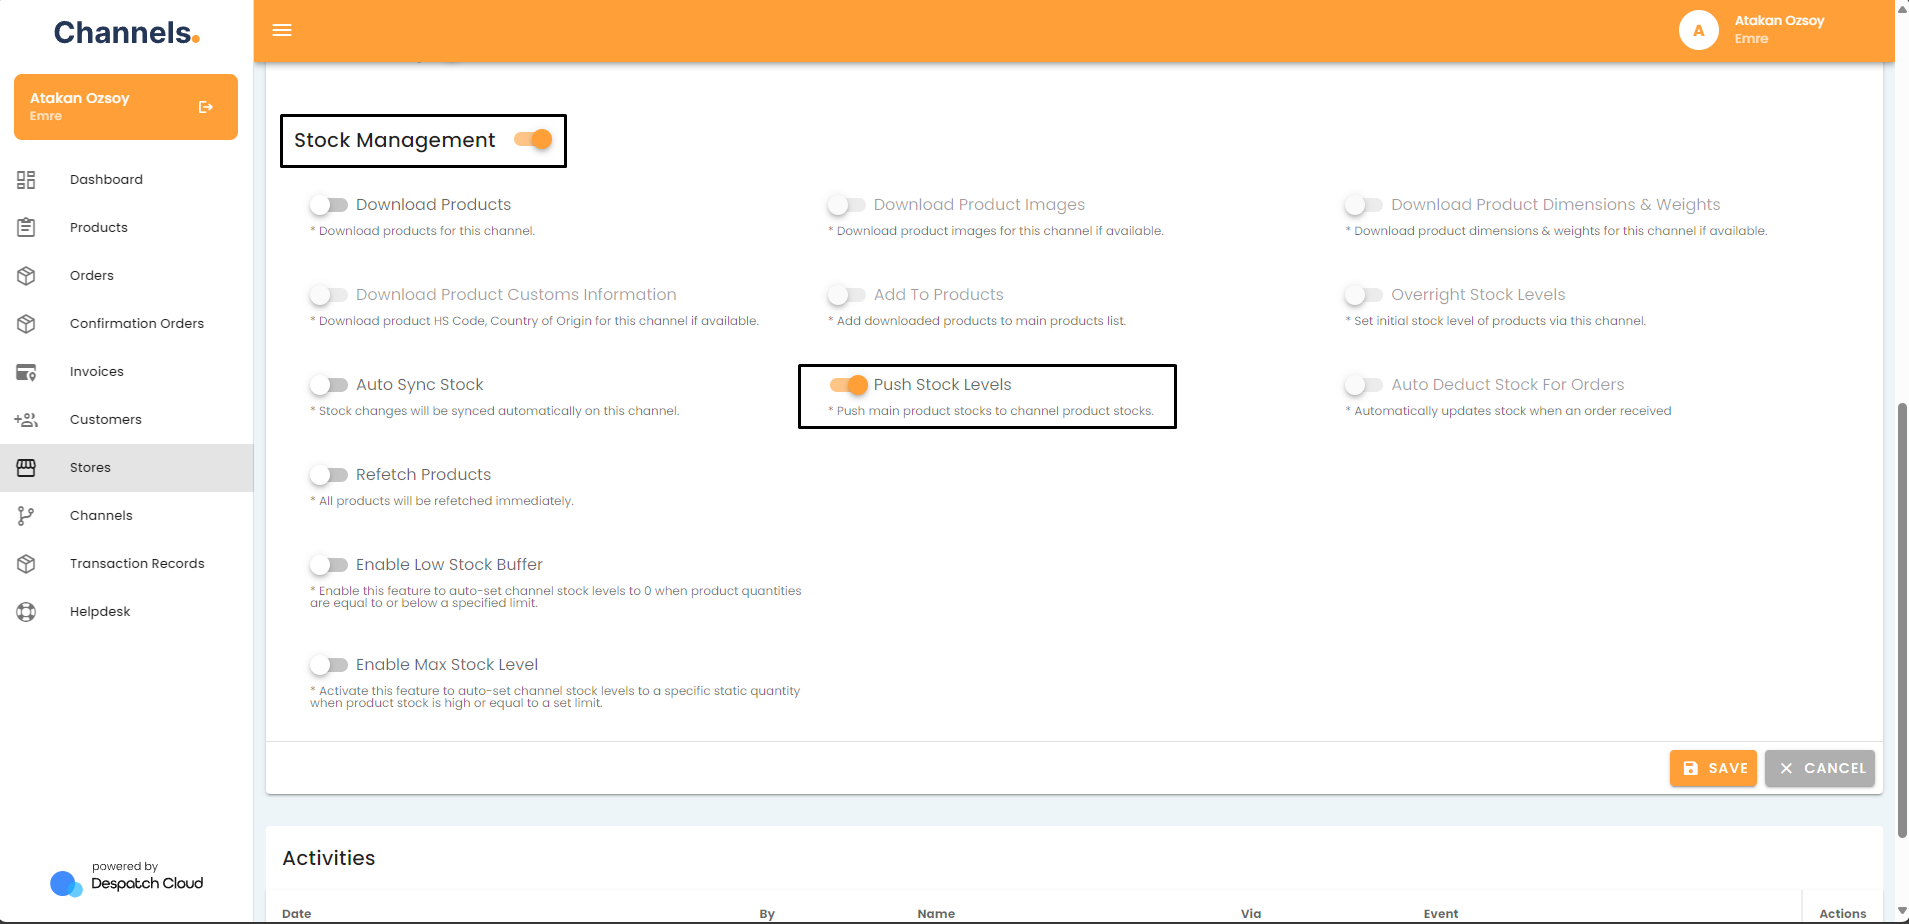
Initiate an Order Push to the Sales Channel
If the "Auto Sync" and the "Add To Products" settings are on, it is best to run a stock push job manually. To do that, follow these steps.
- Go to your stores by clicking “Stores” on the side menu.
- Click on the pencil icon next to the store your channel is in.
- Click on the pencil icon next to the channel you'd like to activate.
-
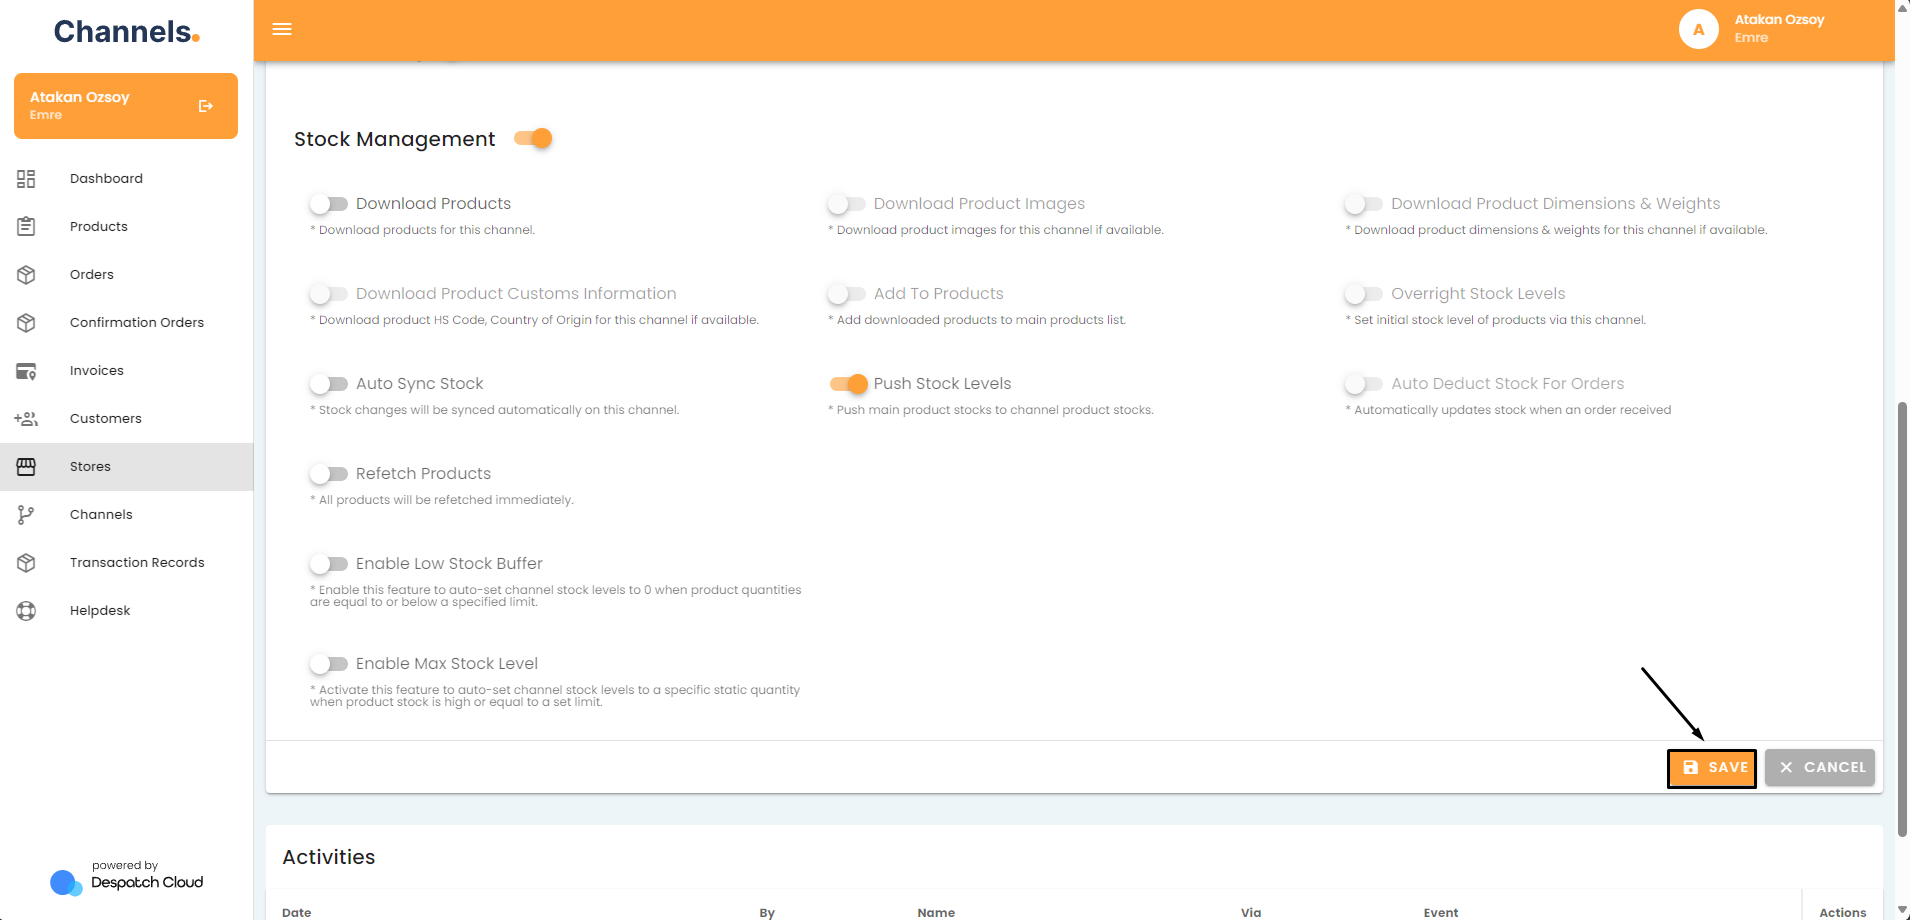
Turn on “Stock Management” and “Push Stock Levels”.

-
Click on the save button.

-
Wait a while for the system to finish stock syncing for all your products.
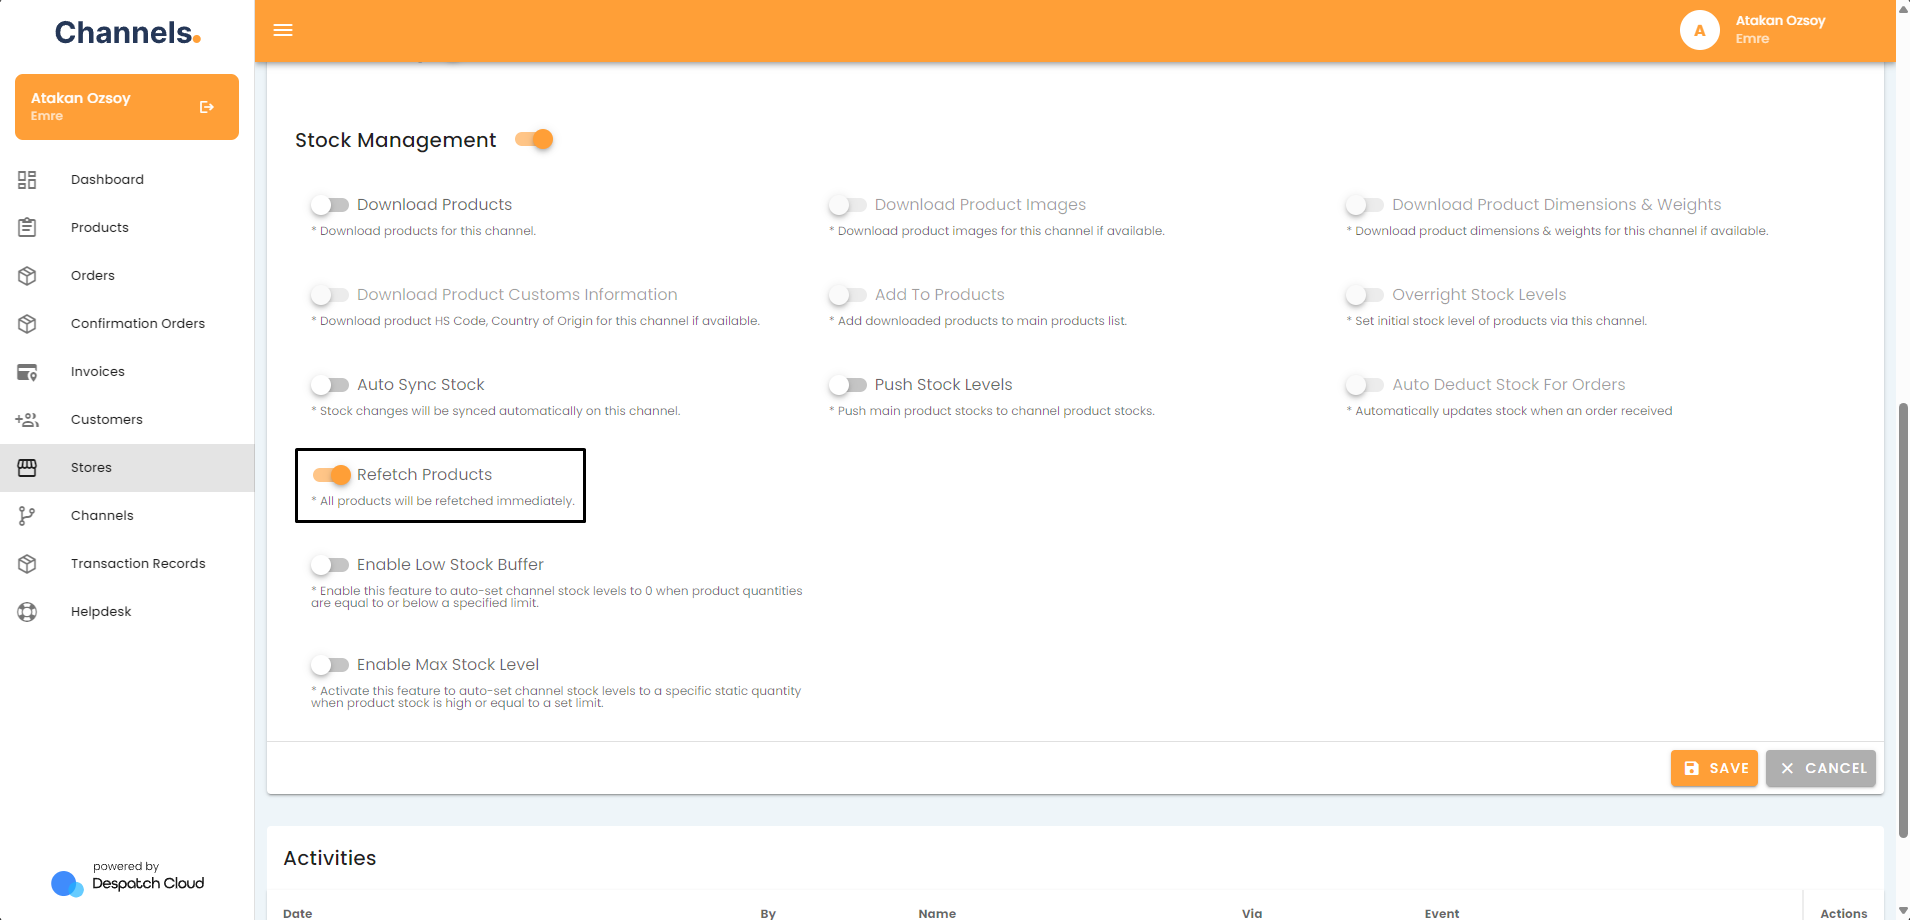
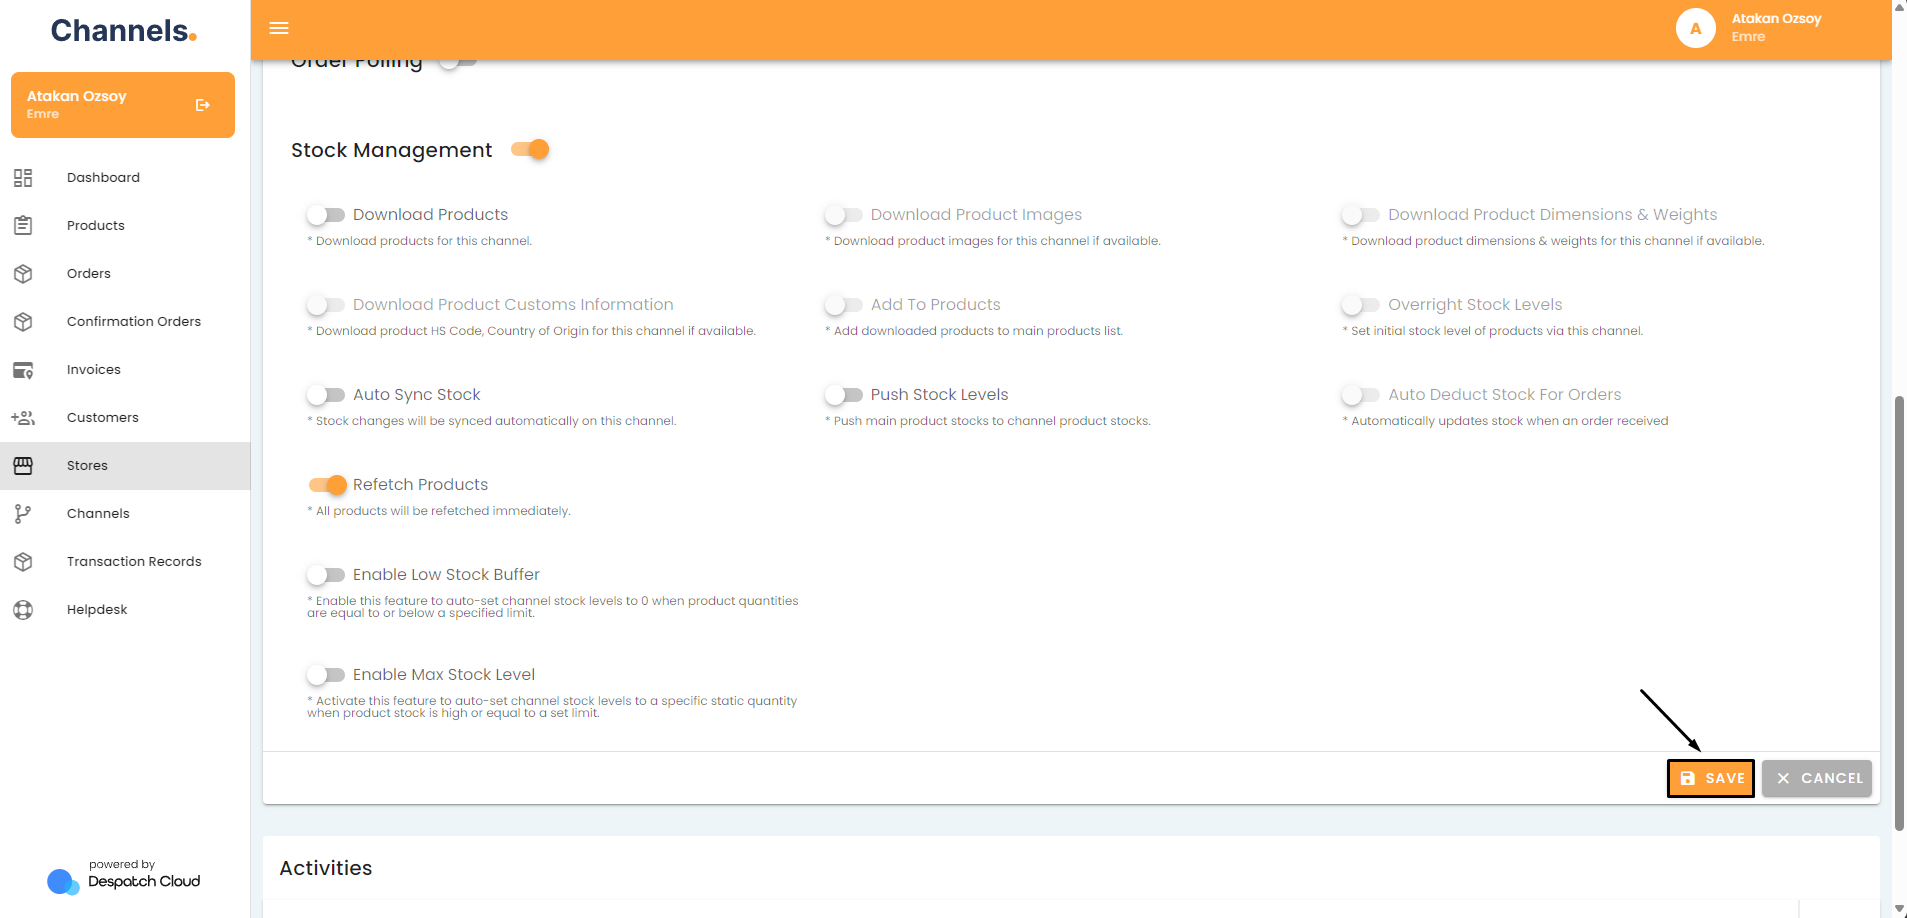
How to Refetch Product Updates from Sales Channel
Try Refetching Your Products
- Access your account and go to the left side of the screen. Click the "Stores" button.
- Click on the pencil icon next to the store your channel is in.
- Click on the pencil icon next to the channel you want to check.
-
Switch on "Stock Management" and “Refetch Products”.

-
Click the Save button and wait a while for the system to finish syncing your products.

How to Refetch Orders and Order Updates
Try Using Order Polling
- Access your account and go to the left side of the screen. Click the "Stores" button.
- Click on the pencil icon next to the store your channel is in.
- Click on the pencil icon next to the channel you want to check.
- Scroll down to the “Order Polling” section and switch it on.
- Select the date from which point the orders will start being polled.
- Click the Save button and wait around 3 to 10 minutes for orders to be imported into the system. If the orders you wanted are still not imported, move on to the next recommendation.
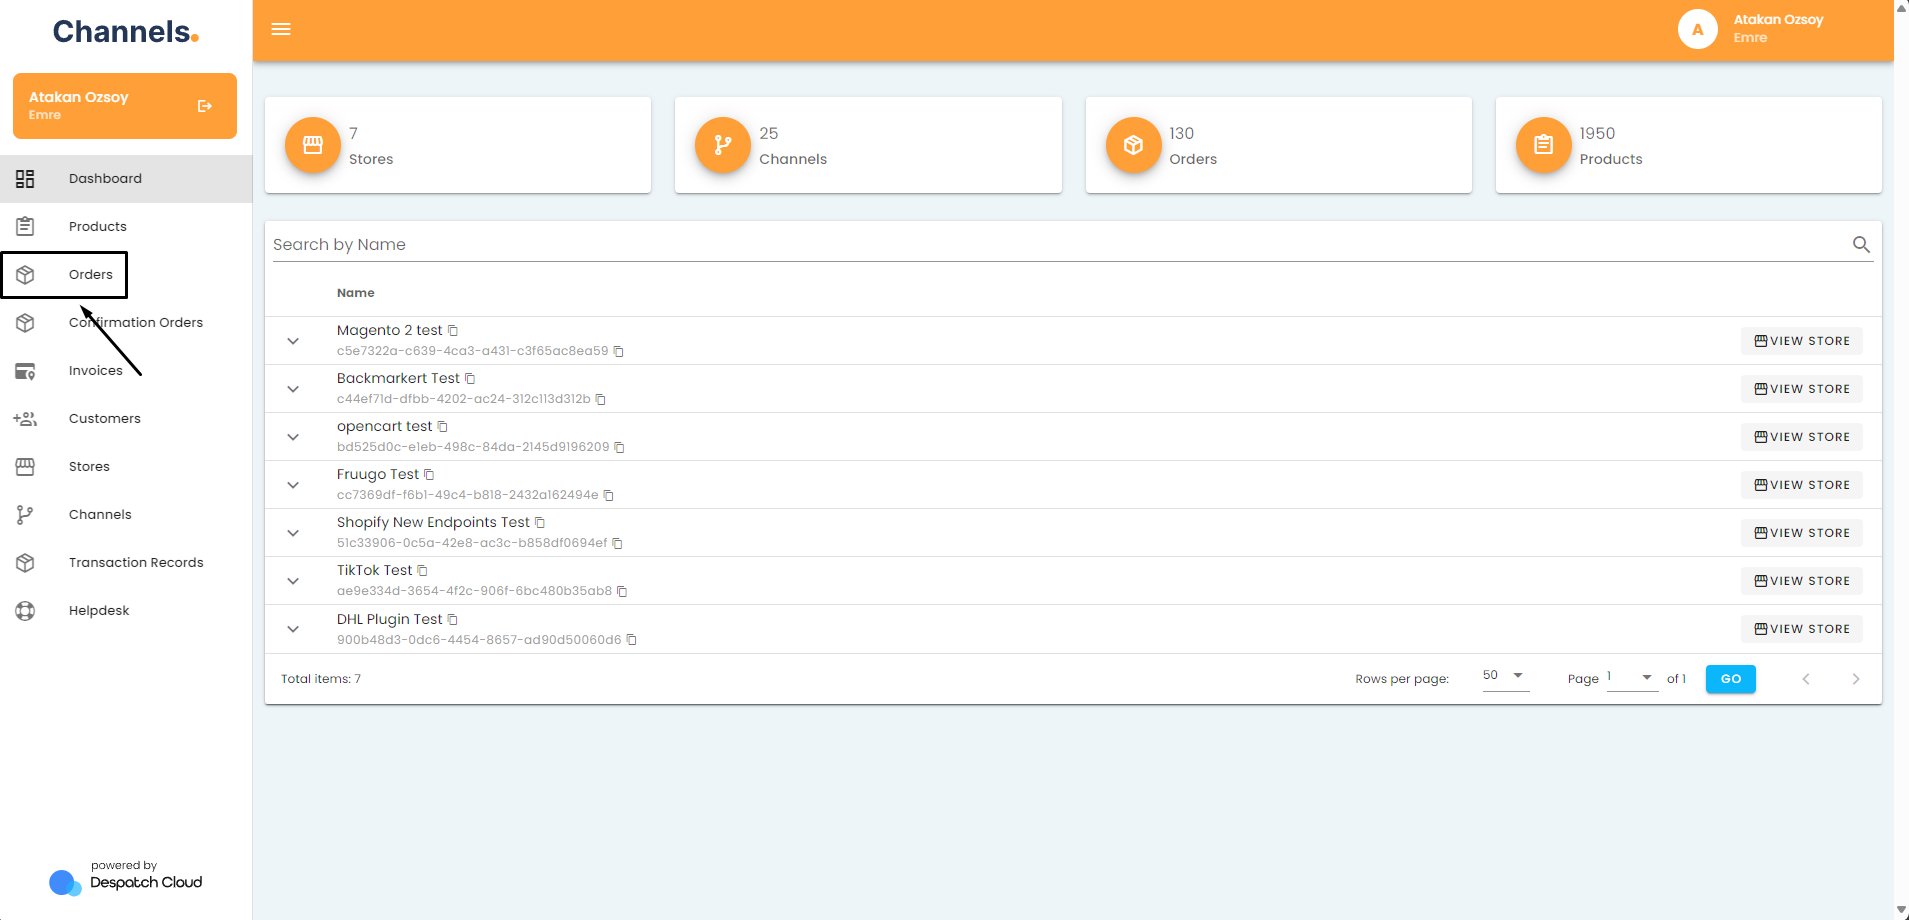
How to Resend Orders via Webhook/Plugin
Try Bulk Updating Your Orders
-
Access your account and go to the left side of the screen. Click the "Orders" button.

-
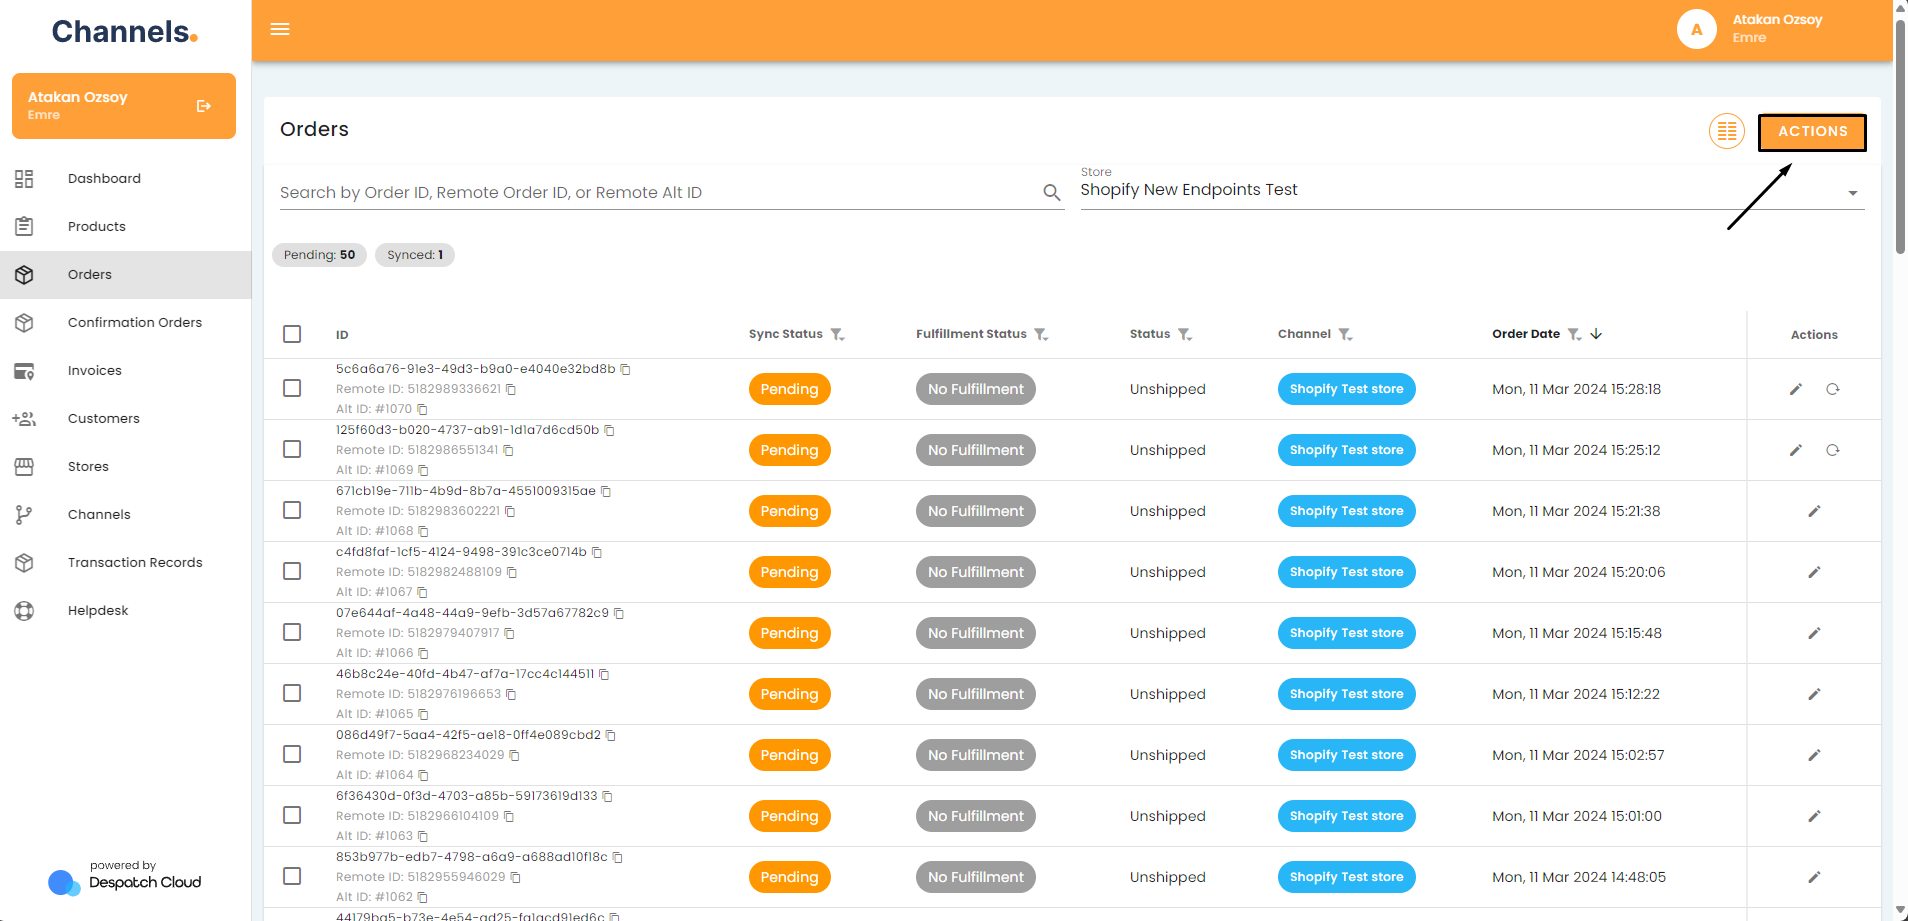
Pick a store and click “Actions”.

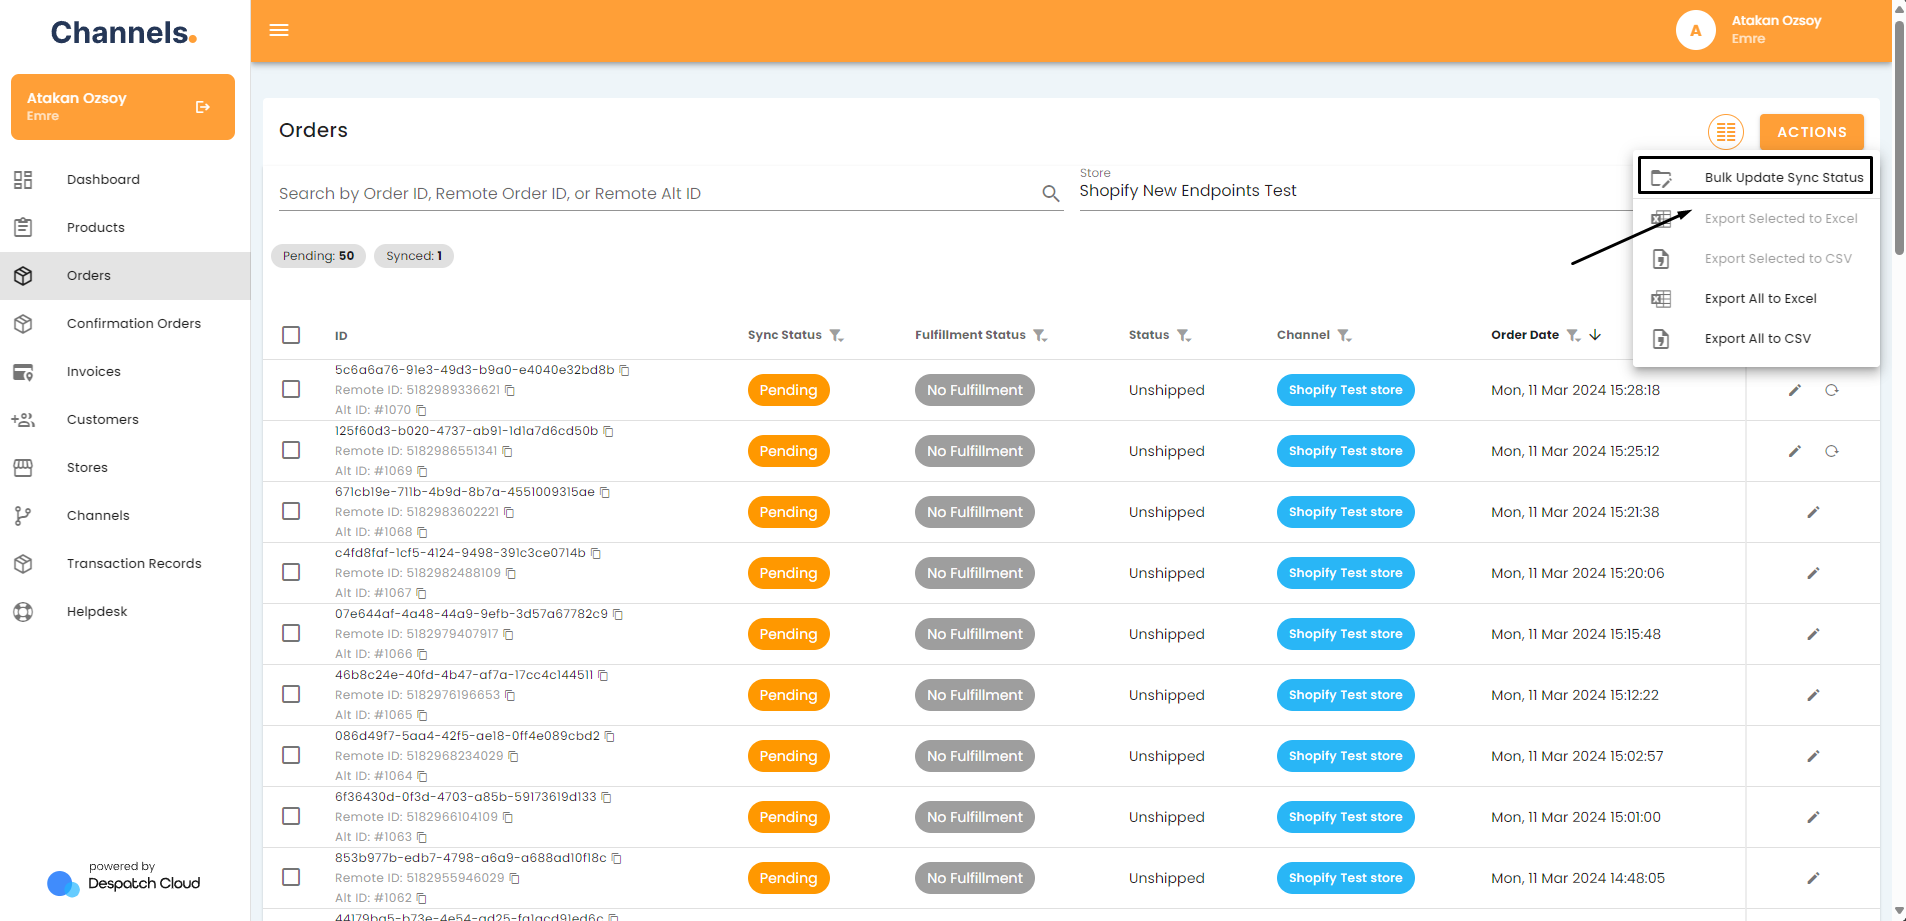
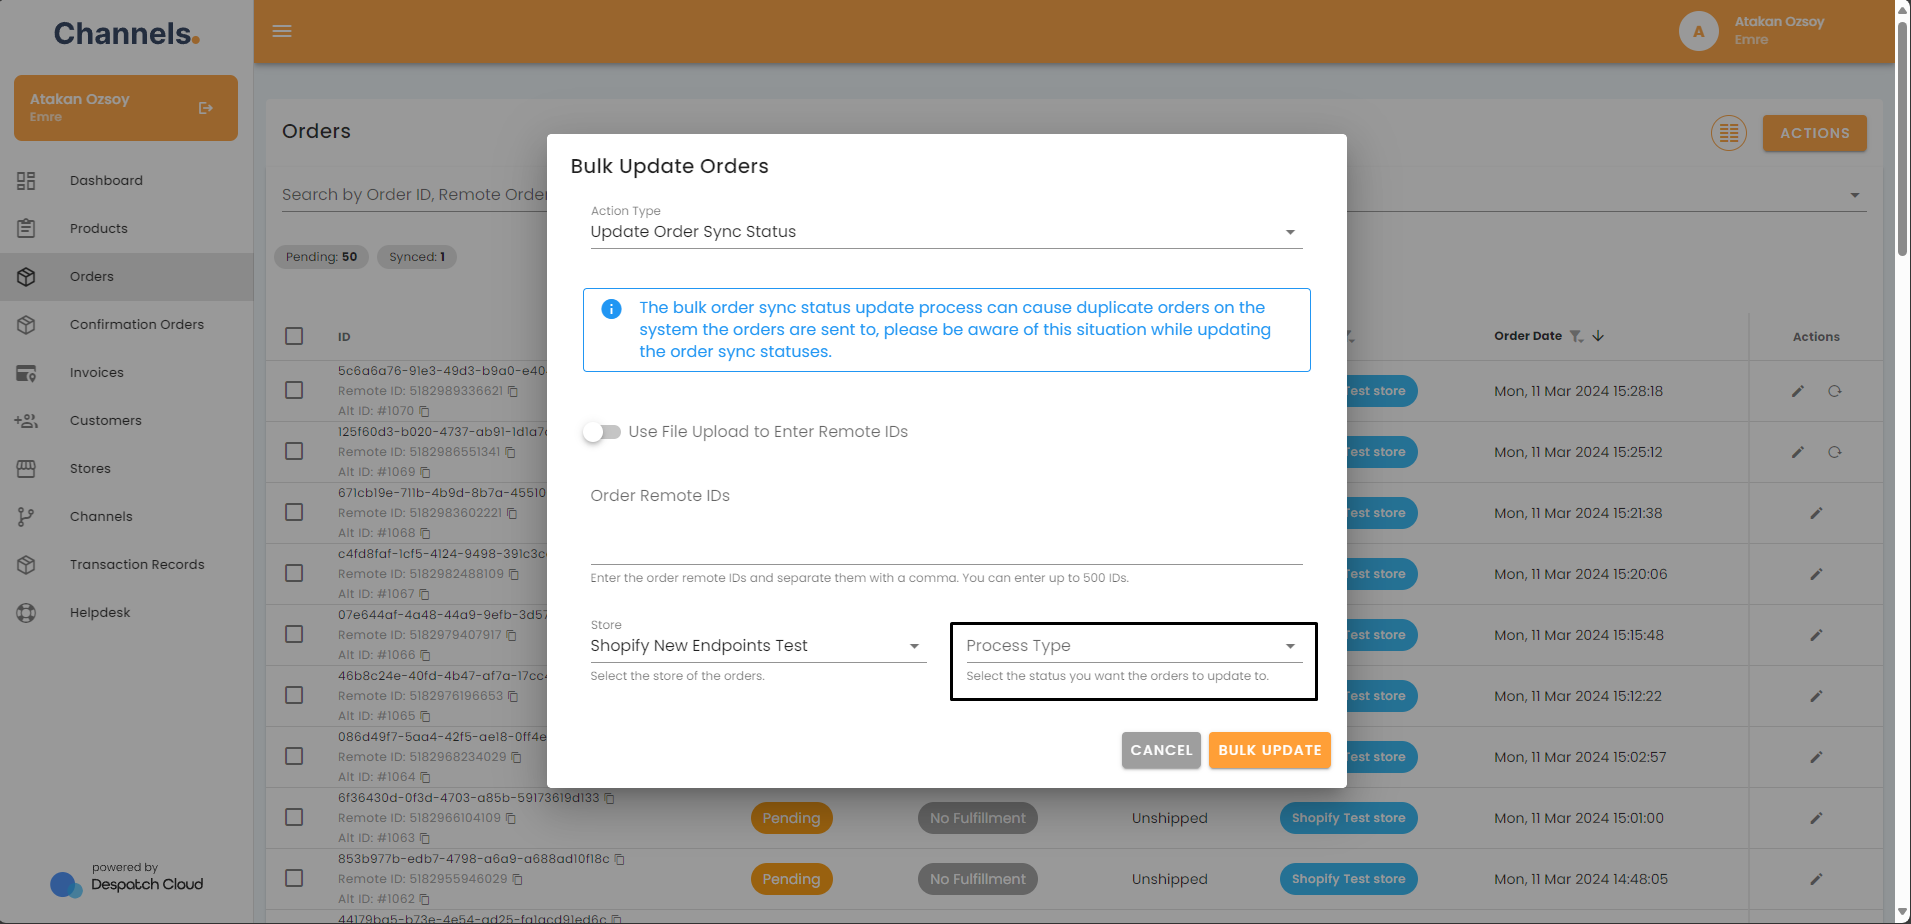
- Click "Bulk Update Sync Status".

-
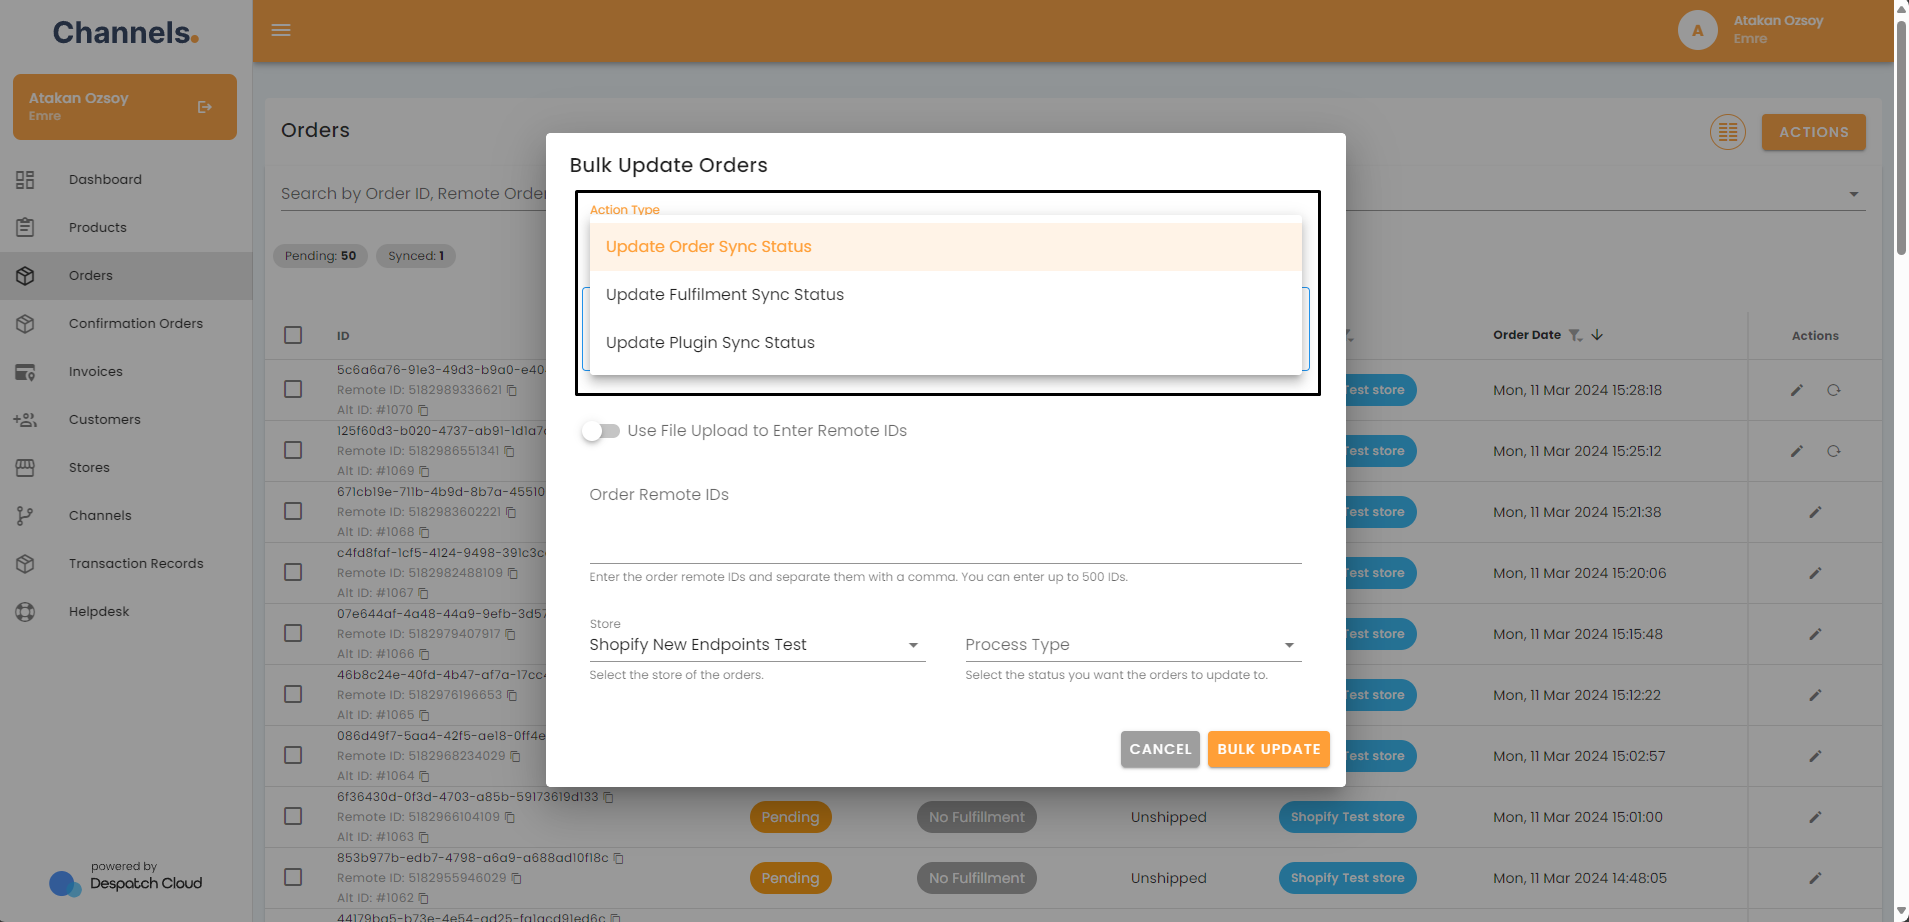
Select the action type you want to proceed with:
-
Update Order Sync Status: select this option if you want to take action regarding the order sync status. For example, to resend orders via webhook
-
Update Fulfilment Sync Status: Select this option to take action on the order fulfilment sync status. For example, resending the failed fulfilment to the sales channel
-
Update Plugin Sync Status: Select this option if you want to take action on order sync status, such as resending already synced or failed orders to the plugin.

-
-
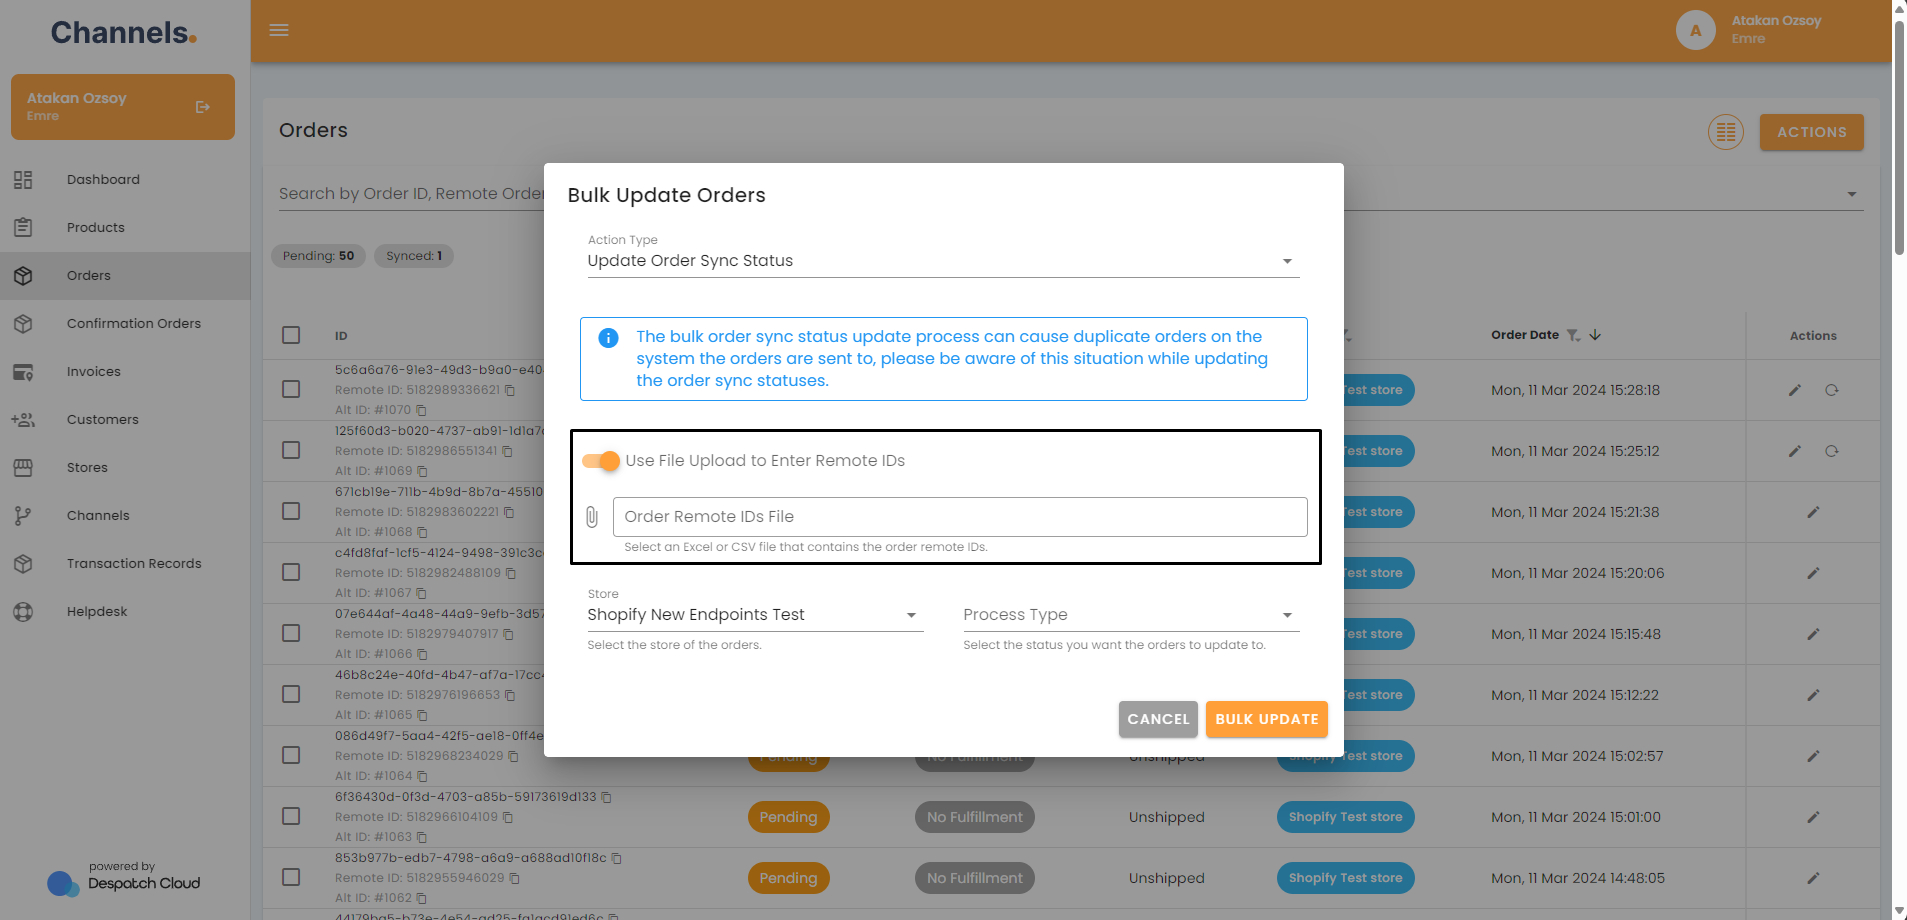
If you have the remote IDs of your orders in an Excel or a CSV file, switch on the “Use File Upload to Enter Remote IDs” option and upload your file by clicking the “Order Remote IDs File” button.

-
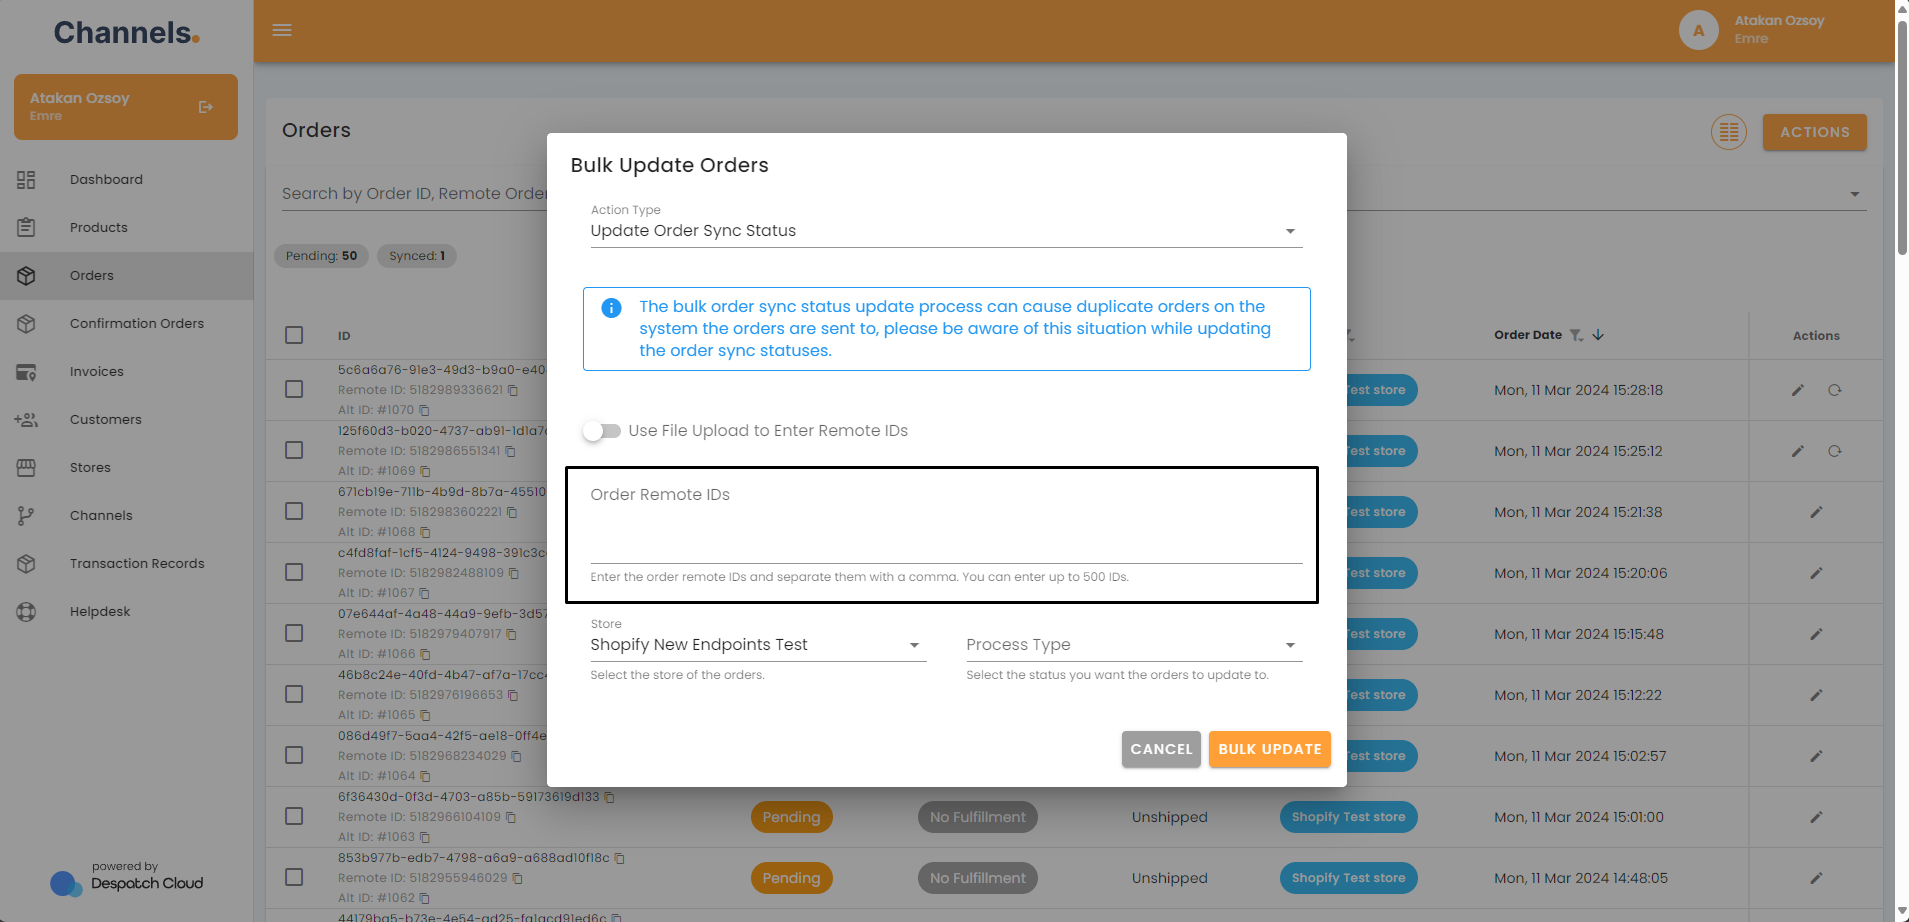
If you don’t have a file, you can copy and paste the remote IDs to the “Remote IDs” field by putting a comma between the IDs. You can only enter up to 500 remote IDs.

-
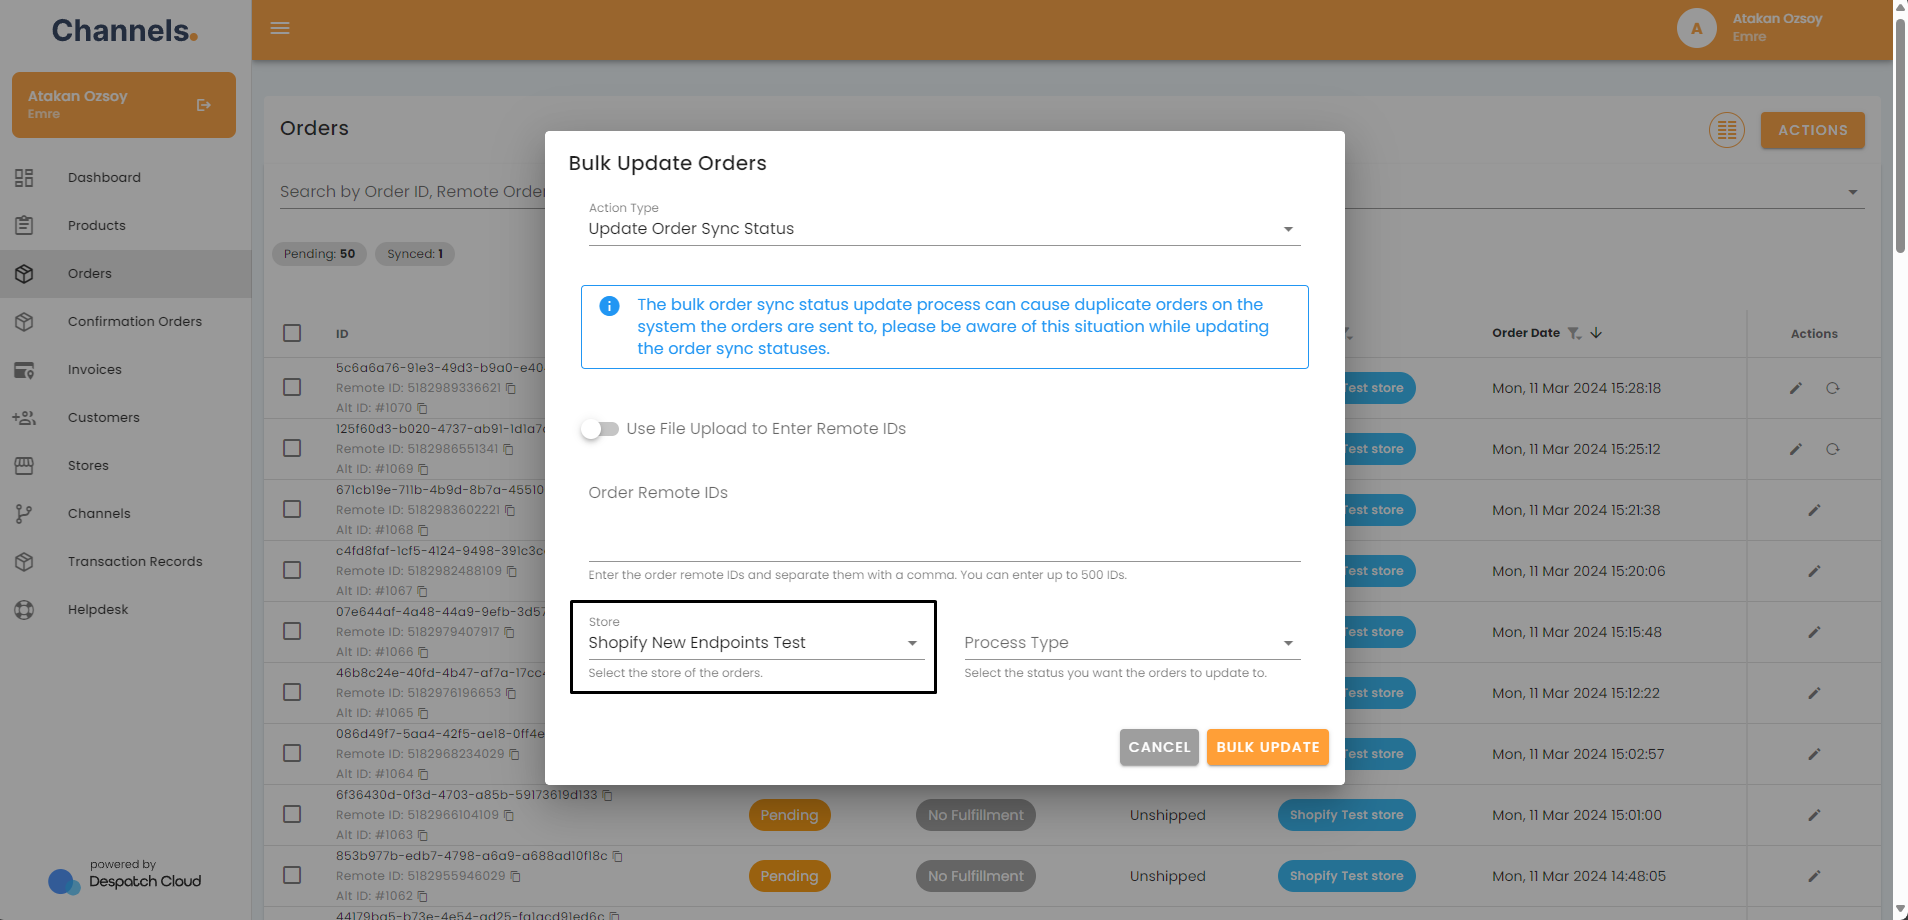
Make sure that the correct store is selected in the “Store” field.

-
Select which process type you'd like to update your orders to.

-
Next, click on Bulk Update to save your changes.

-
You will receive an email confirming the actions when the process is complete.
-
Action configurations should be as follows:
-
To mark the sync status of the orders as “Excluded”, select the action type as “Update order sync status” and select the process type “Mark as Excluded”.
-
To mark plugins' sync status as "Excluded," select the action type “Update Plugin Sync Status” and the process type “Mark as Excluded.”
-
-
If you want to resend orders via webhook, select the Action Type as “Update Order Sync Status” and select the Process Type as “Mark as Pending.” If you have a plugin set up in your store and don’t want your orders sent to it, you need to do another bulk action for the same orders and update their plugin sync status to “Excluded “ to prevent them from being fulfilled more than once.
-
If you want to resend a fulfilment to the sales channel, select the action type “Update Plugin Sync Status” and select the process type “Mark As Awaiting Send”.
-
If you want to resend an order to the plugin, you must do two bulk actions. First, you need to mark the order sync status as "Excluded". Then, you need to mark the plugin sync status as excluded for the orders you want to resend to the plugin.
-

How to Update Wix App Permissions and Reconnect Your Wix Sales Channel
1. Please go to this URL: https://manage.wix.com/studio/custom-apps
Then click on the 3 dots menu on your app and click on Go to app dashboard

2. Click on Permissions on the side menu.

3. Click on the Add Permissions button.

4. Please put a checkmark on each permission by searching them and clicking their checkboxes individually.
- Manage Stores - all permissions
- Read Stores - all read permissions
- Manage Products
- Read Products
- Manage Orders
- Read Orders
- Manage Restaurants - all permissions
- Manage eCommerce - all permissions
- Read eCommerce - all read permissions
- Read v3 catalog
- Manage v3 catalog
- Read products in v3 catalog
- Product v3 read admin

5. Make sure you put a checkmark on all necessary permissions as below and click Save.

6. After saving them, ensure you see the permissions under Permission Scopes.

7. Go to the OAuth tab on the side menu. Enter the below URL to the App URL and the Redirect URL inputs then click Save.
https://production.channelapi.co.uk/authorization/wix

8. Go to your Wix Channel settings page on Despatch Cloud or Channels.
9. Click on "Copy Connection Link" and open the link on a new tab on your browser. 
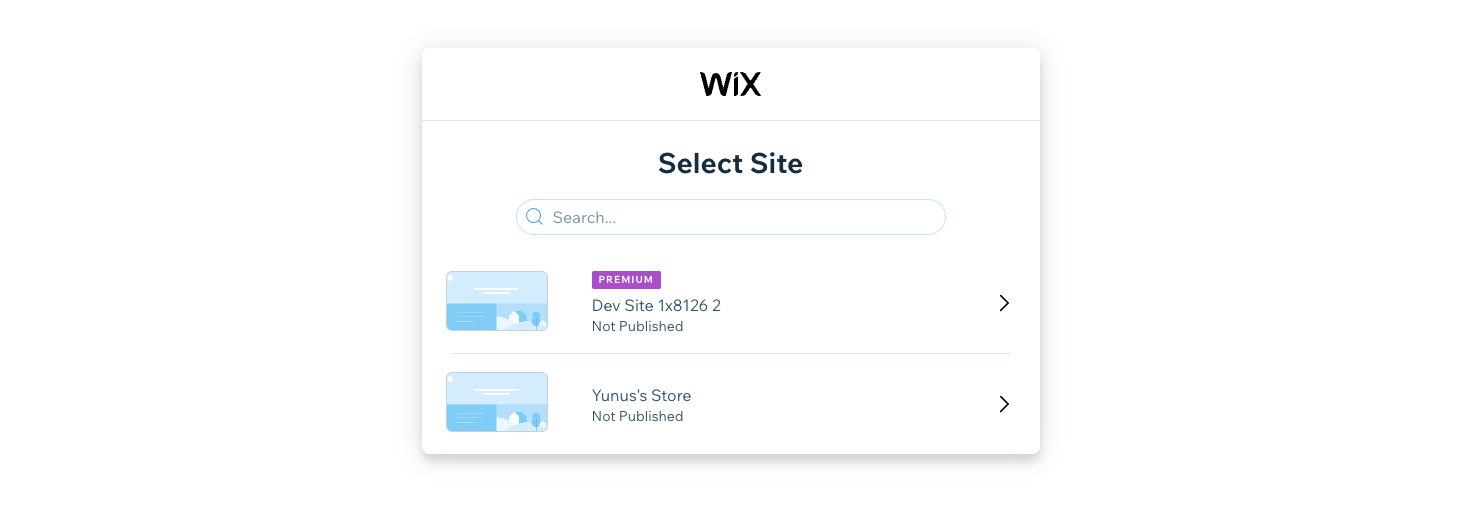
10 Select the site you want to get your orders from if you have more than one site.
11. Check the "By Installing this third party app, I agree to all of the above" checkbox and click the Agree & Add button.

12. Click on "Continue"
